Developing Android app with the thethings.iO

Last week we explained how to create Apps and IoT dashboards from thethings.iO, this week its time to build real mobile apps connected to an App Id. Because most of thethings.iO IoT platform customers do not only make a connected product, but also build mobile applications. Mobile apps are useful to let final customers access to the data generated by the connected products and even interact with them, all with a great UX. iOS and Android are the predominant operating systems at the moment, so we built some simple examples on Android and iOS in order to show to our customers what they need to connect their mobile app with thethings.iO.

Developing Android app with thethings.iO

Developing Android app with thethings.iO

We designed an Android application in order to show you how all thethings.iO’s API calls work from Android SDK. From the user registration and login to the link thing or read and write. All the useful API calls that any Android developer need to connect a mobile app with the IoT platform thethings.iO in few minutes.

Find below a step by step guide about how to use the Android app available at our github repo thethings.iO-android-app . Having said that, remember to have Android Studio installed on your computer.

  1. Building the app:
    1. Open Android Studio
    2. Choose “Check out project form Version Control”. Select Git from the list. Paste the previous github link.thethings-project-checkout
    3. Select the directory and press clone. Maybe will need to install some dependencies (toolkit 21).
  2. Creating an app from thethings.iO
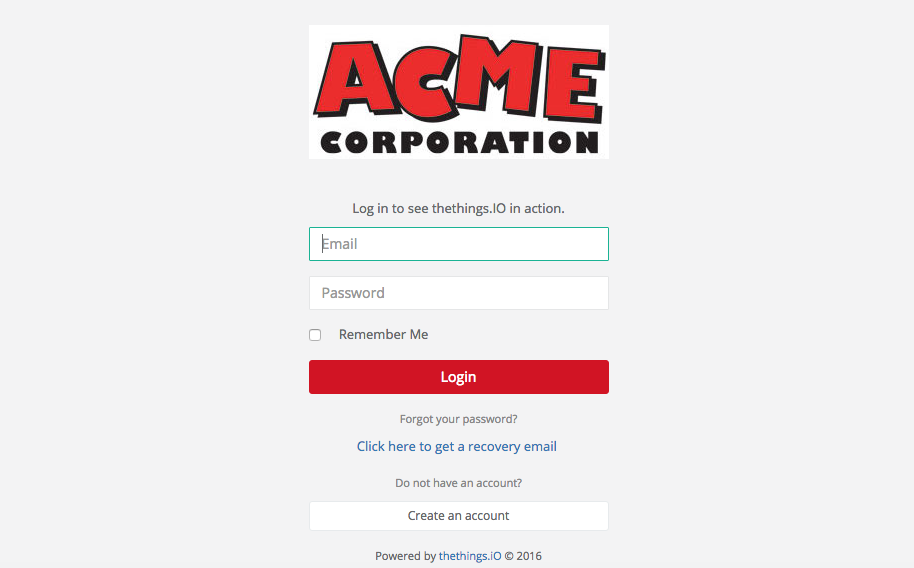
    1. Login (or quickly register here) to your thethings.iO account.
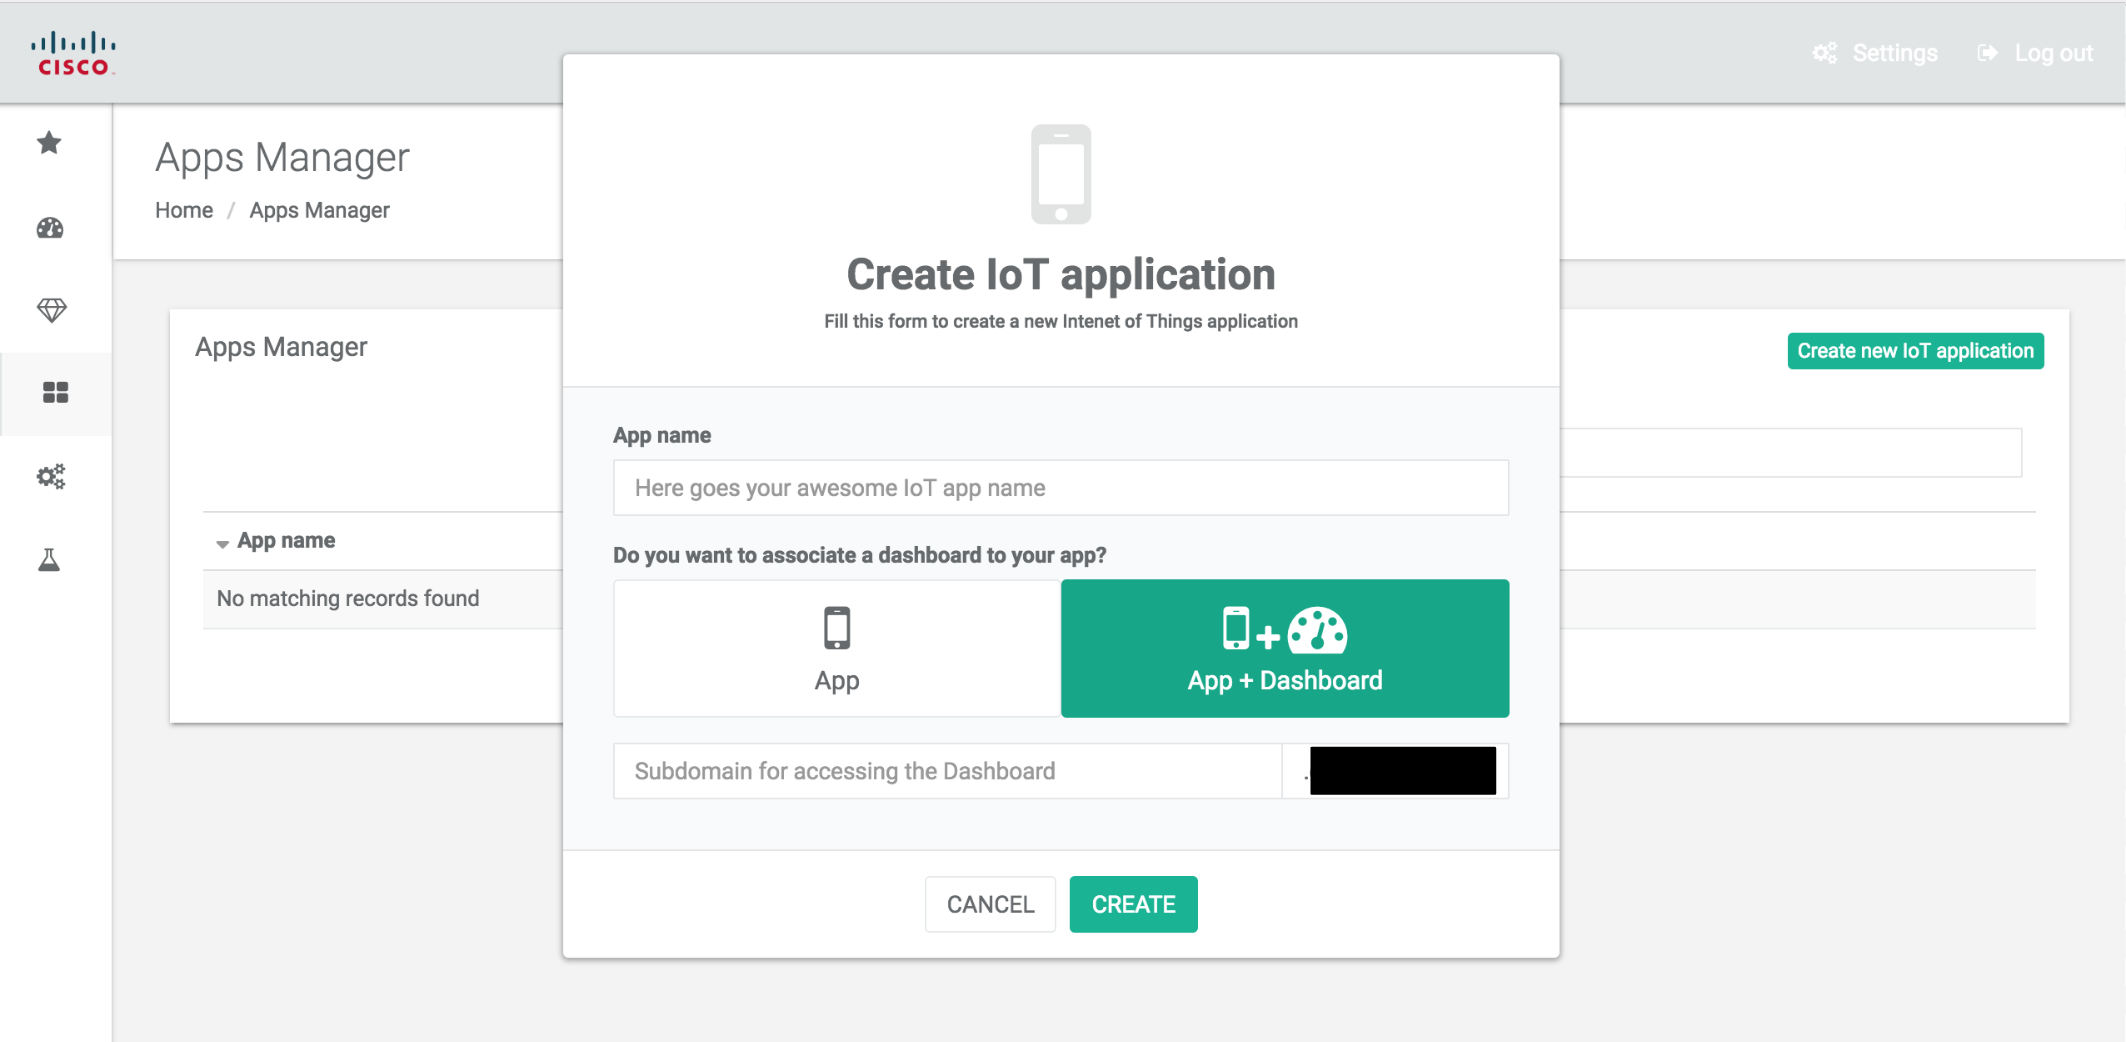
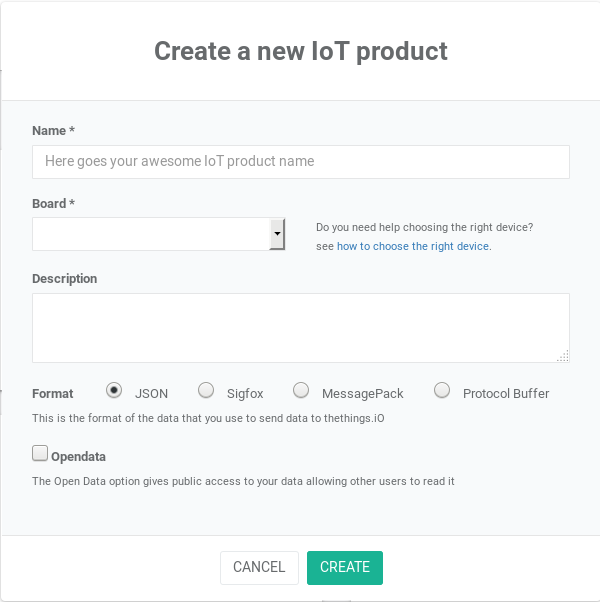
    2. Navigate to Apps (fourth row of the menu) and click on “Create new IoT application”.thethings-app-manager
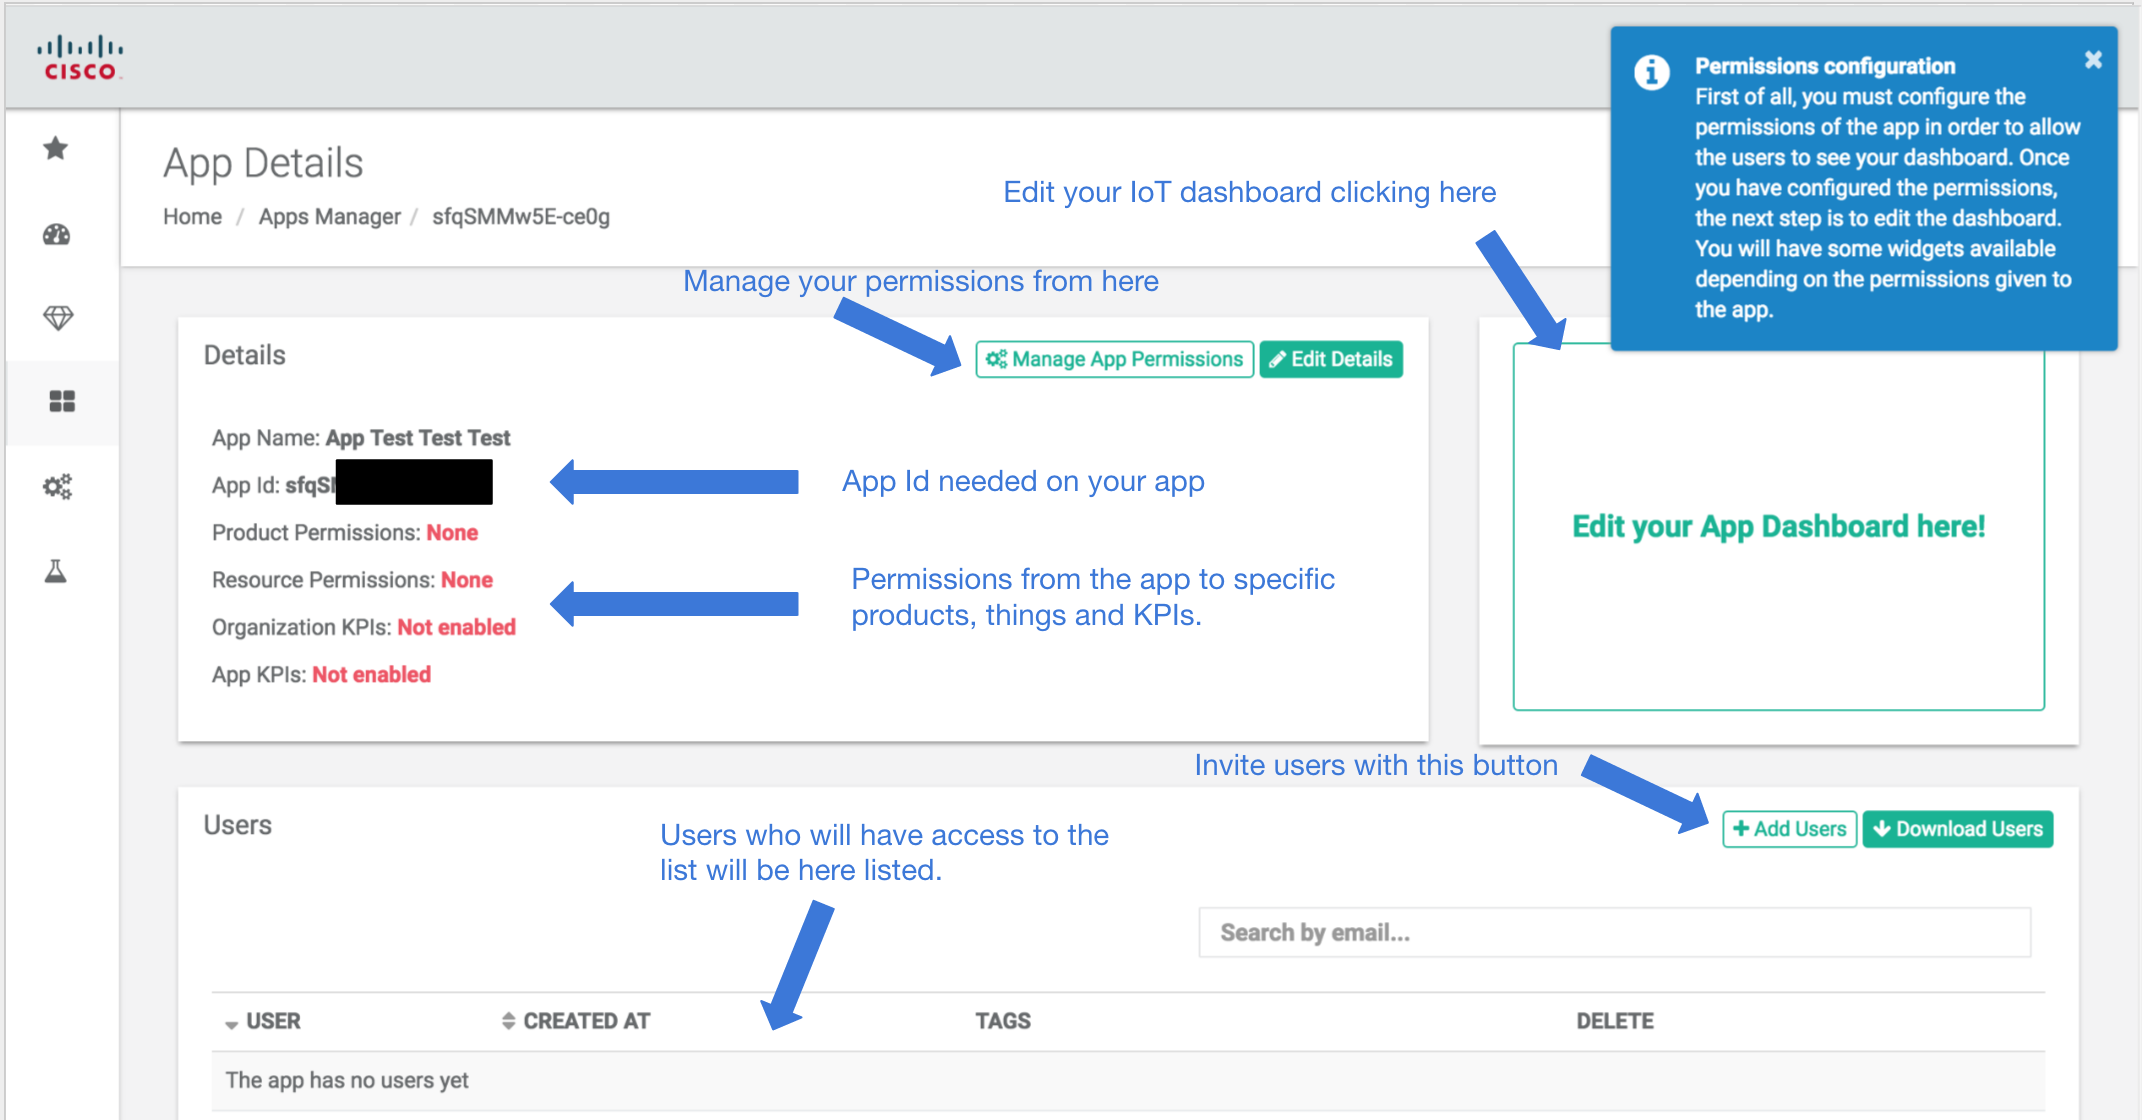
    3. Select the name and press “Create”. Remember to copy and paste your app-id. You’ll need it later.
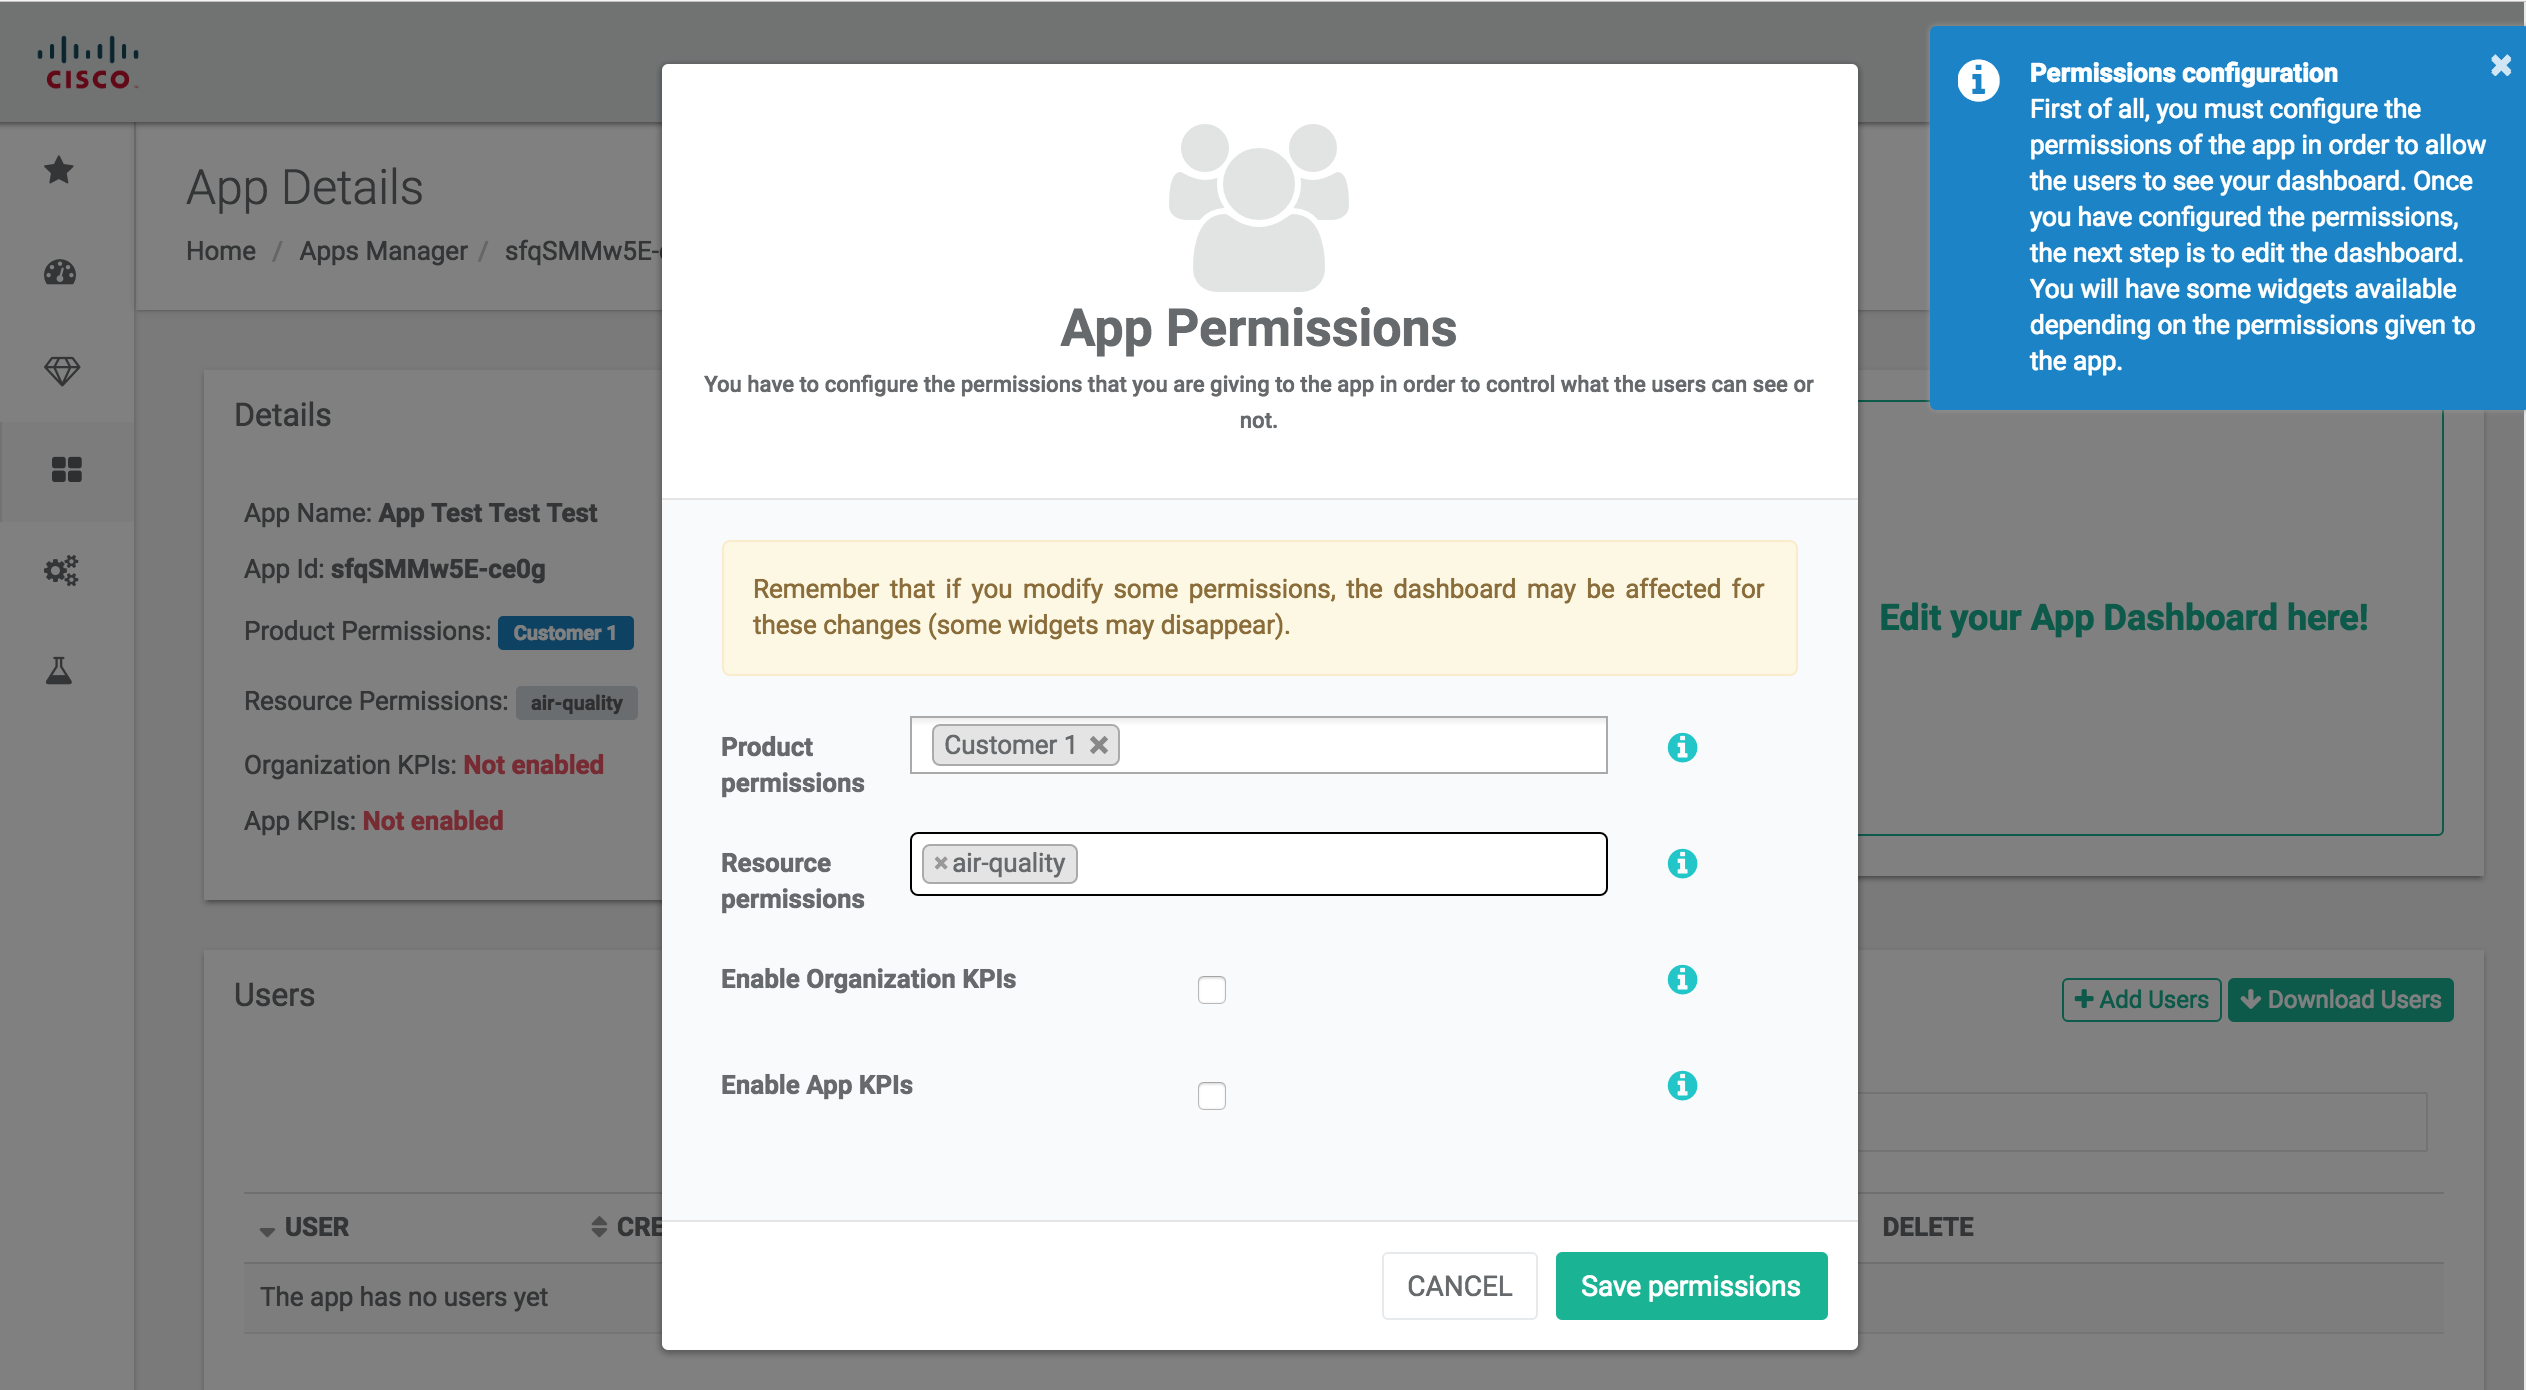
  3. Choosing app permisions
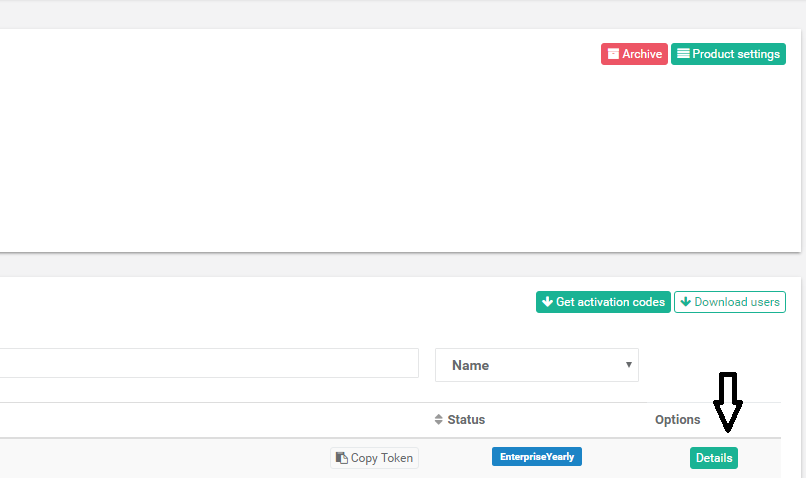
    1. Navigate to the product you want to share with the app (third row of the menu).
    2. Click on “Product details”.thethings-resource-permisions
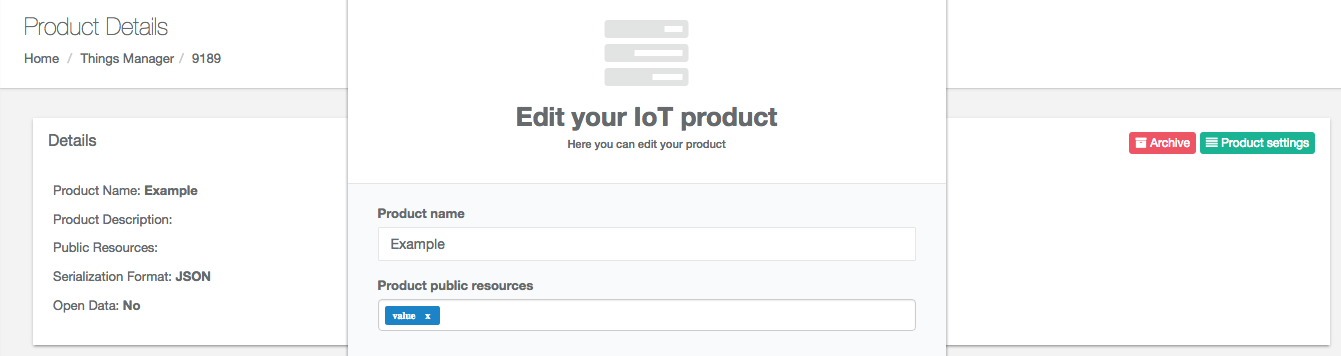
    3. Write the name of the resources that will be available in the app (each one followed by a space).
  4. Clone thethings.iO Android app on your local repository and launch it
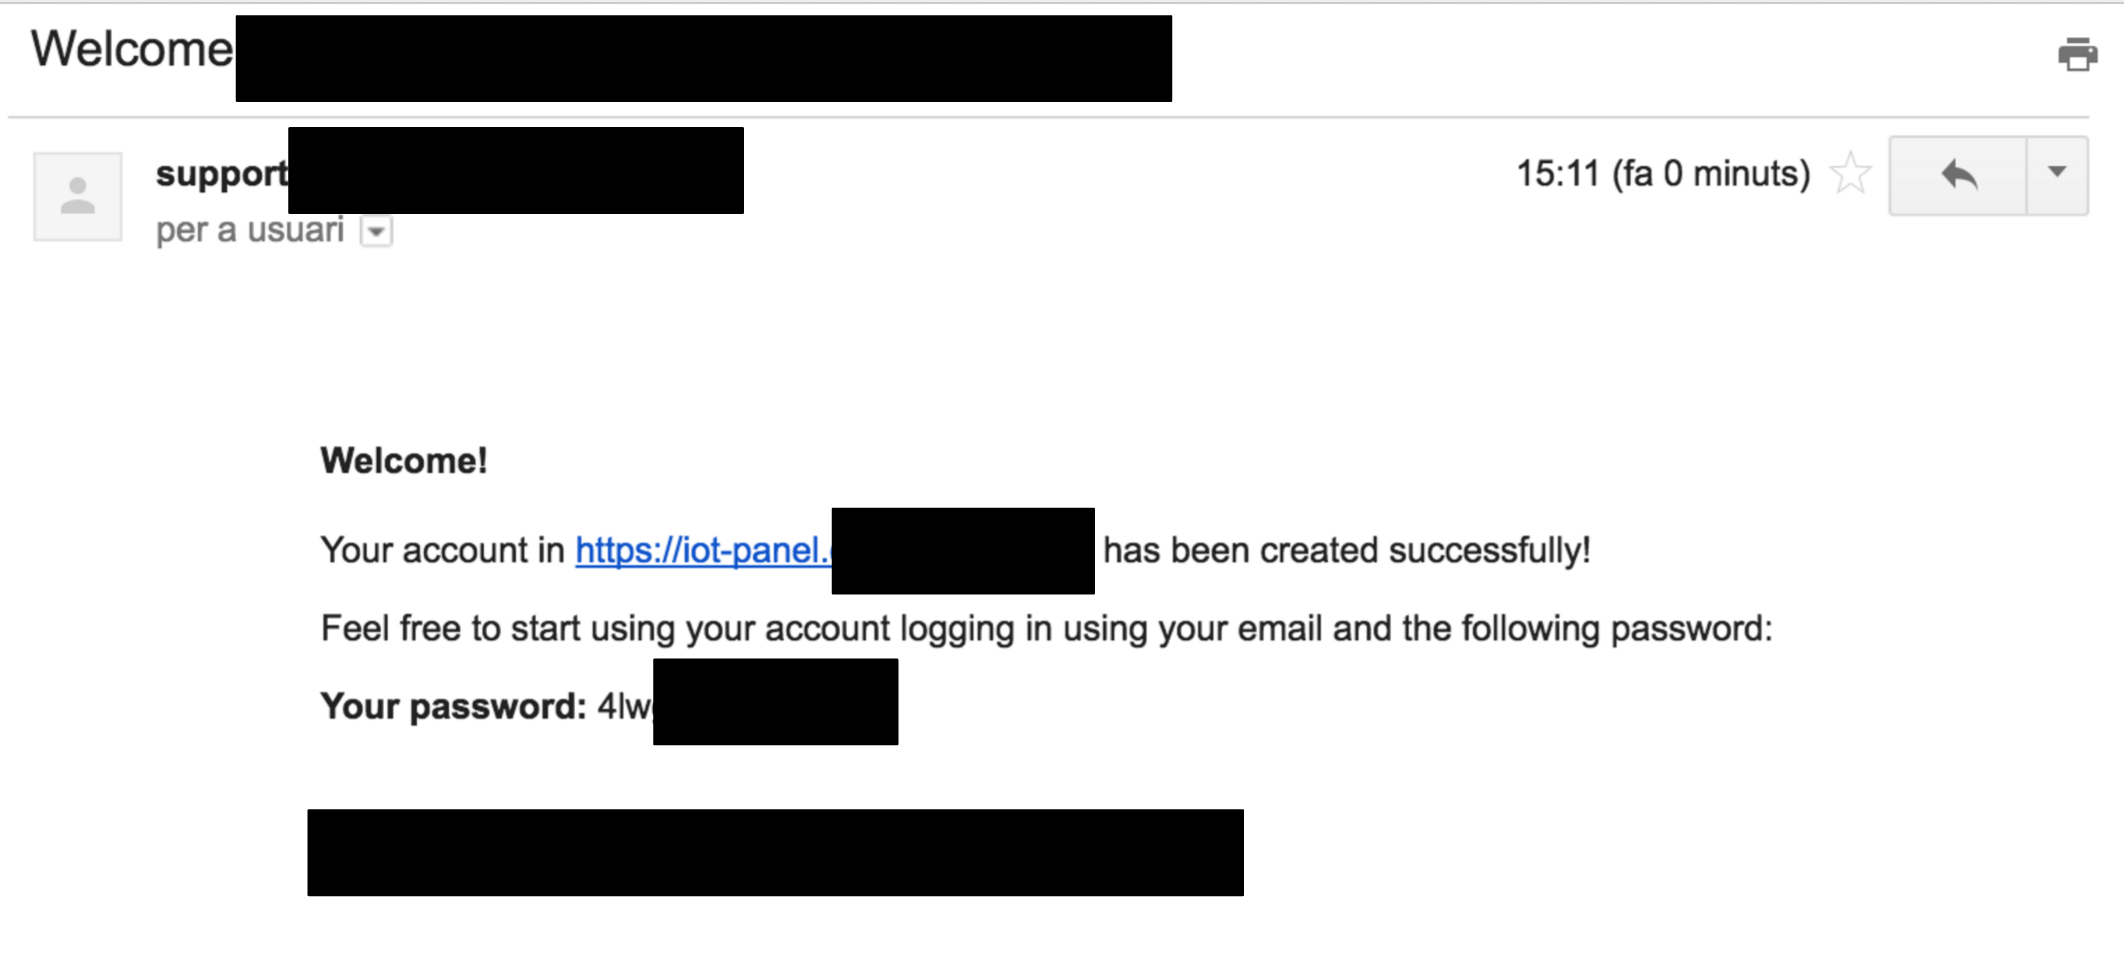
    1. The first display will request some of the basic credentials. Fill your login credentials (inside “Account setup”): Username, password, app-id and the thing-Id you want to interact with.thethings-app-credentials
    2. Press “Api Calls”.
    3. If it’s the first time you use the app, click on “Register”. If it’s not, click on Login. The user will be logged in the app details (at thethings.iO).thethings-app-options
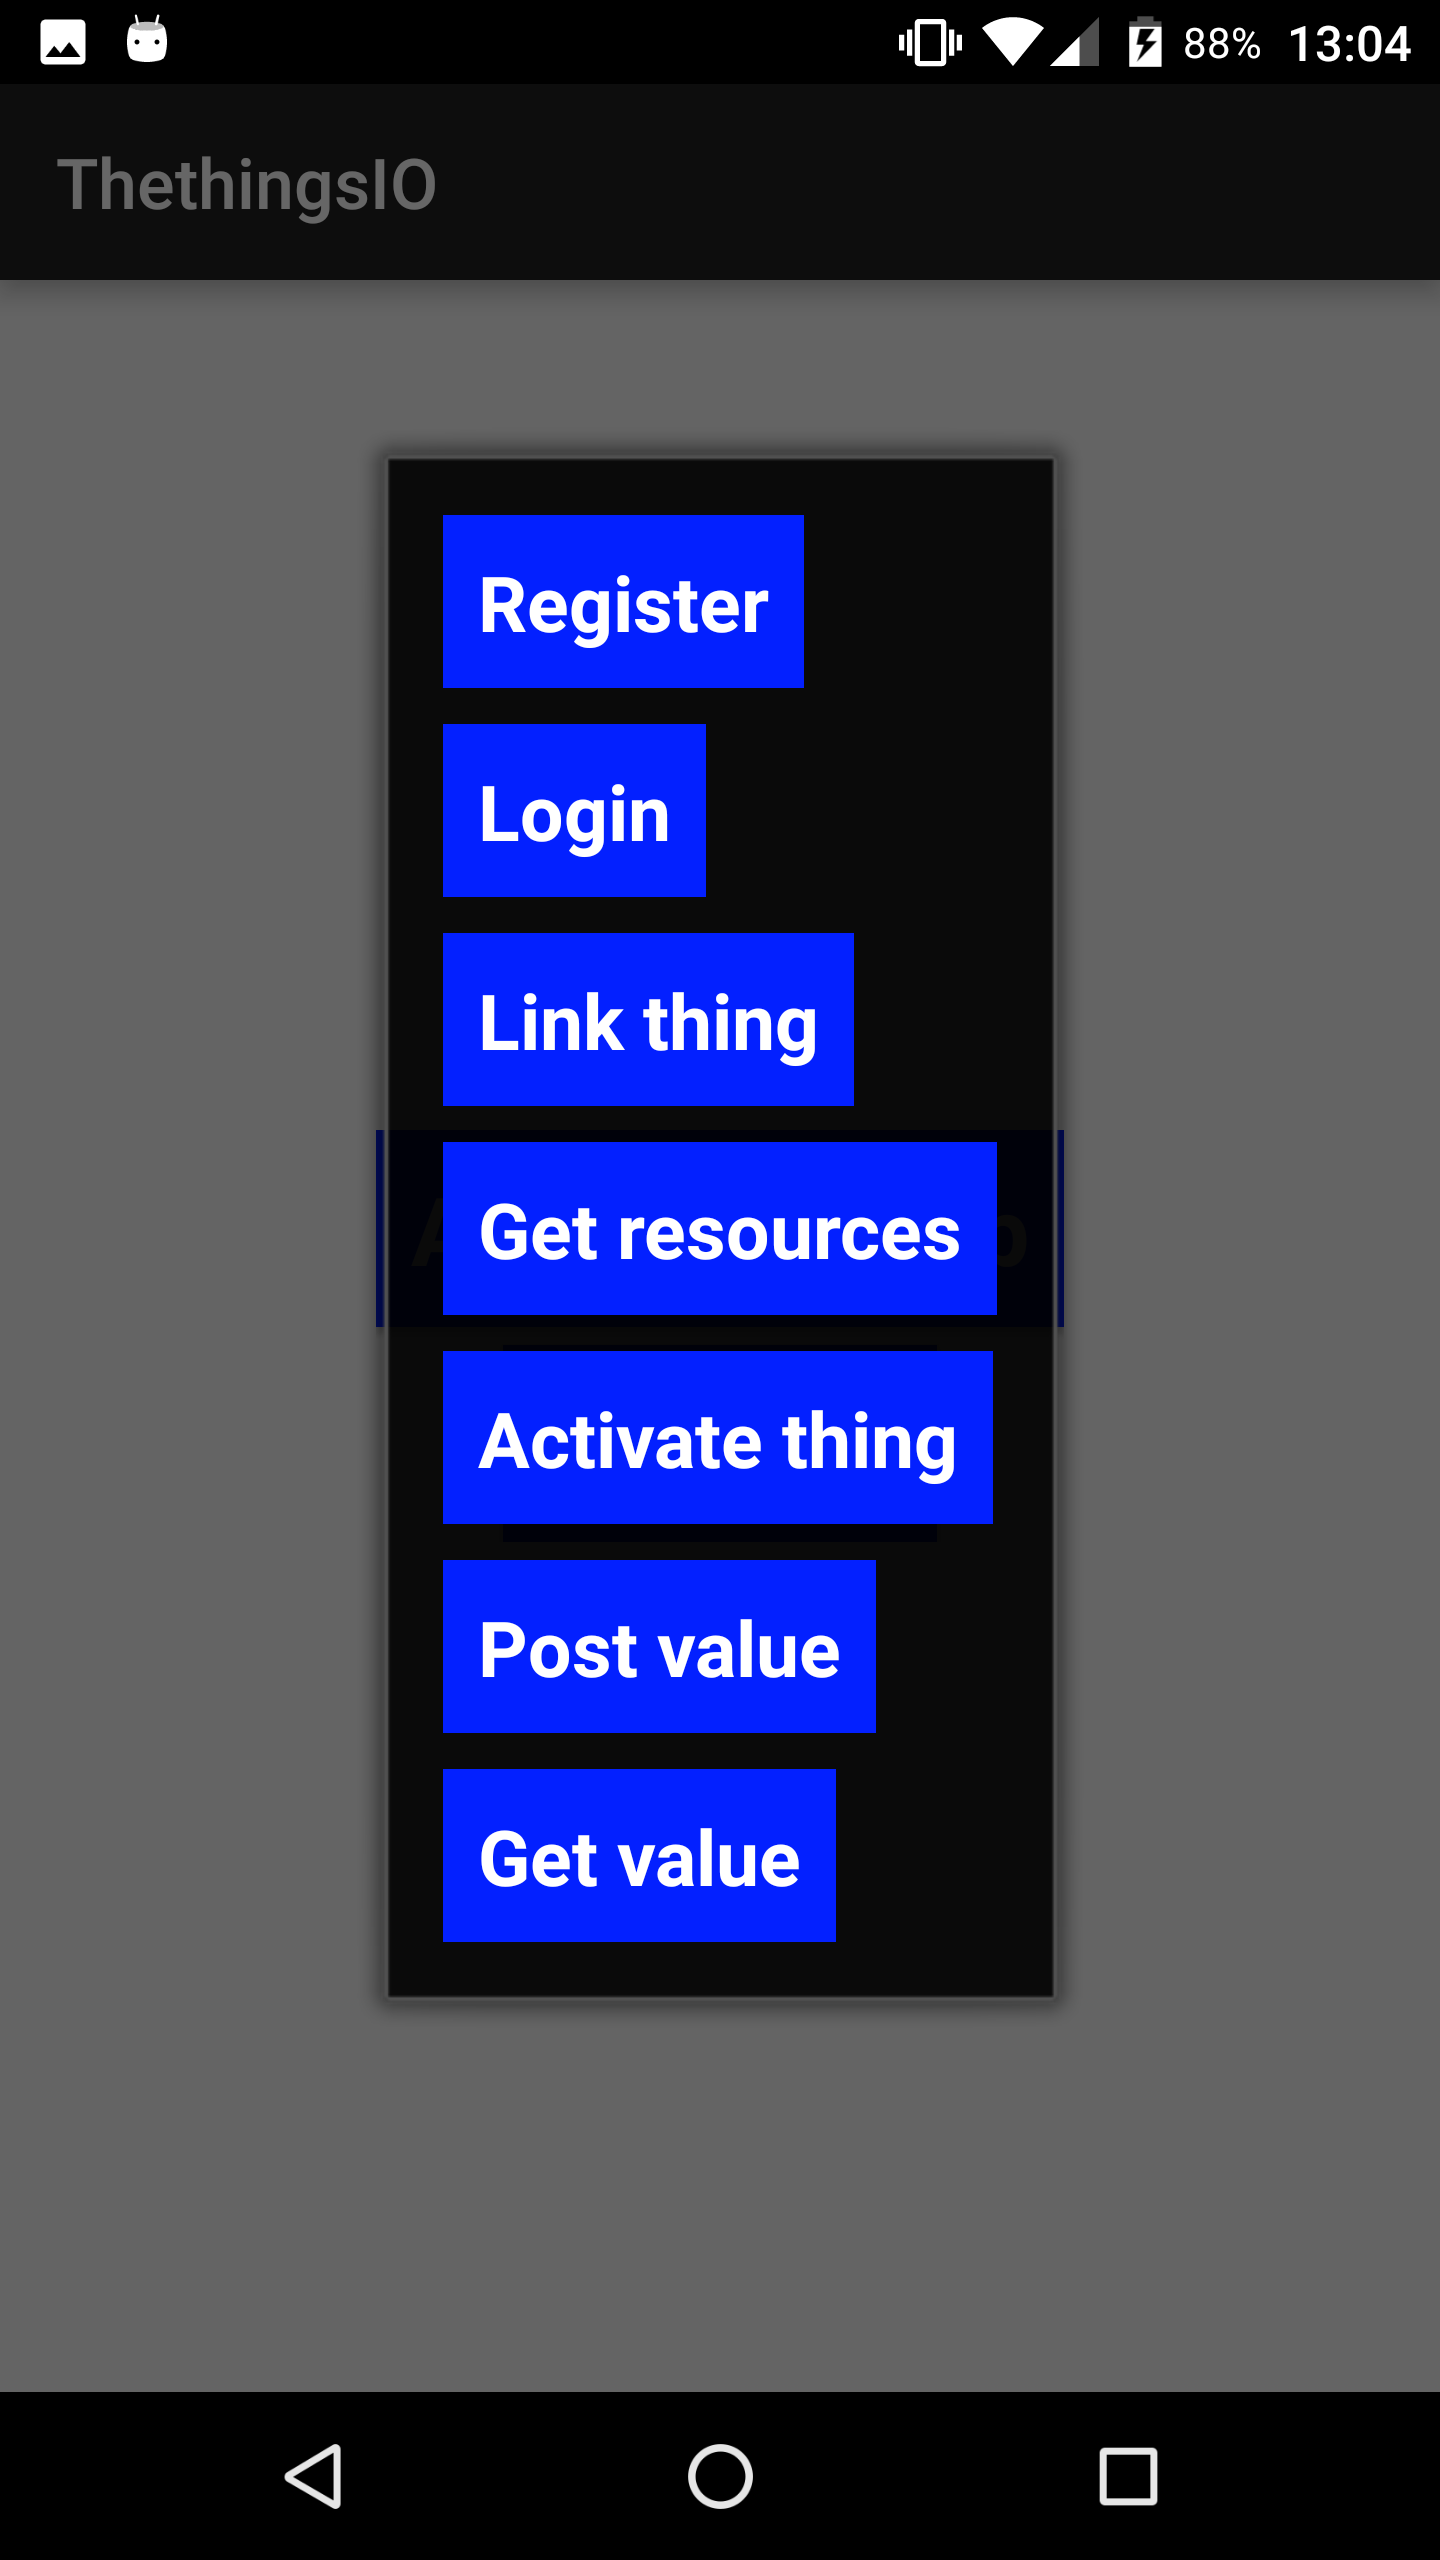
    4. Press “Link thing” to start using the specified thing.
    5. Use the rest of the options at your will.

This Android app shows you all the API calls that you need to connect Android with thethings.iO. If you need more help, please post a message on thethings.iO developers forum and we will solve it ASAP.

thethings.iO API calls for mobile apps

There is a long documentation on thethings.iO developer portal to build mobile app for IoT with thethings.iO. Find here the most important API calls that you can call through HTTP, MQTT, CoAP or Websockets from iOS, Android or whatever mobile OS that you are using.

Register

The first call is to Register a user at thethings.iO IoT Platform. This endpoint also login the user (returns the session token and roles), so you don’t have to do another API call to login the user.

POST https://api.thethings.io/v2/register

curl -i -H "Accept: application/json" \
-H "Content-Type: application/json" \
-d '{"email": "YOUR EMAIL HERE", "password": "a hard to guess password", "app": "The appID given in the panel"}' \
-X POST "https://api.thethings.io/v2/register" -k

Login

Here you can Login a user on your app through thethings.iO IoT Platform. This API call returns the session token and roles. Roles identifies the resources and things that the user has authorized the App to access.

POST https://api.thethings.io/v2/login

curl -i -H "Accept: application/json" \
-H "Content-Type: application/json" \
-d '{"email": "YOUR EMAIL HERE", "password": "a hard to guess password", "app": "The appID given in the panel"}' \
-X POST "https://api.thethings.io/v2/login" -k

Link Thing

This is one of the most important API calls because it joins a user and a thing. That means that it’s a procedure that entitles the owner of a thing.

This procedure needs a thingToken (or the thingId) and a sessionToken of the user (after log in or register). And it requires some kind of direct communication between the mobile app and the thing.

For example, when setting up for first time a thing with WiFi, you usually have to configure the WiFi for the thing. That means that the thing generates a hotpsot, the app connects to that WiFi and the user (after login or registration through the app) introduces the WiFi’ SSID and WiFi’s password. The thing gets the information and get connected to the Internet. At this moment the thing call the API activate and receives the thingToken of the thing. With this thingToken, the App will be able to do the REST call to link the think to the user and store the relation at the platform. The other possibility is to send the sessionToken of the user (after log in or registration) during the WiFi configuration (sending the SSID + WiFi password and the sessionToken).

Note that in order to link the thing the user must be logged in and the thing must be activated (i.e. have a thingToken)

This operation can only be done for applications which have been authorized for the thing developer, this kind of apps are called official apps.

POST https://api.thethings.io/v2/me/things


curl -i -H "Accept: application/json" \
-H "Content-Type: application/json" \
-H "Authorization: { {SESSION TOKEN} }" \
-d '{"thingToken": "{ {thingToken} }"}' \
-X POST "https://api.thethings.io/v2/me/things" -k

Find all the documentation about how to make a mobile app connected to the IoT platform thethings.iO at the developers site.

Today we explained a step by step to build an Android app connected with your things at thethings.iO. Feel free to use our Android app on thethings.iO’s github account. Don’t waste your time and create and account at the most simple IoT platform in the market.

Create an App and IoT dashboard with thethings.iO

Most of the Internet of Things devices bring applications with them. Most of the user experience behind these device live at the mobile applications or websites precisely designed to manage, control and interact with the connected thing. At thethings.iO we know what that means and that’s the reason why you can manage all of your apps through thethings.iO panel.

Apps & thethings.iO

Apps & thethings.iO

One of the features that are “hidden” for FREE users are the IoT apps or how we internally call it, the custom dashboards for users. This feature is only available for Enterprise customers and it is one of the most used by our clients.

Custom IoT dashboards for users

Firstly, we call Apps an interface (mobile app, website, thethings.iO dashboard or API) that have access to a subset of data or subset of machines. Technically an App has an AppId that is needed to be included on the login or register of the users. Any App and user’s App can be managed through the Apps Manager at thethings.iO.

The custom IoT dashboard, it’s a kind of an App that thethings.iO supports. That means that the App or the IoT dashboard can access to the data of the things that are “linked” to this App. Moreover, you can create apps and IoT dashboards under your own brand (colors, logos, etc) and under your URL for your own users. We learnt that users wants that buys a connected product from a specific brand don’t want to go to an application or dashboard from a third party company, they want to perceive that everything belong to you.

How to create an app or IoT dashboard

Let me tell you an example of an IoT dashboard for Cisco that we built some time ago to manage some devices connected to Cisco. In that case, the admin of the account had a login and password on their own custom brand. Remember that custom brand your panel is an Enterprise feature, contact us in case your would like to see a demo with your own brand.

Login page Custom IoT Dashboard

Login page Custom IoT Dashboard

Then we go to the App icon and click “Create new IoT application“. Here if you want to develop only a mobile app click on App button. Nevertheless if you also want to offer a dashboard for your users, click on App + Dashboard.

Create an App and IoT dashboard with thethings.iO

Create an App and IoT dashboard with thethings.iO

Now it’s time to introduce not only the name of the app, but also the subdomain where the users will introduce as URL to log in at the dashboard. For example http://iot-panel.cisco.com.

Next step is to define the App Details.

App details of a custom IoT dashboard @ thethings.iO

App details of a custom IoT dashboard @ thethings.iO

At the App Details, first of all you need to manage all the permissions of the App. What products does the App have access? What things from the app? What resources from the things? Any tag to take into account? The App has access to KPIs from the organization? or KPIs generated through cloud code? These are some of the permissions that you need to manage when create an App.

Edit permissions App Details @ thethings.iO

Edit permissions App Details @ thethings.iO

On the other hand, if you build a mobile app connected to your things you need to manage the permissions and copy the App Id and paste it in the code of your mobile Application. If you want to build a dashboard for your users, then you need to click on Edit Dashboard after editing the permissions.

Edit custom IoT dashboard for users with thethings.iO

Edit custom IoT dashboard for users with thethings.iO

Next step is to invite users to the App through the “Add user” button on the App Details and let them enjoy the user experience of your products with thethings.iO. Once you invite a user they will receive an e-mail customized with your message with their login and password to your IoT dashboard. Check here an example.

E-mail sample of an invitation to an IoT dashboard powered by thethings.iO

E-mail sample of an invitation to an IoT dashboard powered by thethings.iO

From now the users can access to the dashboard design by you to them, under your brand and URL and powered by thethings.iO, so you don’t need to think about the cloud.

Remember, to create a custom IoT dashboard, of course you need to create an App at thethings.iO under your custom brand panel. That means, that you need to become an Enterprise customer before you create that App (under your subdomains and look&feel).

It’s time to start using the most simple IoT platform in the market, don’t waste your time and sign up at thethings.iO and start making cool things and don’t worry about the IoT platform.

thethings.iO Texas Instruments Library

We are happy to announce the release of the library for the Texas Instruments Launchpads! With this library it just got really easy to connect these devices to thethings.iO. And it is available for the open source IDE “Energia” as well as for “Code Composer Studio”! The first one was tested on the CC3200 launchpad and on the MSP-EXP432P401R Launchpad with the CC3100 booster and the second one was tested on the CC3200 launchpad.

So, let’s get right to it! Here, we assume that you have already worked with the launchpads. If you want more examples or a more step by step introduction, soon we we will publish more detailed tutorials. You can find our API reference at github.com.

Step 1: Create a product at thethings.iO

1.1 Get an account at thethings.iO

If you already have an account you can skip this step.

  • Go to thethings.io.
  • In the upper right corner click on ‘Start now’
  • Register.

1.2 Create your first product

  • In your account, at the sidebar on the left click on ‘Things’.
  • Then click on ‘Create New Product’ and you will see the following screen:

new_product

  • Fill out the name of your new product.
  • For ‘Board’ choose ‘Other’.
  • If you want, you can add a description.
  • We will leave the format at JSON.
  • Leave ‘Opendata’ unmarked.
  • Click on ‘Create’.

1.3 Activate your thing!

  • Click on your new product.
  • In the ‘Things’ section click on ‘Get activation codes’.
  • Then click on ‘Generate Activation Codes’.
  • You will be asked how many activation codes you need, leave it at 1 and click ‘Generate’.
  • Then click on the ‘+’ sign on the right side.
  • A window will open, click on ‘Accept’.

Congratulations! You have just activated your first thing on thethings.iO!

Step 2: Try an example from the library

2.1 Download and extract the library

download

  • Extract the downloaded archive and copy the folder ‘thethingsiO_energia’ to C:\Users\[your user name]\Documents\Energia\libraries\

2.2 Open and edit the example

In this step we will try an example that generates random numbers and sends them to our thing at  thethings.IO.

  • Open Energia and select ‘Open…’ from the ‘File’ menu
  • Navigate to C:\Users\[your user name]\Documents\Energia\libraries\thethingsiO_energia\examples and select ‘send_random’
  • A window will pop up telling you that the file ‘send_random.ino’ needs to be inside a sketch folder and asking you if it should create the folder and move the file for you.
  • Click ‘Ok’ (It will actually move the file, so you will “lose” the original if you don’t copy it back).
  • In line 11, put the name of your network (SSID).
  • In line 13, put the password of your network.
  • Next, we need to know our token.
  • Enter into your account at thethings.iO
  • Go to your things by clicking on ‘Things’ at the left sidepane:

tut_cc3200_energia_things

  • Then click on the thing that you created in step 1.
  • Now you can see your Thing Token.
  • Put that token in line 8 of our example code.

2.3 Execute the example

Upload the sketch to your launchpad!

2.4 See the random numbers arriving at thethings.iO!

  • Log into your account at thethings.iO
  • Click on ‘Things’ at the left sidepanel.
  • Click on the thing you created at step 1.
  • Click on ‘Details’ of the token you copied in the code:

details_token

  • In the resource section, choose ‘random’:

choose_resource

  • Then click on ‘Real-time’…

realtime-1

  • And see the random numbers arriving!

random_arriving

Step 2: Try an example from the library

In this step we will execute an example provided by the library that sends random numbers to thethings.iO.

2.1 Download the library

download-1

2.2 Import the example as a project

  • Unpack the zip folder you just downloaded.
  • Open Code Composer Studio
  • Then select ‘Project’ -> ‘Import CSS Projects…’ from the menu.
  • In the window that opens, mark ‘Select Archive File’ and click on ‘Browse’:

sel_arch

  • Go to the folder thethings.iO-TexasInstruments-library-master you just unpacked
  • And navigate to the thethingsiO_css -> examples -> send_random_ttiO
  • Select ‘send_random_ti_css.zip’ and click on ‘Open’.
  • ‘send_random_ttiO’ should appear as discovered project.
  • Select it and click on ‘Finish’.

2.3 Execute the example

The example we just imported, generates random numbers and sends them to thethings.iO. We only have to change one line in order to make it work:

  • In Code Composer Studio, go to the Project Explorer and select ‘send_random_ttio’ so that it is marked as ‘[Active – Release]’.
  • Next thing, we need to know our token.
  • Enter into your account at thethings.io.
  • Go to your things by clicking on ‘Things’ at the left sidepane:

tut_cc3200_energia_things-1

  • Then click on the thing that you created in step 1.
  • Now you can see your Thing Token.
  • After that, open the main file and copy your token in line 41.
  • Save the changes
  • Debug the application clicking on the debug icon:

debug

  • Execute the application by  pressing the execute (or F8) button to execute the application:

execute

2.4 See random numbers arriving at thethings.iO!

  • Log into your account at thethings.iO
  • Click on ‘Things’ at the left sidepane.
  • Click on the thing you created at step 2.
  • Click on ‘Details’ of the token you copied in the code:

details_token

  • In the resource section, choose ‘random’:

choose_resource-1

  • Then click on ‘Real-time’…

realtime-iot

  • And see the random numbers arriving!

random_arriving_iot

Get Creative!

Congratulations!! You just set up your launchpad with thethings.iO! Now it is time for you to make your ideas reality. You can use the thethings.iO library and change one of the examples or start from scratch. You can find our API reference at github.com. Happy coding!

Custom Brand with thethings.iO: the white label IoT platform

Here at thethings.iO we want to give you an easy and flexible way to improve your business through the Internet of Things. That is why, in addition to all of our IoT platform services and features, we provide customizable dashboards for you and your customers that you can alter to fit your specific brand (with logos and URLs).

Why customize?

By employing customization, you get the benefits of thethings.iO IoT platform and user-friendly experience, all while maintaining the focus on your product. You can add your own logo and pictures on thethings.iO web interface to make it a site that looks all your own! So when it comes time to share your data with clients, third party companies and customers, they only see your company name instead of thethings.iO. It’s all about the experience.

This modifiable interface and customizable dashboards also saves you the time and money of designing your own IoT platform. Creating a server from scratch requires a team of experts and many resources that could be better used to help grow your business. Not to mention all the troubleshooting and research that goes along with development. Why reinvent the wheel when thethings.iO already provides highly functioning and user-friendly connectability for all your things? We want to simplify the Internet of Things.

By personalizing thethings.iO, the emphasis stays on you. You get all the advantages of having your own IoT platform without actually having to create one, and for a flexible price! If you sell more you pay more; what could be better than that?

Custom branded IoT platform

Custom branded IoT platform

Want to customize yours?

Send us an email at hello@thethings.io to start customizing your account now at thethings.iO. We are the simplest IoT platform on the market.

The new thethings.iO design & experience

As entrepreneur Jim Rohn once said: “Things do not get better by chance, they get better by change.” This is especially true in the world of technology, where nothing stays the same for long. Today, developers, entrepreneurs and innovators are constantly pushing the boundaries of what is possible to give the world better and faster technology. So here at thethings.iO we think change is a good thing; and in this case change is a very, very good thing.

Enter the new thethings.iO IoT platform design! We’ve changed around the look, feel and user experience of our panel to give users the most optimal experience for connecting and managing their products. The new panel employs Material Design concepts like minimalism, lighting, shadows and bold colors to create a thethings.iO experience that is both simpler and more sleek. The “pen and paper feel” makes it easier to navigate and the flat design is a lighter, more modern twist on the old panel.

We also improved our side navigation bar, making it smaller and fixed. It contains identifiable icons that make it simple to move back and forth between your Things, Apps, Cloud Code and more. A smaller side bar also means you have more space available for what really matters: your things and your data. This design, in all, creates a larger viewing panel in every section of thethings.iO. This is especially useful in the dashboard, where your widgets are now bigger and easier to read.

If our new look isn’t enough to spark your excitement, we’ve also optimized the platform. It now runs faster than ever so you can access the data from your devices wherever you need to, whenever you need to. So head on over to the most amazing IoT platform now and start connecting all your things to the Internet.

GlobalRider: Traveling the world with a connected motorbike

Ever dream of traveling the world? Of venturing off to far places that you’ve never been before? Hugo Scagnetti of Telefonica has, and he will do it with a connected motorbike in 80 days, but his reason why may surprise you.

map

After suffering a major leg injury two years ago from avascular necrosis, Scagnetti vowed that if he was ever able to walk without crutches again, he would navigate the globe with his motorbike. The sole motive of his expedition? To raise funds for the research of stem cells, focused on the regeneration of tissues in children.

After years of recovery, the time finally came for Hugo to make good on his promise. He departed from the Headquarters of Telefonica in Madrid, Spain on May 27th 2016 riding the world’s first “connected” motorcycle. The bike is equipped with Internet connectivity (GPRS and 3G) and sensors that can provide information about Hugo’s trip in real time.

380701-995x662

How is this bike connected to the Internet you might ask? Using thethings.iO of course! At thethings.iO, we gather data from the sensors on Hugo’s motorcycle and display information including his position, velocity, altitude, temperature and much more right as it is happening! All these stats are displayed on a dashboard that is easy to read and can be accessed by any Internet surfing device.

velocity

This project fuses the world of adventure with the world of technology, giving anyone the chance to travel the world. Whether you’re crossing the continents by motorbike or staying in one place, you can connect all your devices to the Internet using thethings.iO.

Want to follow Hugo as he travels around the globe? You can find out his current, past and future locations, along with all of the environmental measures on the Telefonica website.

thethings.iO and emotionsAR cloud printing use case

Under the claim “Images that come alive” there is the company emotionsAR. emotionsAR is a B2B SaaS platform for photography professionals that allows users turn their pictures into life.

emotionsAR cloud printing service

emotionsAR cloud printing service

With EmotionsAR’ app, you can see how pictures come alive: you can add motion, interactivity and sound to your images. But its business model goes further, as they are also experts in Augmented Reality and image recognition.

emotionsAR is also one of our first clients. That’s why we decided to ask Josep Ballesté, CEO of emotionsAR, a few questions about his experience with thethings.iO.

emotionsAR and thethings.iO

At thethings.iO, we understand that can be hard to handle to make a connected device. We offer to these companies the Internet of Things platform that facilitates them to launch their networked products to the market faster than if they had to build the whole cloud and connectivity by themselves.

With more and more customers requesting emotionsAR to scale the cloud printing solution for their needs in thousands of different places all around the world, we set up a solution between emotionsAR and thethings.iO to connect several models of professional printers such as Mitsubishi, Epson, HP among other.

Josep Ballesté, CEO of emotionsAR saw fundamental the need for an IoT platform for their future roadmap so. As mr Ballesté said, “We knew that having a cloud solution was a crucial part of our product, so the decision of choosing it well was so important. We decided to sign up in thethings.iO IoT platform and try it, and it was even better that what we expected! So we stayed”.

We started connecting printers for emotionsAR. And emotionsAR’s CEO, Josep Ballesté, described his experience using thethings.iO as “great. One of the key advantages is its compatibility with all hardware environments”.

We know most of times it is hard and expensive to create from scratch a full IoT platform as thethings.iO to use it in just one part of the business. It can take a lot of time that could be used to develop other phases of the process and launch the product earlier. In emotionsAR case it did not happened, as “thethings.iO provides scalability, reliability and security from the very first minute”, said Mr Ballesté.

Josep Balleste CEO of EmotionsAR at 4YFN

Josep Balleste CEO of EmotionsAR at 4YFN

Interview to Josep Ballesté, CEO of emotionsAR

Why did you decide to use thethings.iO at first?

We had decided to work on an emotionsAR Cloud Printing Solution, launched a few months ago, which combines instant mobile printing with augmented reality, making printing easy and fun. A cloud solution was a crucial part of our product.

How was your experience using our platform? What part helped you the most?

thethings.iO IoT platform is great! One of the key advantages is its compatibility with all hardware environments. Since launch, we have seen its proven reliability. thethings.iO also provides security and scalability.

Why would you recommend other people to use thethings.iO?

In the product ideation phase, thethings.iO team were of great help thanks to their expertise in different Internet of Things verticals. During the development phase, thethings.iO team showed fast execution, responding quickly to the changes requested. Since launch, the customer service has shown quick response rates and great efficiency.

It’s great how emotionsAR mention Bob Dylan at Open Door singing: “<<“Take care of all your memories” / Said my friend, Mick / “For you cannot relive them”.>>”.

IFTTT, LIFX and thethings.iO

One of the most popular services that helped the Internet of Things to reach a great critical mass is IFTTT. IFTTT means if this then that. IFTTT is a fantastic IoT platform that allow people build recipes, triggers or actions with several connected devices and services.

ifttt thethings.iO

thethings.iO + IFTTT

Actually at thethings.iO we love IFTTT. And this is the main reason why we decided to connect thethings.iO with IFTTT and enable our customers and their connected things the possibility to interconnect any device that they have at thethings.iO with any service or device connected through IFTTT. Let me give you an example, imagine that you have a LIFX lightbulb and your own Arduino device. Now through thethings.iO and IFTTT it is possible to make them speak with just 3 minutes of efforts! Keep reading!

At this post we are going to show you two different examples that we built with the IFTTT Maker channel. The first example is using a thing connected to thethings.iO as the IF THIS part of the IFTTT. The second example enables a device connected to thethings.iO that is the thing connected as THAT part.

THIS

This example uses a Particle Photon with a button and a LiFX bulb. Each time the button is pushed, a message is published via HTTP to thethings.iO. This message activates a trigger in real-time, that sends an HTTP POST to IFTTT (activating the IF THIS statement).

Once the IF THIS statement is achieved, IFTTT activates a LIFX bulb from our LIFX account.

This are the steps to follow in order to do the example:

  1. Create a LIFX account and associate your light bulb your your account.
  2. Register at thethings.iO IoT platform.
  3. Create a product with your thethings.iO account.
  4. Register at particle with and flash your photon particle with the button code provided on our Particle photon github repository.
  5. Register at IFTTT and connect to the Maker channel. At https://ifttt.com/maker inside “How to trigger events”, you’ll find the associated url to send HTTP requests later. Modify the path inside the Cloud Code trigger your credentials.
  6. Create the IFTTT trigger:
    1. Select “this” and search the Maker channel. Then click on it.thethings-this-makers
    2. Click on Receive a web request.
    3. Give a name four your event.
    4. Select “that” and search for LiFX. Then click on it.thethings-that-lifx
    5. Your LIFX account credentials will be asked.
    6. Select the event that will happen on the LIFX bulb (in our case Change Color. Randomised).
  7. Go back to thethings.iO and navigate to Cloud Code.
  8. Create a trigger associated with the previous created product.
  9. Copy the following code to the trigger (remember to change your_event and your_key with your actual ones):

function trigger(params, callback){
  if (params.action !== 'write') return callback();
  
  var body = {	//Add the values that you want
    button: '1'
  };
  
   httpRequest({
    host: 'maker.ifttt.com',
    path: '/trigger/your_event/with/key/your_key', // Remember to change your_event and your_key!
    method: 'POST',
    headers:{
      Accept: '*/*',
      Connection: 'close',
      'Content-Type':'application/json'
    }

  }, body, function(err, result) {
    //and postprocess the api result here before sending to your thing
    console.log('Returned from httpRequest');

    if (err) {
      console.log('httpRequest error');
      console.error(err);
      return callback(err);
    }
    if (result) {
      console.log('httpRequest success');
      console.log(result);
    }
    callback(null, result);
  });
}

After this simple steps, this IF example is completed! Now you can play with it!

THAT

This example uses an Arduino Yun with the IKEA discoball connected with a motor (using a relay). The Yun is connected via MQTT to thethings.iO. Using IFTTT, the disco ball from the Yun spins for 2 seconds each time a new task is created in a certain list in Trello.

In order tu make the example, these are the required steps:

  1. Create a LIFX account and associate your light bulb your your account.
  2. Register at thethings.iO IoT platform.
  3. Create a product with your thethings.iO account.
  4. Create a new arduino sketch and paste this code:

#include &lt;YunClient.h&gt;;
#include &lt;Bridge.h&gt;;
#include &lt;PubSubClient.h&gt;;
#include &lt;Process.h&gt;;

#define TOKEN "youThingToken"    // Change yourThingToken with your actual thingToken

YunClient wificlient;

String topic = "v2/things/" + String(TOKEN);
String message = "";
boolean firstValue = true;

void addValue(String key, int value) {
  if (firstValue == true) {
    firstValue = false;
    message.concat("{\"key\":\"" + key + "\",\"value\":" + value+"}");
  }
  else {
    message.concat(",{\"key\":\"" + key + "\",\"value\":" + value+"}");
  }
}

void callback(char* topic, byte* payload, unsigned int length) {
    // handle message arrived
    String text = "";
    for (int i = 0; i &amp;lt; length; i++) text.concat((char)payload[i]); 
    text.replace(" ", ""); //Serial.println(text);  
    if (text.indexOf("\"key\":\"party\"") &gt;= 0) {
        if (text.indexOf("\"value\":\"1\"") &gt;= 0) {
          digitalWrite(7, HIGH);
          delay(2000);
          digitalWrite(7,LOW);
        }
    }
    
}

PubSubClient mqtt("mqtt.thethings.io", 1883, callback, wificlient);

void publish() {
  String toSend = "{\"values\":[" + message + "]}";
  mqtt.publish((char*)topic.c_str(), (char*)toSend.c_str());
  message= "";
  firstValue = true;
  Serial.println("Published");
}

void setup() {
  Bridge.begin();
  //Serial.begin(9600); 
  //while(!Serial);
  pinMode(7, OUTPUT);
  while (!mqtt.connect("Yunclient")) {
    //Serial.println("Could not subscribe, retrying...");
  }
  //Serial.println("Client connected to mqtt broker!");
  mqtt.subscribe((char*)topic.c_str());
}

void loop() {
  mqtt.loop();
}

4. Register at IFTTT and connect to the Maker channel.

5.Create the IFTTT trigger:

  1. Select “this” and search for trello. Click on it.thethings-this-trello
  2. Choose your preferred action (Card added to board, list or assigned to you).thethings-trello-choose
  3. Your Trello account credentials will be asked.
  4. Insert the fields for the chosen action.
  5. Click on “that” and search for Maker. Click on it.thethings-that-maker
  6. Press Make web request.
  7. Insert on the URL field.
  8. Select POST method.
  9. Select aplication/json for the content type.
  10. Insert the following JSON in the body: {“values”: [{ “key”: “party”, “value”: “1” }]}
  11. Click on create action.

thethings-that-maker-details

It’s fun right? We love that people apply innovation on the top of thethings.iO! this is the reason why thethings.iO IoT platform is connected to Twilio, Twitter, and IFTTT, among other. Let us know what you build and we will publish it at the blog.