IFTTT, LIFX and thethings.iO
One of the most popular services that helped the Internet of Things to reach a great critical mass is IFTTT. IFTTT means if this then that. IFTTT is a fantastic IoT platform that allow people build recipes, triggers or actions with several connected devices and services.

thethings.iO + IFTTT
Actually at thethings.iO we love IFTTT. And this is the main reason why we decided to connect thethings.iO with IFTTT and enable our customers and their connected things the possibility to interconnect any device that they have at thethings.iO with any service or device connected through IFTTT. Let me give you an example, imagine that you have a LIFX lightbulb and your own Arduino device. Now through thethings.iO and IFTTT it is possible to make them speak with just 3 minutes of efforts! Keep reading!
At this post we are going to show you two different examples that we built with the IFTTT Maker channel. The first example is using a thing connected to thethings.iO as the IF THIS part of the IFTTT. The second example enables a device connected to thethings.iO that is the thing connected as THAT part.
THIS
This example uses a Particle Photon with a button and a LiFX bulb. Each time the button is pushed, a message is published via HTTP to thethings.iO. This message activates a trigger in real-time, that sends an HTTP POST to IFTTT (activating the IF THIS statement).
Once the IF THIS statement is achieved, IFTTT activates a LIFX bulb from our LIFX account.
This are the steps to follow in order to do the example:
- Create a LIFX account and associate your light bulb your your account.
- Register at thethings.iO IoT platform.
- Create a product with your thethings.iO account.
- Register at particle with and flash your photon particle with the button code provided on our Particle photon github repository.
- Register at IFTTT and connect to the Maker channel. At https://ifttt.com/maker inside “How to trigger events”, you’ll find the associated url to send HTTP requests later. Modify the path inside the Cloud Code trigger your credentials.
- Create the IFTTT trigger:
- Select “this” and search the Maker channel. Then click on it.
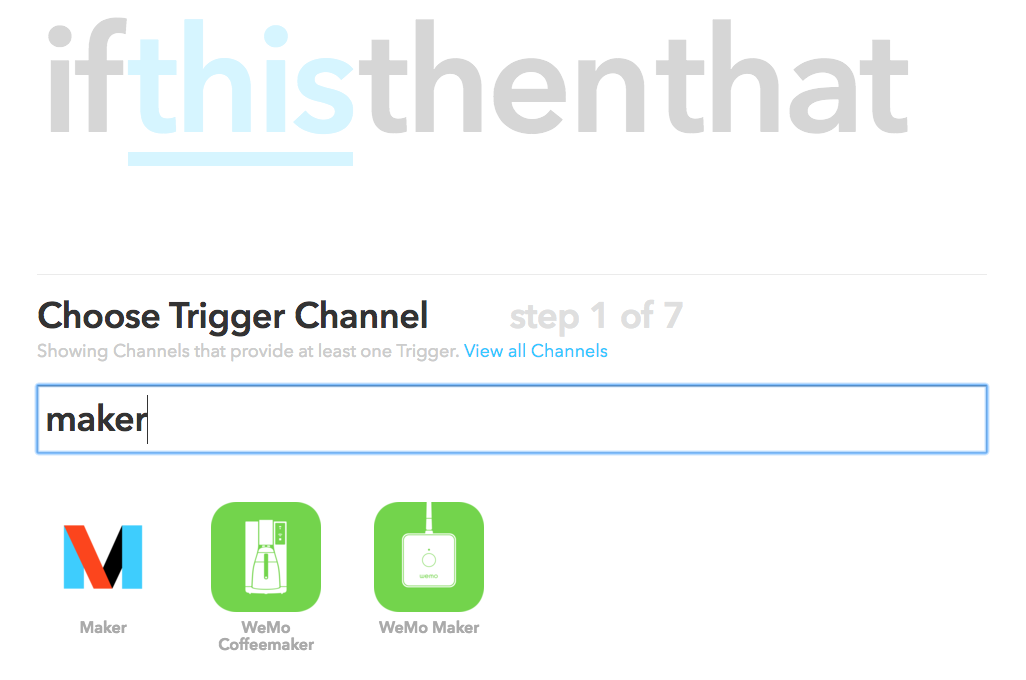
- Click on Receive a web request.
- Give a name four your event.
- Select “that” and search for LiFX. Then click on it.
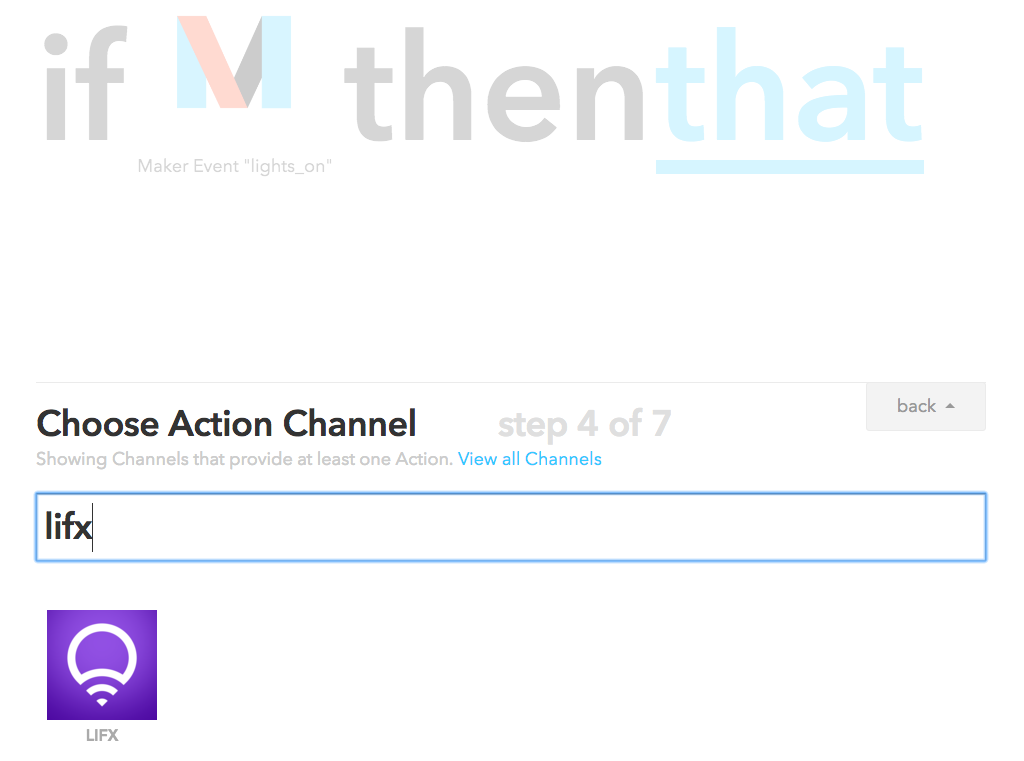
- Your LIFX account credentials will be asked.
- Select the event that will happen on the LIFX bulb (in our case Change Color. Randomised).
- Select “this” and search the Maker channel. Then click on it.
- Go back to thethings.iO and navigate to Cloud Code.
- Create a trigger associated with the previous created product.
- Copy the following code to the trigger (remember to change your_event and your_key with your actual ones):
function trigger(params, callback){
  if (params.action !== 'write') return callback();

  var body = {	//Add the values that you want
    button: '1'
  };

   httpRequest({
    host: 'maker.ifttt.com',
    path: '/trigger/your_event/with/key/your_key', // Remember to change your_event and your_key!
    method: 'POST',
    headers:{
      Accept: '*/*',
      Connection: 'close',
      'Content-Type':'application/json'
    }

  }, body, function(err, result) {
    //and postprocess the api result here before sending to your thing
    console.log('Returned from httpRequest');

    if (err) {
      console.log('httpRequest error');
      console.error(err);
      return callback(err);
    }
    if (result) {
      console.log('httpRequest success');
      console.log(result);
    }
    callback(null, result);
  });
}
After this simple steps, this IF example is completed! Now you can play with it!
THAT
This example uses an Arduino Yun with the IKEA discoball connected with a motor (using a relay). The Yun is connected via MQTT to thethings.iO. Using IFTTT, the disco ball from the Yun spins for 2 seconds each time a new task is created in a certain list in Trello.
In order tu make the example, these are the required steps:
- Create a LIFX account and associate your light bulb your your account.
- Register at thethings.iO IoT platform.
- Create a product with your thethings.iO account.
- Create a new arduino sketch and paste this code:
#include <YunClient.h>;
#include <Bridge.h>;
#include <PubSubClient.h>;
#include <Process.h>;
#define TOKEN "youThingToken" // Change yourThingToken with your actual thingToken
YunClient wificlient;
String topic = "v2/things/" + String(TOKEN);
String message = "";
boolean firstValue = true;
void addValue(String key, int value) {
if (firstValue == true) {
firstValue = false;
message.concat("{\"key\":\"" + key + "\",\"value\":" + value+"}");
}
else {
message.concat(",{\"key\":\"" + key + "\",\"value\":" + value+"}");
}
}
void callback(char* topic, byte* payload, unsigned int length) {
// handle message arrived
String text = "";
for (int i = 0; i &lt; length; i++) text.concat((char)payload[i]);
text.replace(" ", ""); //Serial.println(text);
if (text.indexOf("\"key\":\"party\"") >= 0) {
if (text.indexOf("\"value\":\"1\"") >= 0) {
digitalWrite(7, HIGH);
delay(2000);
digitalWrite(7,LOW);
}
}
}
PubSubClient mqtt("mqtt.thethings.io", 1883, callback, wificlient);
void publish() {
String toSend = "{\"values\":[" + message + "]}";
mqtt.publish((char*)topic.c_str(), (char*)toSend.c_str());
message= "";
firstValue = true;
Serial.println("Published");
}
void setup() {
Bridge.begin();
//Serial.begin(9600);
//while(!Serial);
pinMode(7, OUTPUT);
while (!mqtt.connect("Yunclient")) {
//Serial.println("Could not subscribe, retrying...");
}
//Serial.println("Client connected to mqtt broker!");
mqtt.subscribe((char*)topic.c_str());
}
void loop() {
mqtt.loop();
}
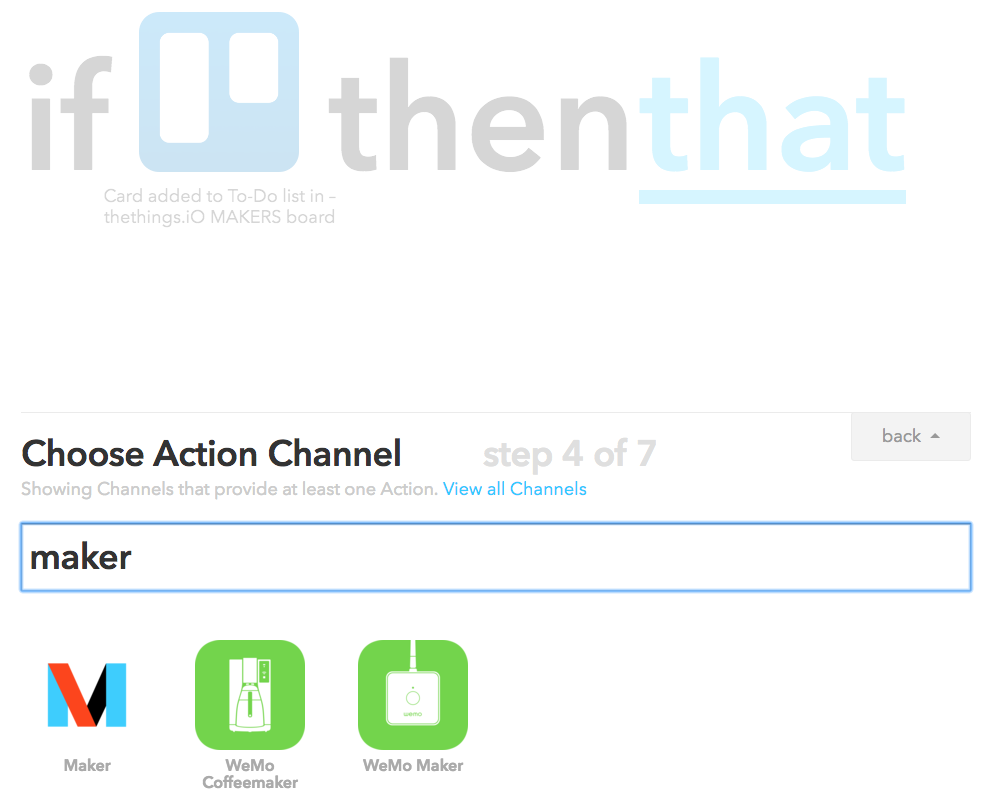
4. Register at IFTTT and connect to the Maker channel.
5.Create the IFTTT trigger:
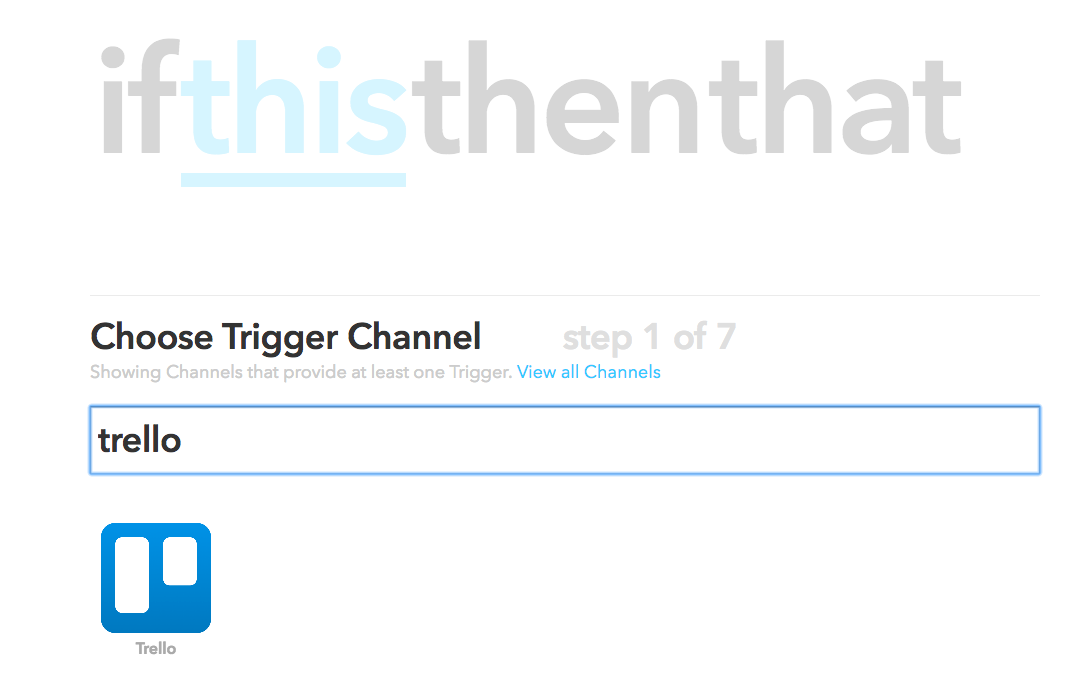
- Select “this” and search for trello. Click on it.
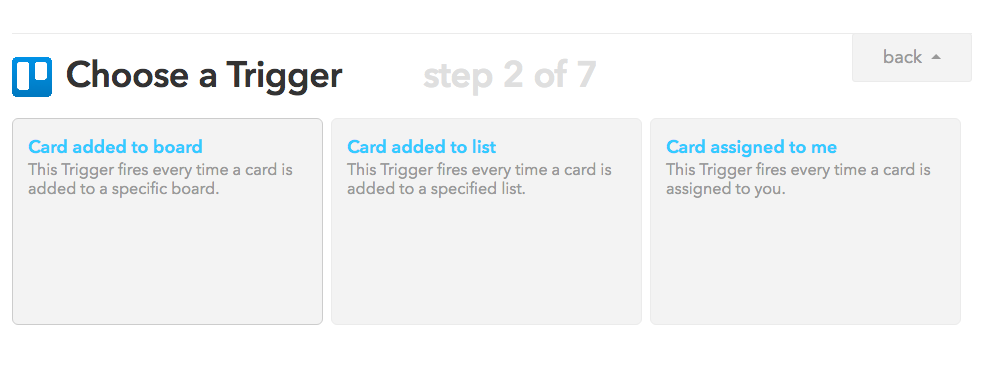
- Choose your preferred action (Card added to board, list or assigned to you).
- Your Trello account credentials will be asked.
- Insert the fields for the chosen action.
- Click on “that” and search for Maker. Click on it.
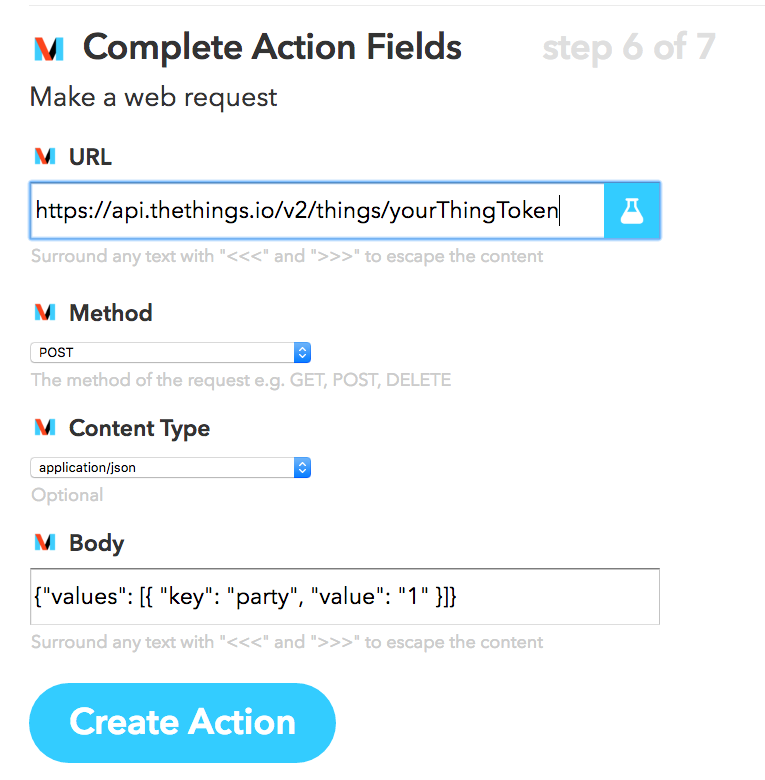
- Press Make web request.
- Insert on the URL field.
- Select POST method.
- Select aplication/json for the content type.
- Insert the following JSON in the body: {“values”: [{ “key”: “party”, “value”: “1” }]}
- Click on create action.
It’s fun right? We love that people apply innovation on the top of thethings.iO! this is the reason why thethings.iO IoT platform is connected to Twilio, Twitter, and IFTTT, among other. Let us know what you build and we will publish it at the blog.


