, ,

How to Setup your Insight Dashboard
When you log into your thethings.iO IoT platform, the first thing that you see is your Main Dashboard. This dashboard is here to give you the main overview of all of your things. However, sometimes you need to see more specific information about your things. For this reason, we’ve created the Insight Dashboard feature. If you need to see a high level vision of all your IoT project but then deep-dive into the details of one specific thing don’t miss this tutorial. Let’s see what it’s all about!

Main Dashboard and Insight Dashboards in more detail

The Main Dashboard is where you can see broad information about all of your products.

You can create widgets that give your information about a product. However, if you want a dashboard that gives you a closer look into something, you can create an Insight Dashboard. For example, you may want to set up an Insight Dashboard that gives you a closer look at errors. Say you have a table on your Main Dashboard with errors. Now with your Insight Dashboard built, you can click on the “thing” with the error in the Main Dashboard and it will take you directly to that “thing’s” Insight Dashboard. You can create Insight Dashboards under each product.

The difference between products and things

For the purposes of thethings.iO, “Products” are the categories and “things” are the actual things that you have. For example, if you had a set of GPS trackers that would be the “product”, and each GPS tracker would be a “thing”.

The Insight Dashboard is a template, and the template can be used for whatever “things” you choose. This means you can specialize as much or as little you want, pulling up every “thing” under one template or pulling each “thing” up under its very own template.

Example: You have a bunch of buttons with different data, either gsm cell data or gps data. Here, your product is “buttons” and each button is one “thing.” Let’s say you wanted to use a different Insight Dashboard depending on the source of data the button uses. Then you need two Insight Dashboard templates, one for gsm cell data and one for gps data, so that you can customize each Insight Dashboard template by data type. Then when you click on each thing, the thing (which knows by what it’s tag tells it) will go to its specific Insight Dashboard.

Creating Insight Dashboards

To create an Insight Dashboard, go to “things” in the sidebar and then click details on one of the products you see there. Once there, midway down the page, you will see a section that says “Insight Dashboards”. There, you can click “+Create Dashboard, and don’t worry, you can have as many Insight Dashboards as you want!

Adding widgets to your Insight Dashboard

Next click action>edit on the Insight Dashboard you want to edit.

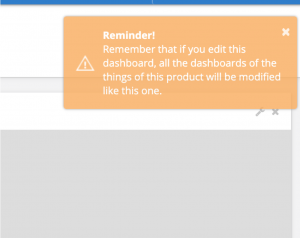
An alert like this will probably pop up here reminding you that this dashboard is a template, thus whatever you change will affect how you view every “thing” using this template. 

When you first open your brand new Insight Dashboard, it will have autogenerated a sample for you(with sample data as well) to show you many of the features available. You can go through and delete these if you like. In addition, when editing or creating your Insight Dashboard, all the data you see is sample data.

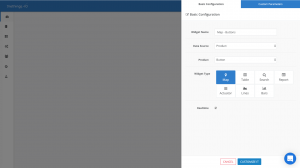
Now, let’s create a map to show you how you can personalize your dashboard.
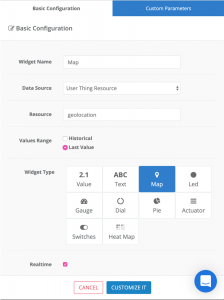
Remember your “Resource” is what you see here under “things” in the side bar>details>a thing at the bottom of the page>details. For example, ctm_payload, geolocation, and msg are my options for resources for this “thing”:
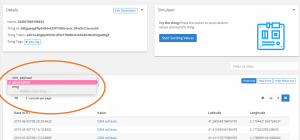
When you’re done editing your Insight Dashboard, don’t forget to save!

Connecting an Insight Dashboard to a widget on the Main Dashboard

Get the Insight Dashboard’s ID

Once you have created the dashboard, you will see it along with its unique ID appear there in the table of Insight Dashboards(things in the sidebar>details next to the product you would like>find the Insight Dashboard table midway down the page>copy the id next to the Insight Dashboard you would like to use). We will use this ID to link a widget on the Main Dashboard to your new Insight Dashboard.

Add The Insight Dashboard’s ID to a widget in the Main Dashboard

In the Main Dashboard that you can get to from the sidebar. Click the “edit dashboard” icon, then the wrench icon in the top, right corner of your widget. Then, click “customize it” and scroll to the bottom. There you will see a spot to set the Insight Dashboard ID. Just paste the ID there, and click done!

Try it out!
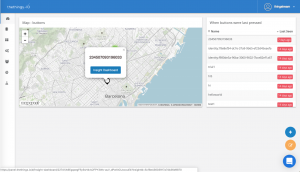
Now when you click on a thing in this widget, you will have the option to view more about this thing under the template of your Insight Dashboard. For example, I clicked on the white marker above, and now when I click on Insight Dashboard, it will take me to this following screen, which shows this “thing’s” data under the Insight Dashboard template we just created. Magic!
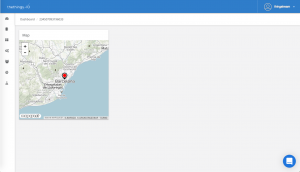
I hope you enjoyed this tutorial! Feel free to contact us if you have any questions on thethings.iO IoT platform.

, ,

How to connect Thingstream with thethings.iO

In this tutorial, we will set up a Thingstream Button with thethings.iO IoT platform so that when we click the button, it’s GPS location will be sent to thethings.iO and can easily be seen on a map! This tutorial will walk you through setting up your button, creating a flow in Thingstream, sending data to thethings.iO, and then visualizing your data with your thethings.iO insight dashboard.

Find here the video tutorial or scroll down in order to read the step-by-step.

Let’s get started!

First steps

Go to Thingstream and activate your button. Make sure your button says active next to it.

If it doesn’t say “active”, you can follow the steps here in a video on activating your button.

Then, click on the button and look at the “IMSI” number and the “identity” number, these are what we will use in the future to send the button’s specific id with it to thethings.iO.

Creating a thing on thethings.iO IoT platform

First, we must create a “thing” so that we can have a way to listen to our button.

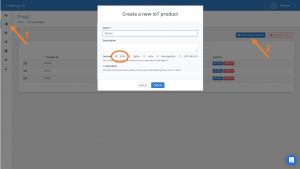
Go to “things” on the sidebar(1) and then click “Create new ioT product”(2). For this project, we will be using the JSON format.

Once your thing is created, click details and let’s take note of some things. In the top left corner, we see “Product ID” and “Hash”.

These are what we will use in the http request to tell Thingstream to send the information to this “thing” on thethings.iO.

You can learn more about http/s and JSON here in a past blog post.

Creating a flow on Thingstream

For this project, it will be best to begin with a template so, within Thingstream’s site, click on flows > create flow > from flow library > Thingstream button > Email CSDK Tracker Lctn. This flow will give us a starting point. You can change the name if you want, and then click edit to personalizing it!

Make the flow look like the following by putting “http request” where “location mail” is and adding “msg.payload” to help you with troubleshooting later. 

Understanding the flow

Now, let’s take a closer look at the flow. What kind of data the “GPS or GSM” node takes in, either GPS data or GSM cell data, will affect which path the flow takes. In each path, we are going to organize our data with a msg.payload that we can send with our http request to thethings.iO.

Organizing the data

Next, let’s change the “Prepare GPS…” node. We will add in “externalId”, “identity”, and “timePushed”. The first two will identify what button was pushed and the later will tell when it was pushed. You can also delete the addition of the url if you choose because thethings.iO will offer you with an even better, more functional map :).

Tip: If you are extra curious and want to see what values are available to you in “msg”, you can change your Id value(here “externalId”) to msg and see what it prints when it comes up in thethings.iO.

var gps = msg.payload['gps-location'];
var lon = gps.lon;
var lat = gps.lat;
var source = 'GPS';
msg.payload = {
 "externalId":msg.messageOrigin.externalId,
 "identity":msg.messageOrigin.entityId,
 "timePushed":msg.created, 
 'long':lon,
 'lat':lat,
 'source':source
};
return msg;

We will make similar changes to the “prepare GSM…” node.

var lon = msg.payload.longitude;
var lat = msg.payload.latitude;
var source = 'GSM cell data';
msg.payload = {
 "externalId":msg.messageOrigin.externalId,
 "identity":msg.messageOrigin.entityId,
 "timePushed":msg.created, 
 'long':lon,
 'lat':lat,
 'source':source
};
return msg;

Making the http request

Finally, that leaves the “http request” node. For this one, make sure the method is set to POST and the return is “a parsed JSON object”. For the url, we will follow this pattern:

https://subscription.thethings.io/http/{productId}/{hash}?idname={idname}&fname={fname}

Remember your productId and hash will come from your thing on thethings.iO site. The “idname” we will set to “externalId” and the fname will be the name of our function (which we will write next); let’s call it “thingstream-parser”. Thus, your url should look something like this:

https://subscription.thethings.io/http/123456/hashhash?idname=externalId&fname=thingstream-parser

You can learn more about http/s and JSON here in a past blog post.

Creating a function for your “thing”

To create a function, go to thethings.iO site, and click “cloud code” in the sidebar. Then click “Add Function”.

Once here, give the function a name. It must be the same one as you used in your http request so in our case, that’s “thingstream-parser”. Then, assign your function to a “thing”, this should be whatever “thing” you have been using to represent your button on thethings.iO site.

Now, change the code to look like this:

function main(params, callback){

var result = [
 {
 "key": "geolocation",
 "value": params.payload.source,
 "geo":{
 "lat": params.payload.lat,
 "long": params.payload.long
 }
 },
 {
 "key": "$geo",
 "value" : {
 "type": "Point",
 "coordinates": [params.payload.long, params.payload.lat]
 }
 }
];
callback(null, result);

}


More on the $geo and geo keys can be found here in one of our previous blog posts about how to geolocalize things on a map.

You can also include a console.log of the payload which you will be able to see in the “developer’s console” (“developers” in thethings.iO sidebar > “developer’s console”) every time you click your button.

Testing your button

Deploying the flow for your button

We’re almost ready to click the button! Let’s deploy our flow. Make sure you are looking at your flow on the Thingstream site, then in the upper right corner find and click Deploy > Deploy Test > A Thing > then your button > Deploy.

Click the button!

We’re now ready to click the button! It may take some time for the button to send the http request after being clicked so be patient and let it do it’s thing :). Usually you will see the color green when it is first clicked, then yellow when it is trying to make a connecting, blue when it has made then connection and finally pink when it is talking to the server. If all goes well it will let out a cheerful “beep!” and flash green to tell you that it’s done. At this point, you should see the message

"{"status":"success"}"

in the debug window of your flow.

Reading your data on the thethings.iO site

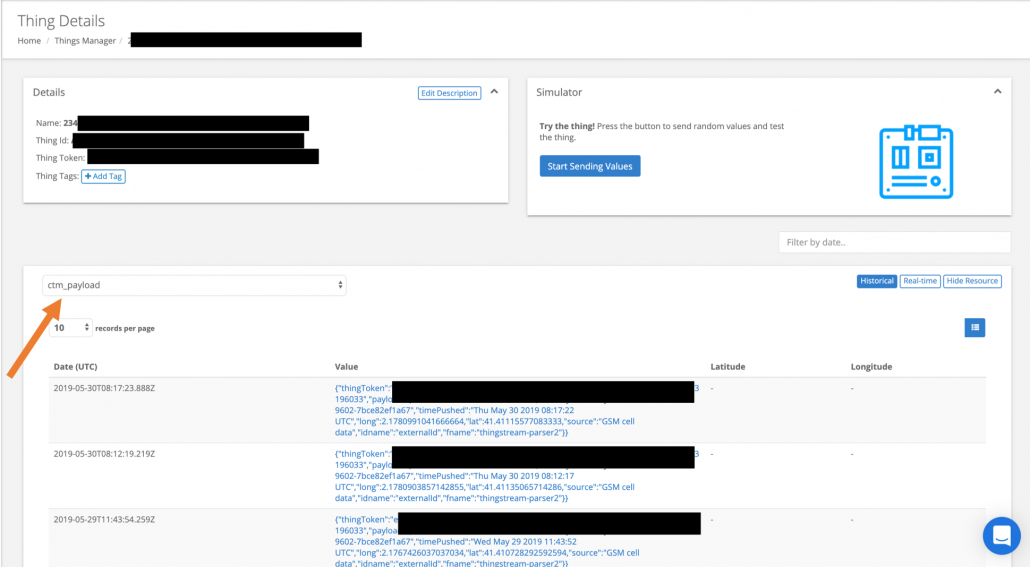
To get to your data, click on “things” in the sidebar, find your “thing” and then click “details”. Towards the bottom of the page, you should see your IMSI number from the button there under “Names”. Click “details”. Now you should see a screen like this.

Under “ctm_payload”, you can see all the payload messages you sent with your button.

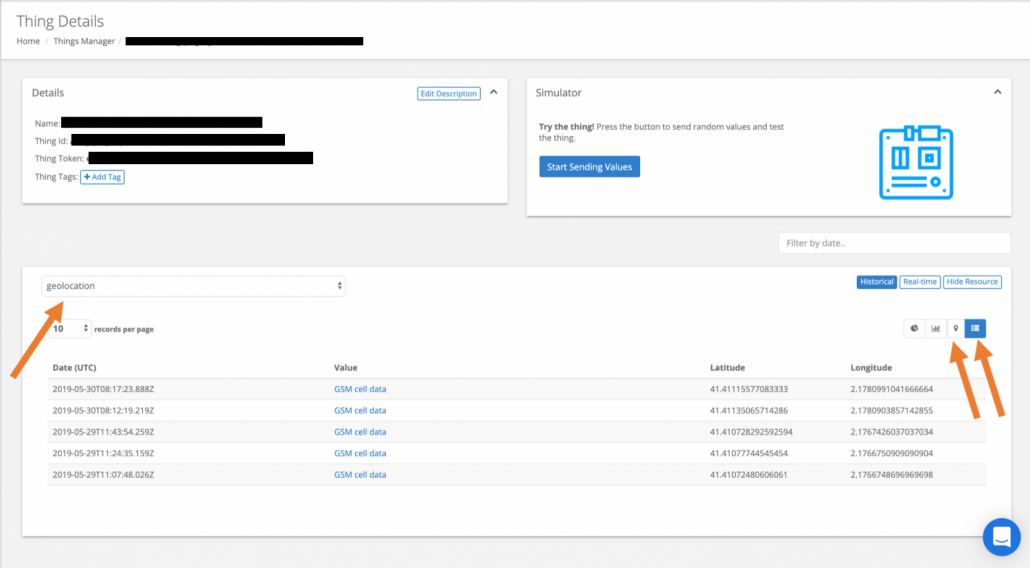
Under “geolocation”, you can view the map, or view the list view.

Personalizing your button data with thethings.iO dashboard

First, let’s create a map of all of our buttons under our Button “thing”.

On “Customize It”, you may want to change map-type and enable polygons(this will make the map have arrows that show you in what direction the button has traveled).

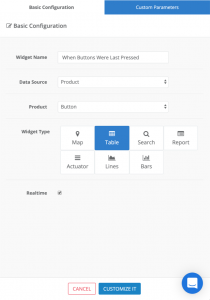
Now, let’s create a table that shows when each button was last pressed.

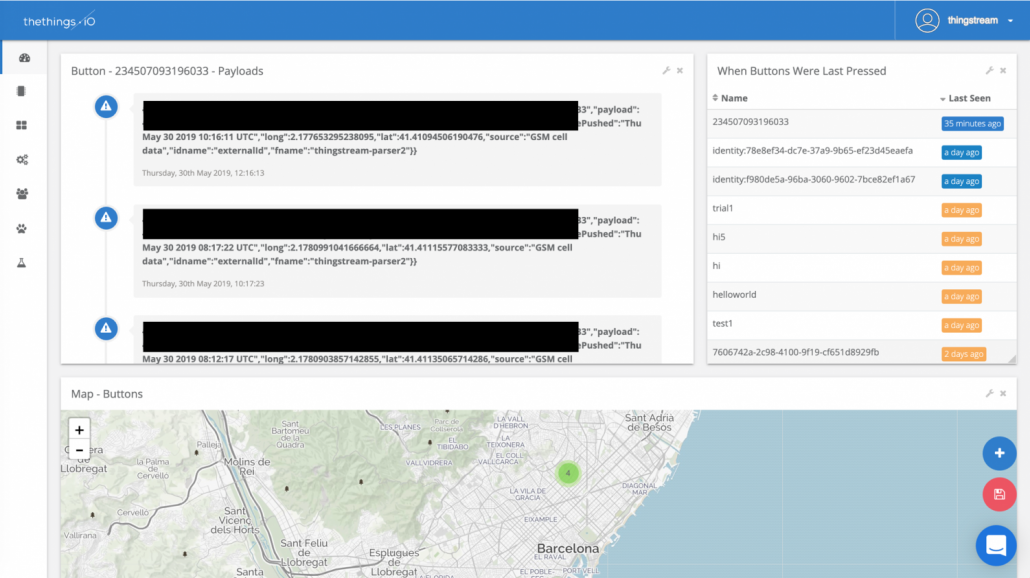
Here’s what we have so far! These are just a few examples of all the cool things you can do with your insight dashboard. Feel free to explore some more!

Here are a couple link’s to some tutorials for customizing your dashboard even more:

I hope you enjoyed this tutorial! Feel free to contact us if you have any questions on thethings.iO IoT platform.

,

Connect anything to thethings.iO IoT platform with HTTP/S and your JSON

On this post we would like to show you how to connect anything using HTTP/S and your JSON. We used to get contacted by IoT developers and companies who were having devices already connected with their own JSON structures. Usually they wanted to move to thethings.iO IoT platform, so this is the reason why we created the HTTP subscription gateways.

The HTTP subscription gateways enables developers to send data to a unique URL without need to deal with thingTokens, activations among others. We provision automagically all the devices identified with an ID or name to thethings.iO in a simple way.

Find below the video tutorial with an example or find here the HTTP subscription documentation.

Step by Step tutorial

First of all, create a thethings.iO IoT platform account. Go to https://thethings.io and follow the steps. In addition, try to fill the information during the first session so we will be able to help you more.

After that, go to create a Product at the Things Manager. Select JSON as a type of product. Once created, then click on Details of the created Product.

Now it’s important to learn to create the subscription URL. The base path for the subscription is:

https://subscription.thethings.io/http/{productId}/{hash}

Get the Product ID and the Hash defined on the Details box of your recently created Product at thethings.iO. With these values you will be able to generate the correct HTTP subscription URL. The subscription URL will be followed by the parameters idname and fname. The idname parameter will define the name that the ID of the device will have inside the JSON coming in the body (e.g. in LoRa dev_id, in Sigfox idname, etc). The fname parameter will define the name of the function developed on Cloud Code that will parse the JSON sent in the body (e.g. http_parser). The final URL should be something like this:

https://subscription.thethings.io/http/{productId}/{hash}?idname={idname}&fname={fname}

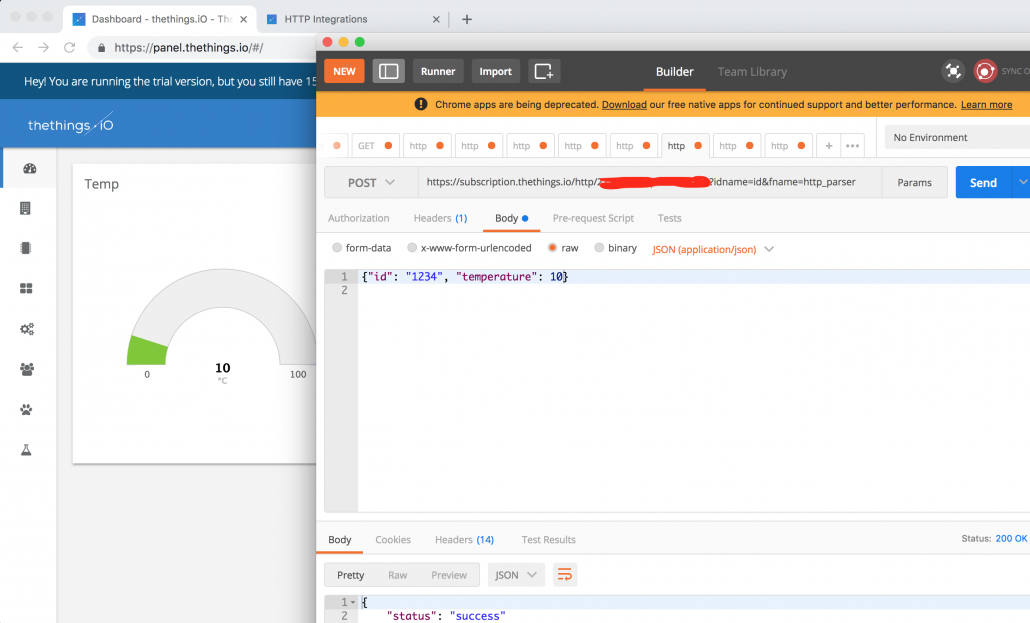
After that, this is the moment to create the function on Cloud Code to parse the JSON sent to thethings.iO. Let’s imagine that you are going to send the JSON file:


{"id": "1234", "temperature": "10"}

For that type of JSON you will need a function on Cloud Code like this:

function main(params, callback){

var result = [
{
"key": "temp",
"value": params.payload.temperature
}
];

callback(null, result);
}

All the data coming at the JSON is coming into the object params.payload. That means that if you have a complex JSON, just use the object params.payload to find all your data and store it at thethings.iO with the key-value JSON needed at thethings.iO.

From now, you will be receiving the temperature and store it as temp, so you are ready to create a dashboard and more with thethings.iO. BTW at the video we used Postman to simulate a device sending data. Nevertheless we have clients using this technique to connect LoRa connectivity services, Sigfox, BLE gateways and others.

Use thethings.iO the most simple enterprise IoT platform. And feel free to send us questions and contact us in case we have to help you more!

Asset Tracking Success Story on the Automotive Industry

At thethings.iO we have been working during the last twelve month on the thethings.iO Solutions. One of the most successful IoT Solution is related with the asset tracking and more concrete with a complete Internet-connected plastic pallet for automobile industries.

Here you can find more details on thethings.iO Asset Tracking Solution Success Story.

At thethings.iO we have a clear mantra on IoT Solutions: We need to help our clients to save money or make money. If thethings.iO Solution can’t help our clients, hardly it will work on high volumes in production.

The challenge that we found on the Asset Tracking IoT use case are clear. Companies who transport special goods, such as in the automotive industry where the urgency is an important variable, usually move assets from their warehouse to their manufactories, or other company’s warehouses. Most of the times, they are used to use plastic or metal pallets, crates or foldable plastic boxes with the main goal to recycle them during several years (3 or 5 years). Wooden pallets have a limited time life and plastic or metal pallets can last more years. Due the higher price of the plastic or metal pallet compared with the wooden pallet, makes that companies have more limited pallet stock and furthermore the acquisition of these pallets are slowlier.

67% of manufacturing companies with high value pallets make manual searches at least once a day of their pallets. Sadly this is a usual problem for this type of companies, several times during the year there is a lack of high value pallets that unable them to send all the expected goods to their shops or clients. That means that the company start loosing money for the lack of goods on their destination or just trying to use other materials to transport the goods.

This is the reason why these companies need to understand where the pallets are to ensure the expedition of goods to their destinations every day, avoiding high labor costs and improving stocking, efficiency costs and operations optimization.

Here you can find more details on thethings.iO Asset Tracking Solution Success Story.

Chatbots and Internet of Things with thethings.iO IoT platform

Most of the IoT projects where thethings.iO works today use a mobile application as a user interface. Some of these users are different actors of the project, can go from final clients to technicians or managers. That means that some of them don’t need any specific user experience, they just need an interface to interact with the connected devices. Ask questions, such as last values, change configurations, and offer a kind of a “bidirectional” communication.

At that moment, clients have different choices, build their own mobile application for each of the actors of the project, or just start prototyping these applications with a chatbot. And actually at thethings.iO we love chatbots. We think it’s a great tool to prototype apps and to get first insights from the actors of the project interacting with the connected things.

For that situation, we have created a chatbot framework with thethings.iO Cloud Code to enable our clients to use chatbot technology, such as Telegram and others coming soon, as the interface to talk with the connected things. And the results are great!

Telegram chatbot connected with thethings.iO

Telegram is an instant messaging platform that provides a lot of flexibility to developers. Telegram offers an easy way to create chatbots with an API integration. As we did in the past with Twilio, Mailchimp and others, we have integrated automagically Telegram with thethings.iO Cloud Code.

The Telegram + thethings.iO Cloud Code service let you send a Telegram message to a Telegram account using a Telegram Bot from thethings.iO. On of the most important requirements is that the user have to acknowledge, starting a conversation, to received a message from the bot. In some cases is not allowed to push information without this acknowledgement.

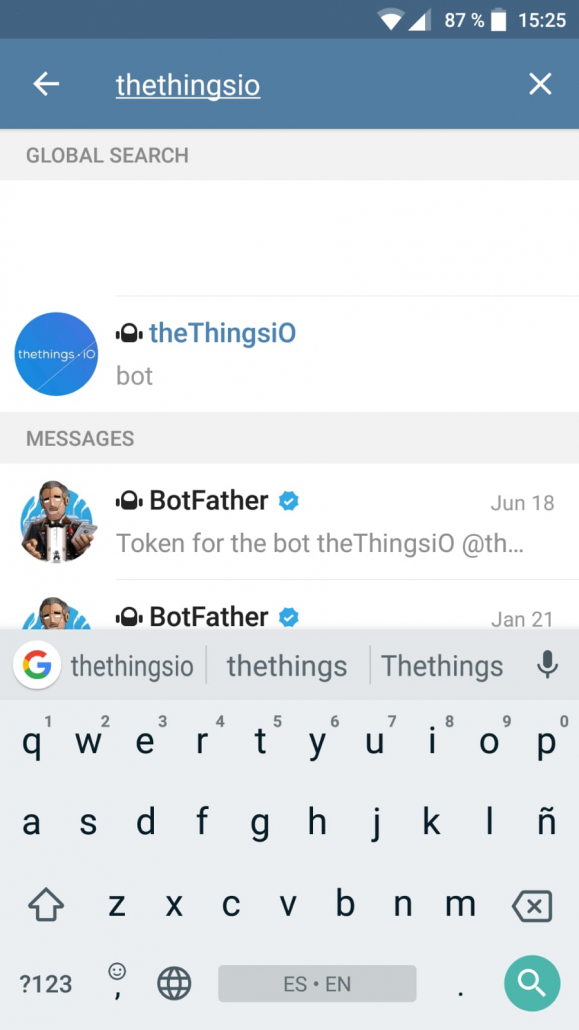
We have created a demo, so you can play with it on Cloud Code. So download the Telegram Instant Messaging application and search for the thethings.iO bot.

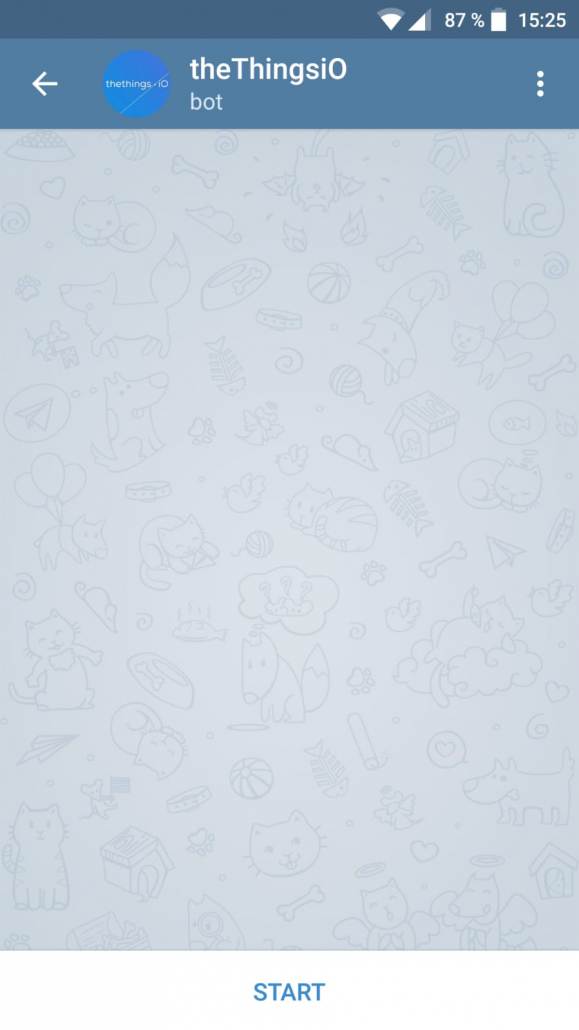
Get into the bot and click the button START on the bottom or just write /start.

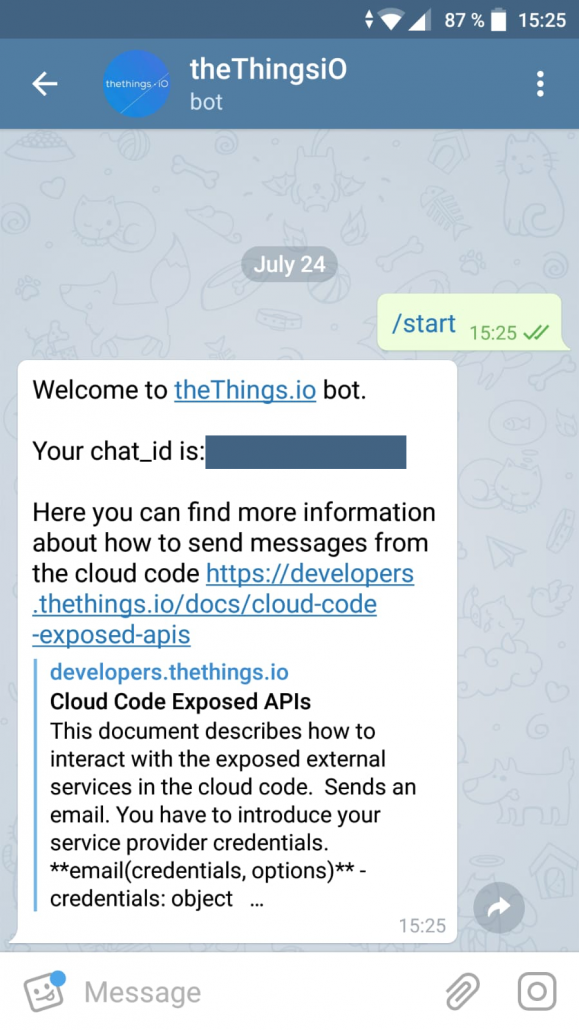
At that point the thethings.iO Bot will send you a welcome message with a chat_id.

Every conversation between a user and a bot have a chat_id, it’s important that you can manage these chat_ids from Cloud Code in case you want to have more than one user. For this demo, we are only going to have one user. So we are going to copy and paste this chat_id into the Cloud Code code (Trigger).


function main(params, callback){
var chat_id = 12345;
var message = 'Hello world';

var options = {chat_id : chat_id, text: message};

telegram.sendMessage(options, function(err, result)
{
if(err) return callback(err)
callback(null, result)
})
}

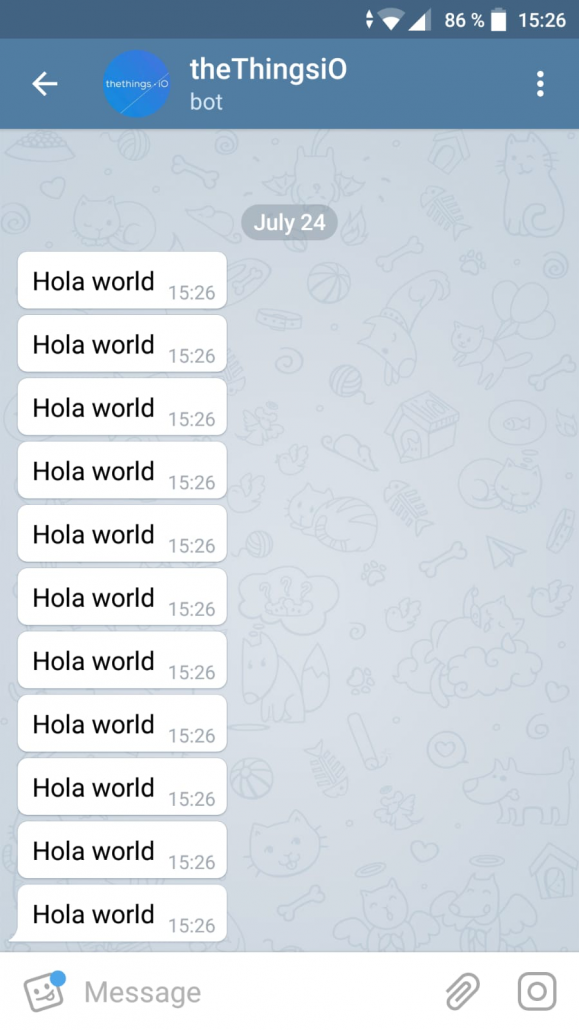
In that case, every time we execute this Trigger we will send to the user a Hello World message.

That’s great right?!

In the previous example you are using thethings.iO Telegram bot. In case that you are building your own bot, find here the code to introduce your own custom_bot ID.


var chat_id = 12345;
var message = 'Hello world'
var custom_bot = 'abcdefghijklm'
var options = {chat_id : chat_id, text: message, custom_bot: custom_bot};

This is the first part of this tutorial. In next tutorials about chatbots and Internet of Things we will showcase how to manage multiple chat_ids of different users from the project into one thethings.iO Cloud Code function, among other features. And of course, expect other chatbot integrations. Anyway if you have a chatbot technology and you think it could be interesting to integrate it with thethings.iO, feel free to contact us!

Enjoy thethings.iO IoT Platform experience! Let’s stay connected

How to integrate Prometheus time series with thethings.iO IoT platform


Today we would like to explain how to integrate the Prometheus time series server and database with thethings.iO IoT platform using exclusively thethings.iO Cloud Code Functions and Triggers. Rendering real-time sensor data is not a problem with thethings.iO IoT platform but computing historical metrics – like how many times a button has been pressed within a certain time period – is a lot harder unless you are thethings.iO Cloud Code proficient. There is another possibility, so we shall use a time series database, Prometheus, to store time series data and compute time series metrics. Learn here more about Prometheus.

Assumes that you are using 4 things (e.g. wireless push buttons) connected to thethings.iO via the Sigfox IoT network. The 4 buttons make up a customer feedback survey panel, labelled as: Excellent, Good Job, Fair, Poor. Each button shall be connected to thethings.iO via the standard Sigfox callback provided by thethings.iO.

Prometheus system shall use the time series data to compute a new metric named button_presses_5m, which is the incremental number of button presses in the past 5 mins. The computed metric is pushed back into thethings.iO via a Cloud Code Function and stored in thethings.iO things resources that correspond to each of the four things in thethings.iO IoT platform. The computed metric is then rendered in a thethings.iO dashboard.

This demonstration uses Prometheus to compute a simple time series metric. Prometheus supports sophisticated time-series queries that have been used for monitoring highly complex computer networks in real time. Details on the advanced time series functions supported by Prometheus.

Find on thethings.iO github repository the code to replicate the integration among Prometheus time series and thethings.iO.

Benchmark IoT platforms for Sigfox products

Today we have the pleasure to publish an invited guest post made by a UPC student. Daniel Torán Mercadé was a student of the Department of Electronic Engineering at ETSEIB-UPC and he has been working on a master thesis named Comparison of different Internet of Things Platforms. Dani tested different IoT platforms such as AWS, IBM Watson IoT, Microsoft Azure and thethings.iO using the data provided by a temperature sensor of a Sigfox device and today he is going to explain the benchmark of all of these IoT platforms with Sigfox.

On his master thesis the student configured a Sigfox device with several IoT platforms. The Sigfox device is sending periodically temperature readings to the Sigfox Cloud and these are sent from there to the different IoT platforms, which have been configured to receive and store the data. Once the data is stored in the IoT platforms, the main objective is to get useful insight from them. Therefore, graphical visualizations have been carried out. The report explains in detail how to configure these platforms in order to receive and analyze data, conveyed by a Sigfox device.

The added value provided by this project is that the reader can get a broader vision of how to configure and deploy an IoT architecture and, more importantly, which IoT platform
better fits with the requirements of each and every project. To make things easier, a comparison of the platforms, considering features such as easiness to connect and data analysis, pricing, flexibility or services, has been checked.

Comparing features of the IoT platforms

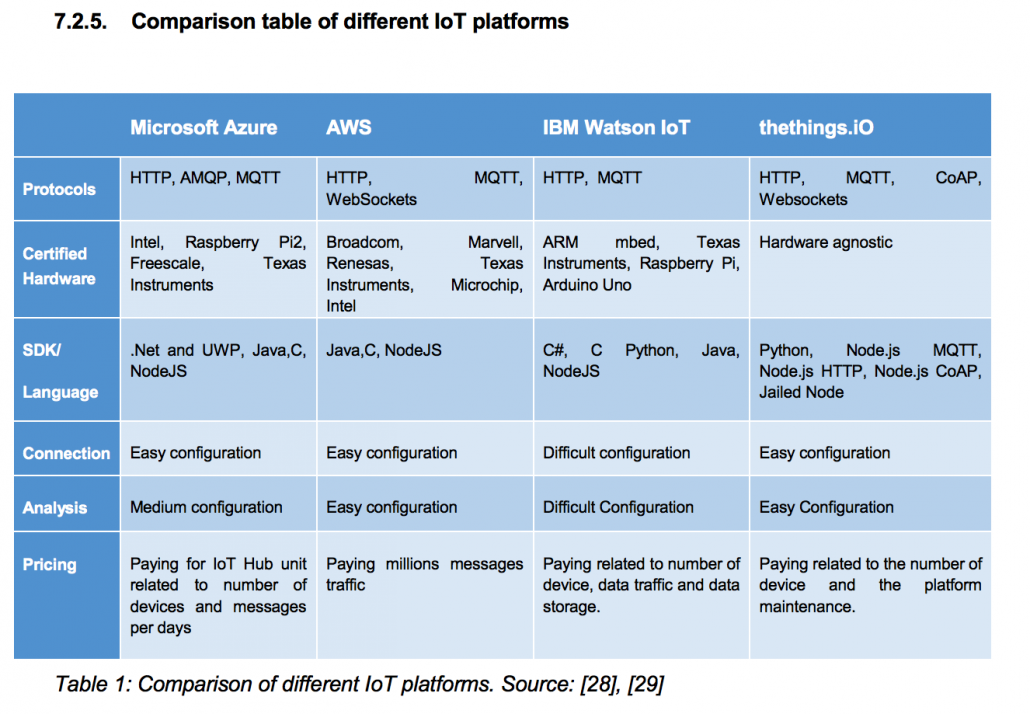
This is the result table of comparing the different IoT platforms AWS IoT, Microsoft Azure IoT, thethings.iO and IBM Watson.

In relation to the thethings.iO IoT platform, it has been configured in order to receive the data from the Sigfox Cloud with the provided Callback URL. Then, by means of a Sigfox parser, the data has been addressed and given an attribute. Finally, a table and a graphic visualization have been created in order to watch the trend of the temperature during a period of time.

The steps followed to connect the Sigfox devices are much simpler with thethings.iO than the steps done in the other IoT platforms. The physical thing, which corresponds to the Sigfox device, which is conveying data, is registered / provisioned in the IoT platform cloud automatically and the data automatically stored after generating a Sigfox payload parser.

With reference to the strengths of thethings.iO IoT platform, it can be stated that it is simple to configure the connection between the Sigfox Cloud and the thethings.iO platform. Moreover, it has a different internal structure than the other platforms which makes relatively easy to make an analysis right after the data reaches the platforms in comparison with the other IoT platforms. A feature that singles out thethings.iO IoT platform is that it is software and hardware agnostic, therefore, it can be connected to any device whereas the other platforms had a few group of hardware to which they can be connected.

This post and project has been developed by Daniel Torán Mercadé graduated in Industrial Engineering at ETSEIB-UPC and it has been mentored by Manuel Moreno Eguílaz UPC Senior Researcher. Further information of how to configure the platforms can be found here on Daniel Torán master thesis.

Geocoding location coordinates to addresses from GPS-trackers

Today we talk about geocoding. Geocoding is a very interesting art! Geocoding consist of converting addresses (e.g. streets) into geographic GPS coordinates (i.g. latitude and longitude). On the other hand, we have reverse geocoding that is the reverse process: transforming a pair of geographic GPS coordinates into an address (street with number and city).

You might be wondering what geocoding can be used for. From simple analysis to business and customer management to distribution techniques, there is a wide range of applications for which geocoding can be used. At thethings.iO we are helping companies for which is important to geocode the GPS coordinates into addresses for the fleet management, route planning, among others.

At thethings.iO we usually receive the location as geographic GPS coordinates (latitude and longitude). It is known that it is the best way if you want to represent your assets on a map. However, geographic coordinates are not meaningful if they are not represented on a map. That’s why some customers ask us for the possibility of the integration of geocoding services in thethings.iO IoT platform.

Thanks to the Cloud Code service, we help you to integrate third-party services that enable you to transform the data from your connected things into information that will be useful to your daily activities.

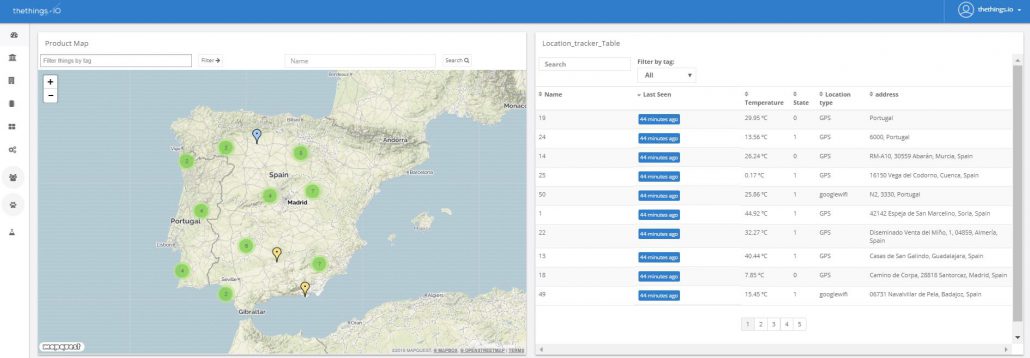
Here you can see an example. In the table, you can see the addresses where the devices are located in:

Geocoding services

Although there are many geocoding services, today we will talk about two of them:

  • OpenCage Geocoder
  • Google Maps Geocoding API

Both are free up to 2.500 requests per day. In the case of Google will charge us $0,5/1.000 requests up to 100k daily requests if we overlap the free limit. For OpenCage we have different plans, e.g the x-Small plan includes 10k requests per day and it cost $50 per month.

Some lines below you will find information on how to use it. The first step is to get the API key or token.

Obtaining the API key

OpenCage

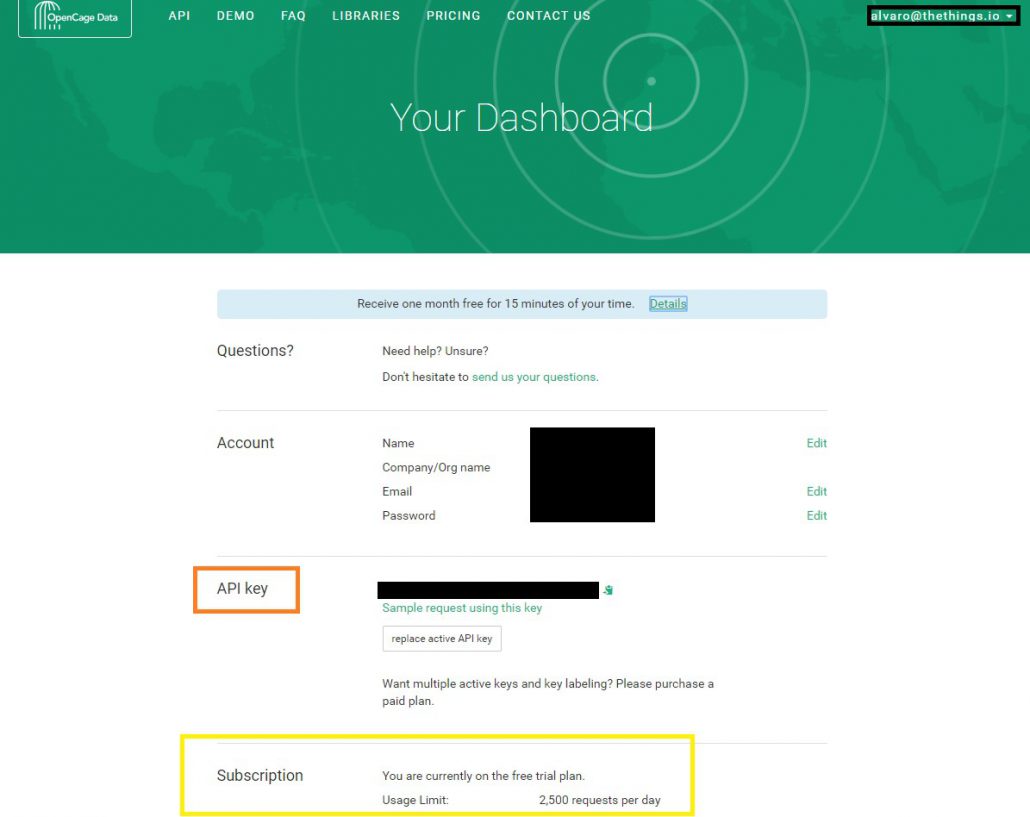
OpenCage Geocode is a very simple geocoding service (as we like). You only have to sign-up and follow all the registrations steps. After that you will see your dashboard like this:

Copy and keep the API key. We will use later!

Google Maps Geocoding API

If you have decided to use the Google Maps Geocoding API you must follow these steps:

1. You have to sign in with your Google account and follow this link:

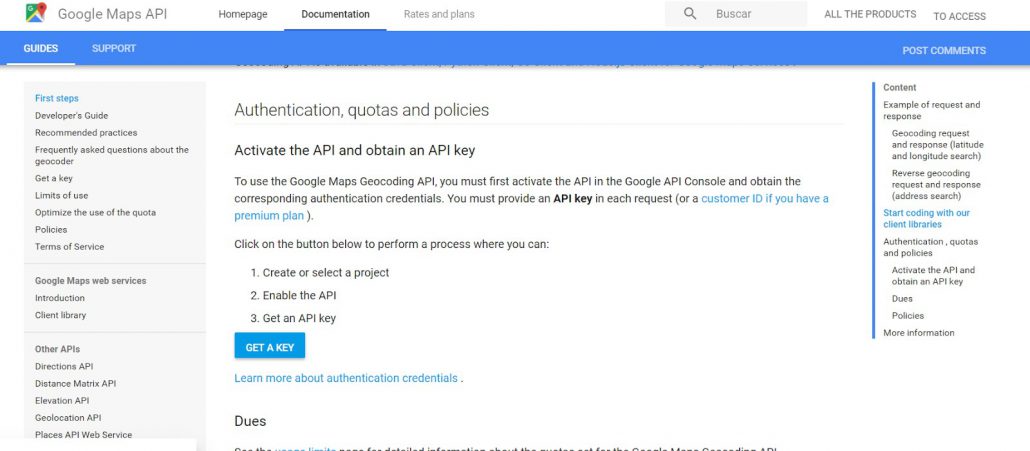
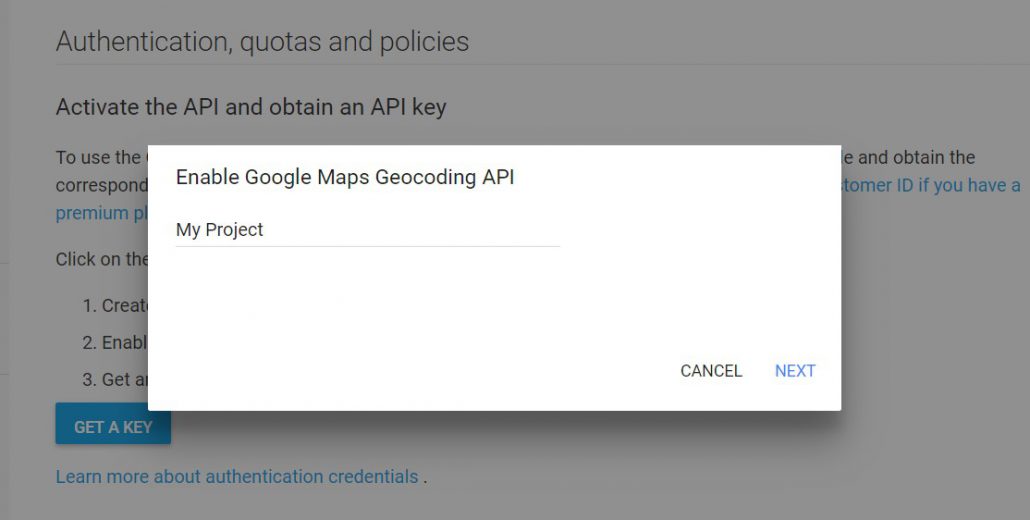
2. Click on ‘Get a Key’ button and follow the instructions.


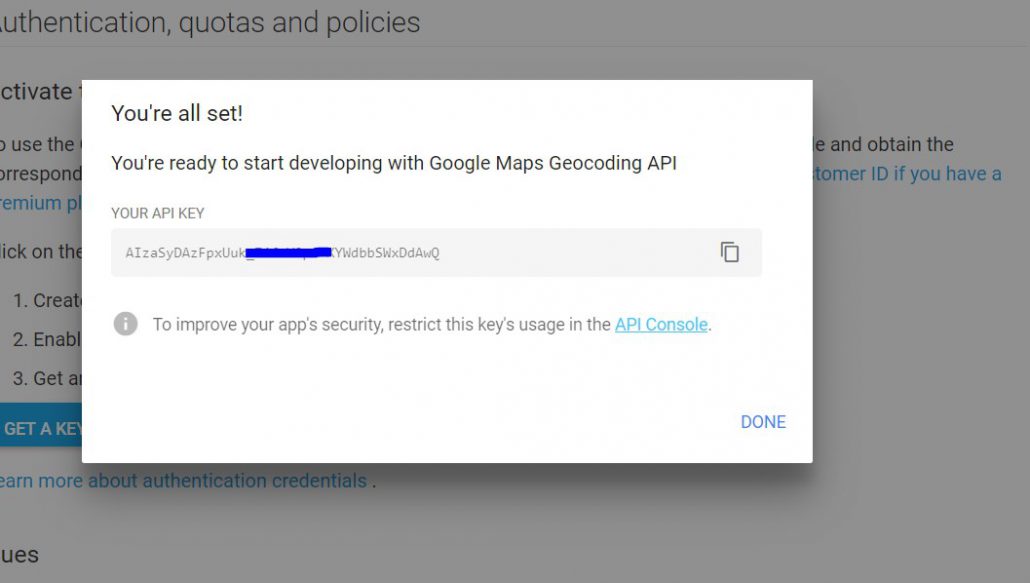
3. You will obtain your API key. Keep it! We will need it later!


Using geocoding services at thethings.iO

Once you get your API key, you are ready to use the geocoding services on our platform. In the following link, you can find a repository with the functions and examples of how to use these services.

In the repository, you can find two folders and two files. The folders contain the code for the httpRequest with both the OpenCage and Google Maps API geocoding and inverse geocoding services.

With that code, we build two examples that could be useful for your business requirements. Anyway, do not hesitate to contact us if you have further questions regarding this topic. We can provide you with more examples!

       1. Example 1. Trigger (Inverse geocoding with Open Cage API)

With this code every time you send data to the platform that contain location information, the trigger will be executed and we will transform the coordinates from the resource $settings.geo into a physical address. Then we will save it into the resource address. You just have to create a new trigger in the cloud-code. Then copy and paste the following code.

      2. Example 2. Function (Inverse geocoding with Google Maps Geocoding API)

In this case, we transform all the addresses of all the things of one product just in one cloud-code execution. Create a new function, choose the product and copy and paste the code from the file. Finally, introduce “{}” in the Preview Params (Check the picture below). The function will calculate the address for all the devices that contain information in the resource $settings.geo and will be saved in the resource address of each thing.

We hope all this information will be helpful for you. If you want to know more about us, you can create an account by clicking here, sign up to receive our monthly newsletter or follow us on Twitter! Stay tuned and be the first in knowing the latest news of the IoT world and thethings.iO