thethings.iO IoT Startup Program

At thethings.iO IoT platform we are supporting some of the most exciting early-stage IoT startups. Nowadays some of them are changing the world with their amazing Internet of Things products and with our humbly help with thethings.iO IoT platform. One of the goals of thethings.iO is to help companies, like yours, to build your IoT solution in the most agile, efficient and scalable possible manner. We can help you with our experience and our technology. I’m sure we can.

Since we launched our IoT service some years ago, many enterprises have arrived at thethings.iO IoT platform but also quite a lot of early-stage companies and IoT startups with amazing projects. They usually have some characteristics like small budgets, looking to connect their products fast, and so on. Sadly, some of them decide to build a non-scalable IoT platform themselves and other solutions that are less efficient. We wrote about this at this ebook IoT platforms for dummies. Feel free to read it.

thethings.iO Advanced Plan is one of the most cost-effective ways to get started at the IoT ecosystem. It comprises a complete IoT platform up to 1.000 things cost only only 399€/month and covers all the infrastructure components, dashboards, apps, cloud code and more.

We think that offering is quite accessible, nevertheless we know as founders ourselves that some IoT startups just getting started may still find it hard to set up such accounts when they are kicking off pilots with their customers. So we have decided to offer a brand new free tier for 2 months.

This new free tier is now called the thethings.iO IoT Startup Program an initiative to support startups working with Internet of Things projects to succeed by offering access to our tools and IoT platform.

The benefits of thethings.iO IoT Startup Program

  • Two months of a free Advanced Plan license with thethings.iO
  • Joint marketing and PR.
  • On-line support.
  • Early access to new features.

If you are starting an Internet of Things company or know a fellow founder please share this page about thethings.iO IoT Startup Program with thethings.iO. We would love to connect more devices from you!

How to set up thethings.iO Blinders for your retailers

At thethings.iO IoT platform we have a security solution to protect your retailers, partners and distributor. The goal of thethings.iO Blinders IoT platform for retailers is to keep their clients data private from customer information leaked through your digital products. Meet thethings.iO Blinders IoT platform for retailers.

Learn on this post how to set up thethings.iO Blinders. As you probably know, we love simplicity.
[note: we used to call the Blinders tool as Galaxy tool]

Setting up the Blinders tool

Adding a new retailer

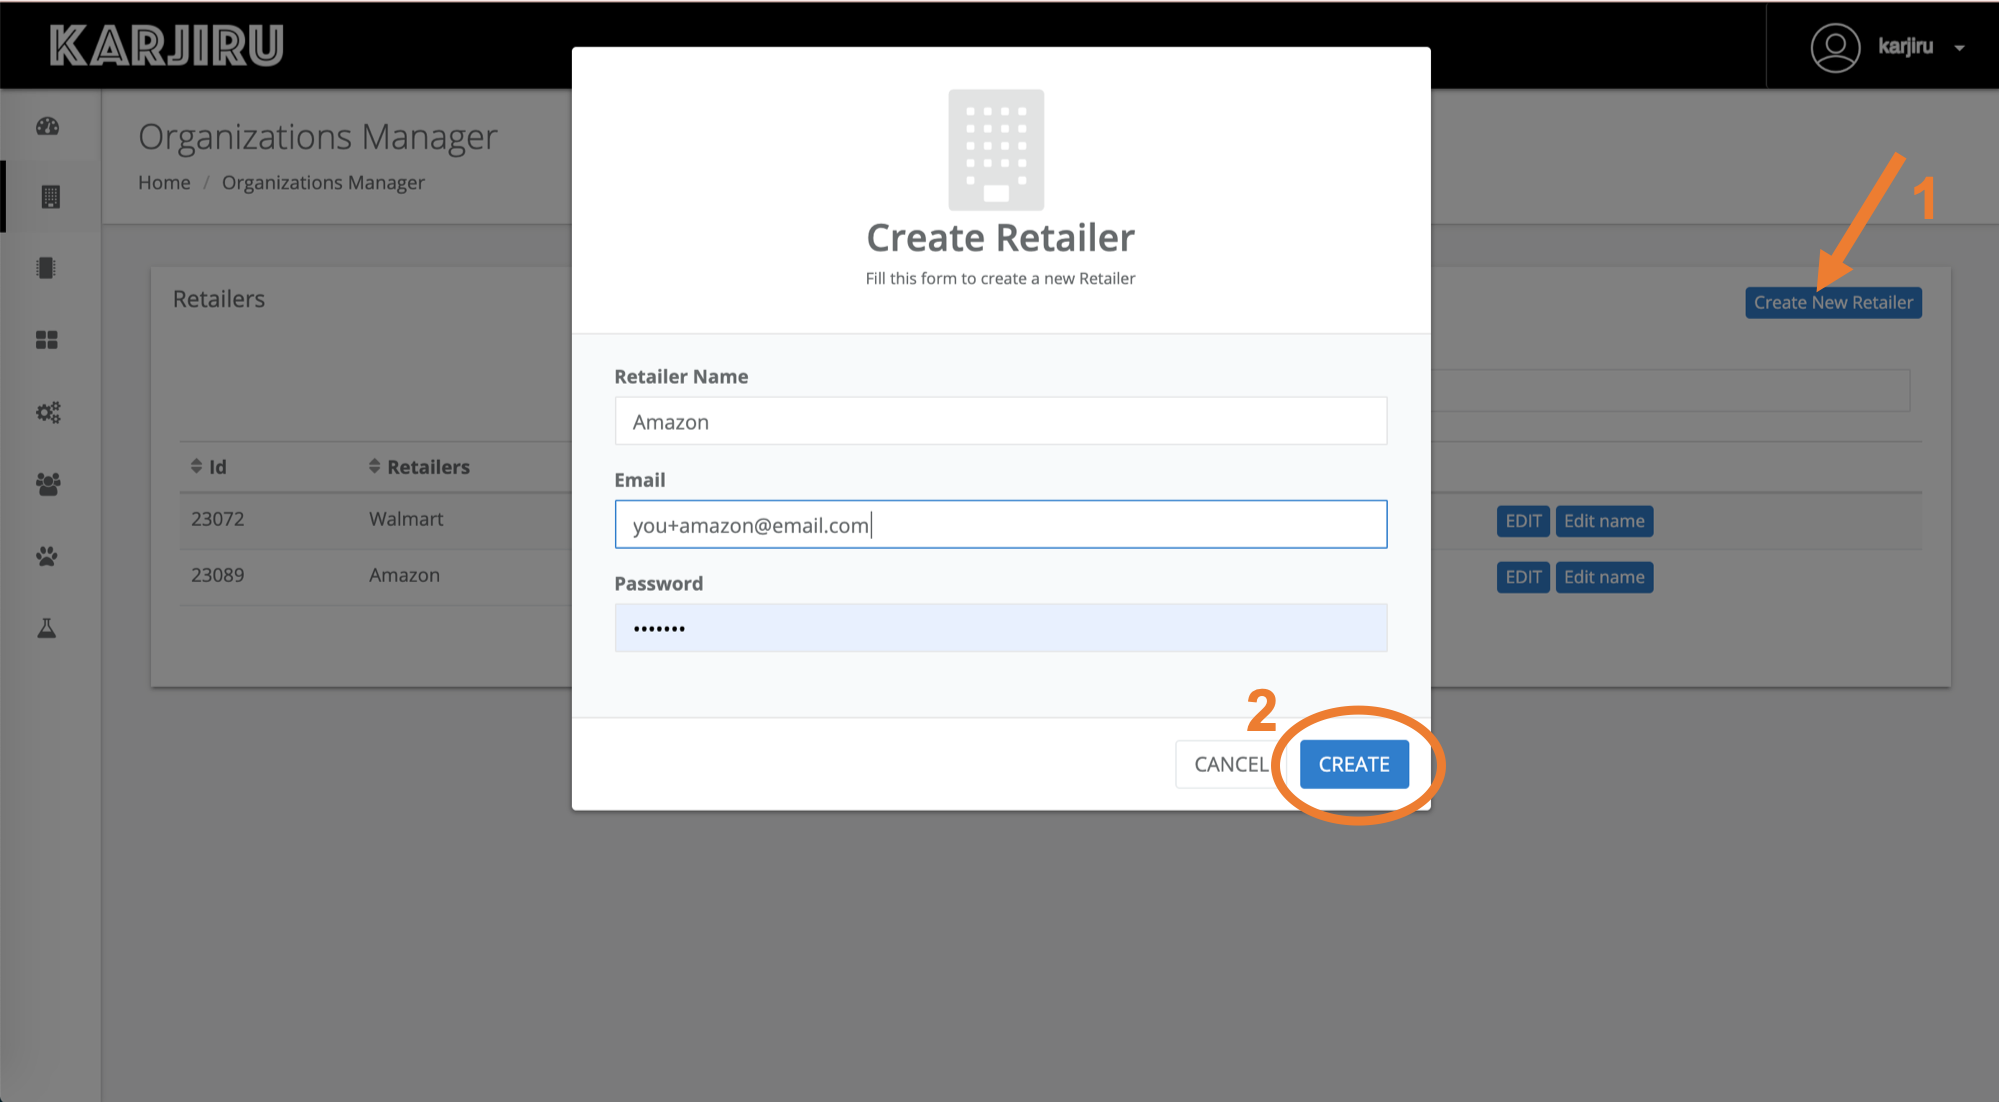
Go to Organizations Manager in the sidebar, then click (1)Create New Organization. The email and password you enter can be anything. Then (2)click create!

Note: This email and password will be the login information when logging into the retailer’s dashboard.

Note: This email will also be an admin by default, but can be deleted later. For example, once you set up your retailer’s dashboard and hand over control, they can delete your email from the list of users with access (under “Users Manager” in the sidebar). It is also important to note that you cannot delete a user you are currently logged in under.

Adding Tags

Using tags allows you to specify what products a certain retailer sees. It works by giving a tag name to the product and the same tag to a retailer. The retailer will only see the products with the same tag(s) as it has.

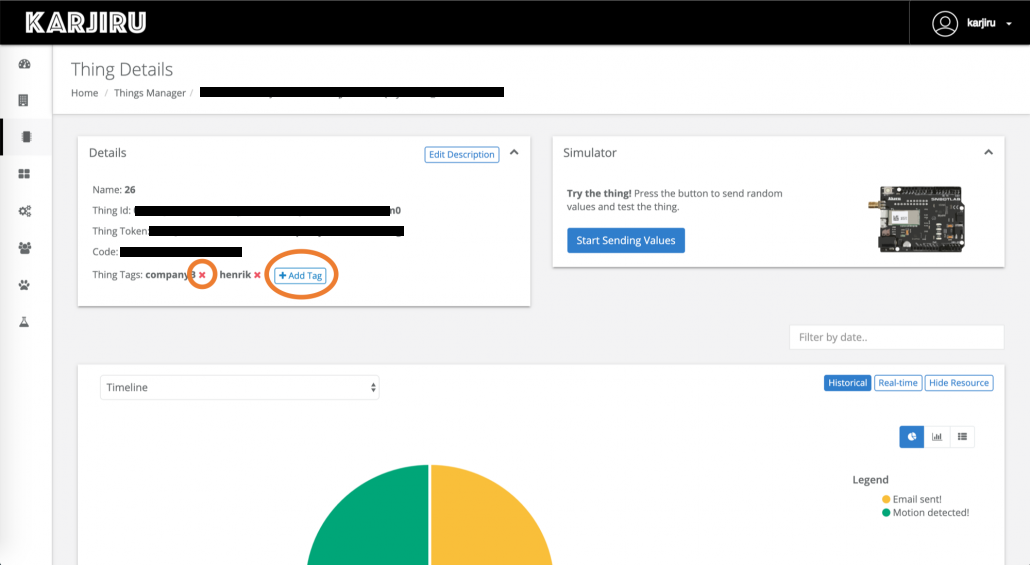
Giving Products tags: Click “Things” in the sidebar, then click “Details” next to one of the products. Once on this screen, scroll down to the bottom section and click details next to one of the things. On this screen, there is a box in the upper left called “Details.” Here you can manage your tags next to “Thing Tags.” You can delete a tag by clicking the red x, or you can add a new tag by clicking “+Add Tag.”

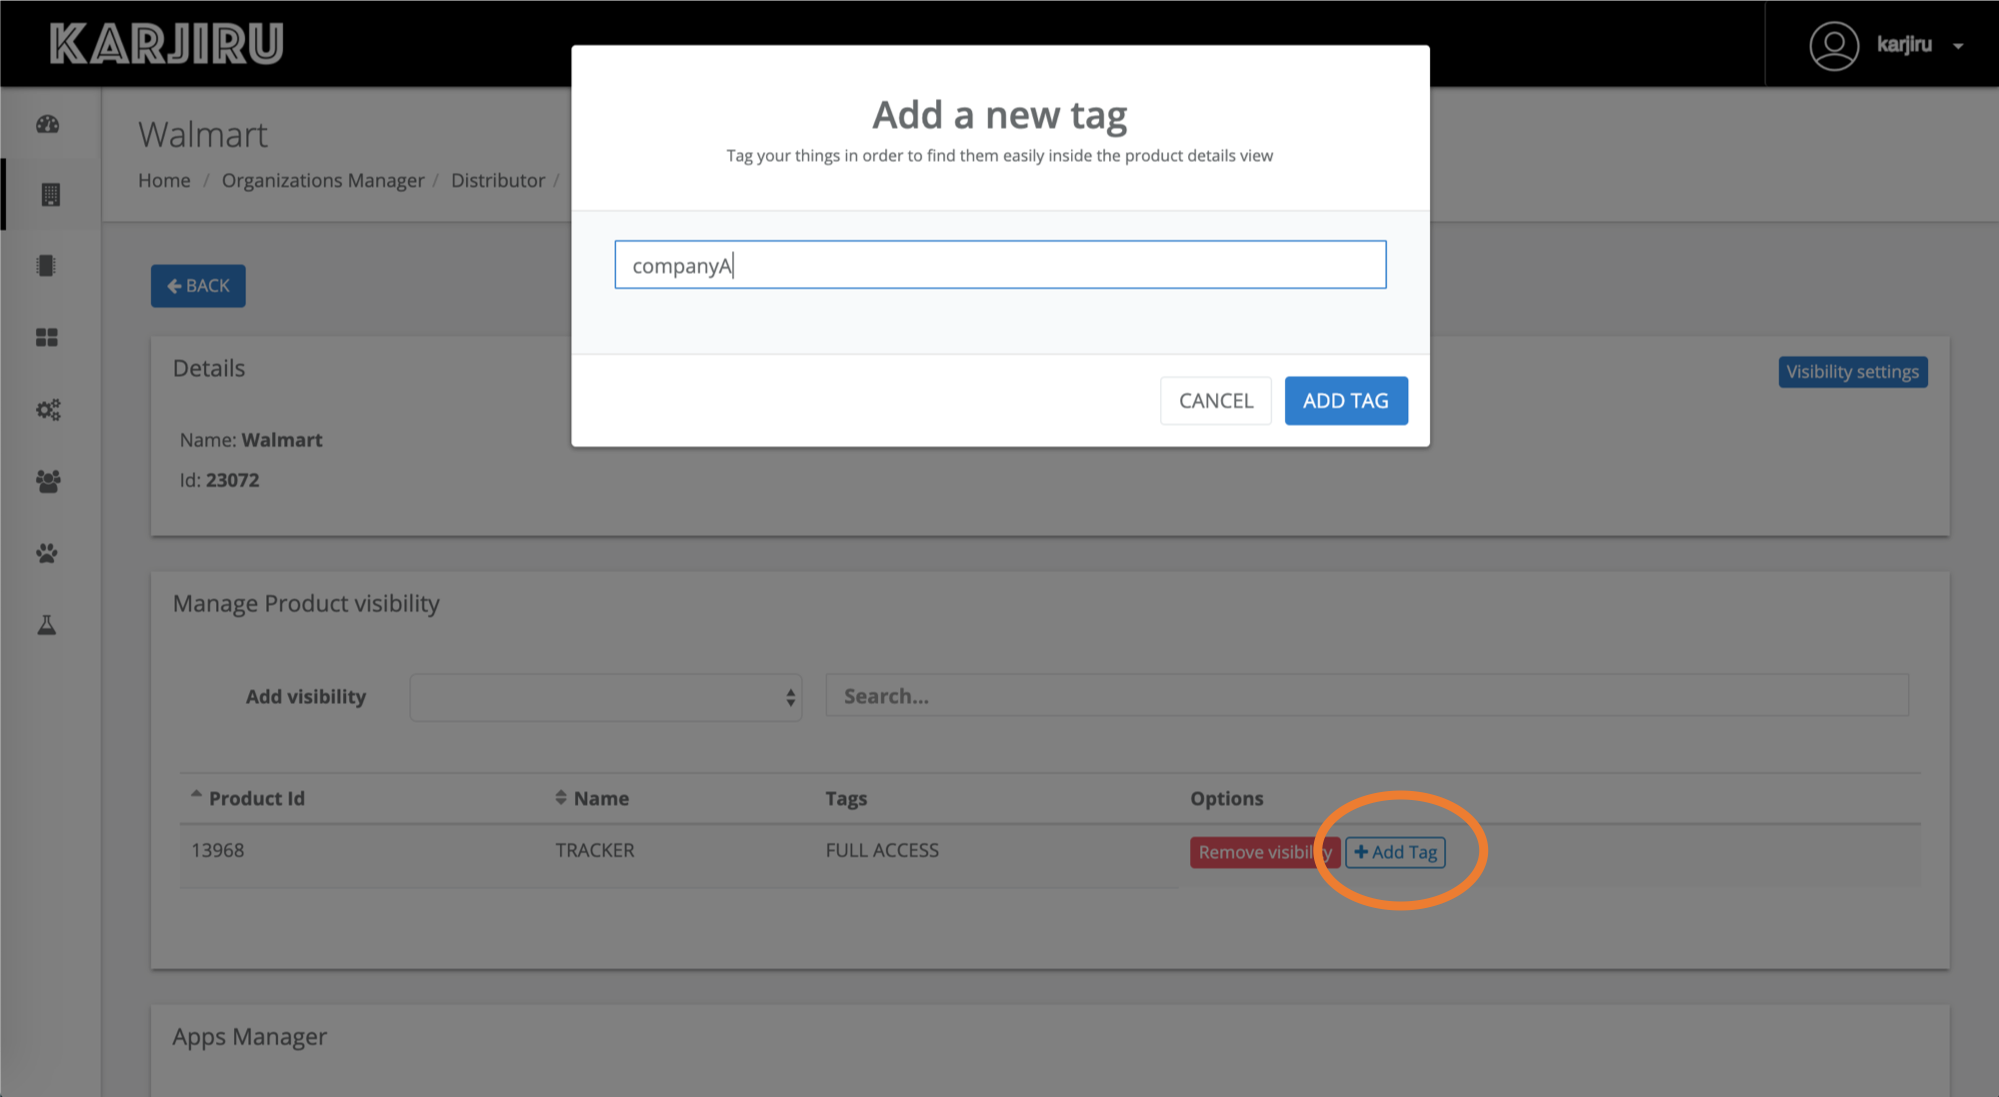
Giving Retailers tags: Click “Organizations Manager” in the sidebar, then click “edit” next to one of the retailers. Halfway down the page, you should see a section titled “Manage Product Visibility.” Here, you can click “+Add Tag.” Make sure whatever tags you give has the exact same name as the products tags you wish to assign to it.

Note: By default, the retailer will have access to all the same products as its parent retaielr in the “tree”. Once you add some tags, it will only have access to the products with the same tags as it has.

Understanding the “Visibility Settings”

The “Visibility Settings” affect how much your retailer will be able to see and do in their dashboard. You can get to these settings by clicking “Organizations Manager” in the sidebar, then “edit” next to one of your retailers. Once on this screen, you will see the “Visibility Settings” button in the top right. Here are explanations of some of the different setting options you have under “Visibility settings”:

Note: The following examples of what the visibility settings will do are all assuming you are logged in as “you,” the things.io customer and adjusting the visibility settings under one of your retailers.

  • Create organizations
    • If you choose yes, this creates the “Create Organizations” tab in the sidebar of this retailer’s Dashboard. The new tab allows this retailer to create sub-retailers of itself. For example, Amazon would have the ability to create Amazon US and Amazon Europe as two smaller organizations.
  • Authorize create organizations delegation
    • If you choose no, this retailer’s sub-retailers will not be able to create its own sub-retailers. For example, Amazon still has the ability to create Amazon US, but it cannot adjust what Amazon US’s dashboard will look like and Amazon US will not be able to create sub-retailers such as Amazon Texas. In other words, it will remove the “Visibility Settings” button from Amazon US.
  • Prefix
    • A shorter version of this retailers name. For example, Walmart’s could be Wal.
  • The following are all things that you can choose to enable to show up in this retailer’s sidebar.
    • Show Things Manager
    • Show Apps Manager
    • Show Users Manager
    • Show Custom Brand
      • This says in Custom Brand will show up in Walmart’s Sidebar or not. Example: you can make it show up to edit Walmart’s dashboard look, save the look and then take this ability away so that it can not be changed.

Using the Blinders Tool

Logging into the Retailer’s Dashboard

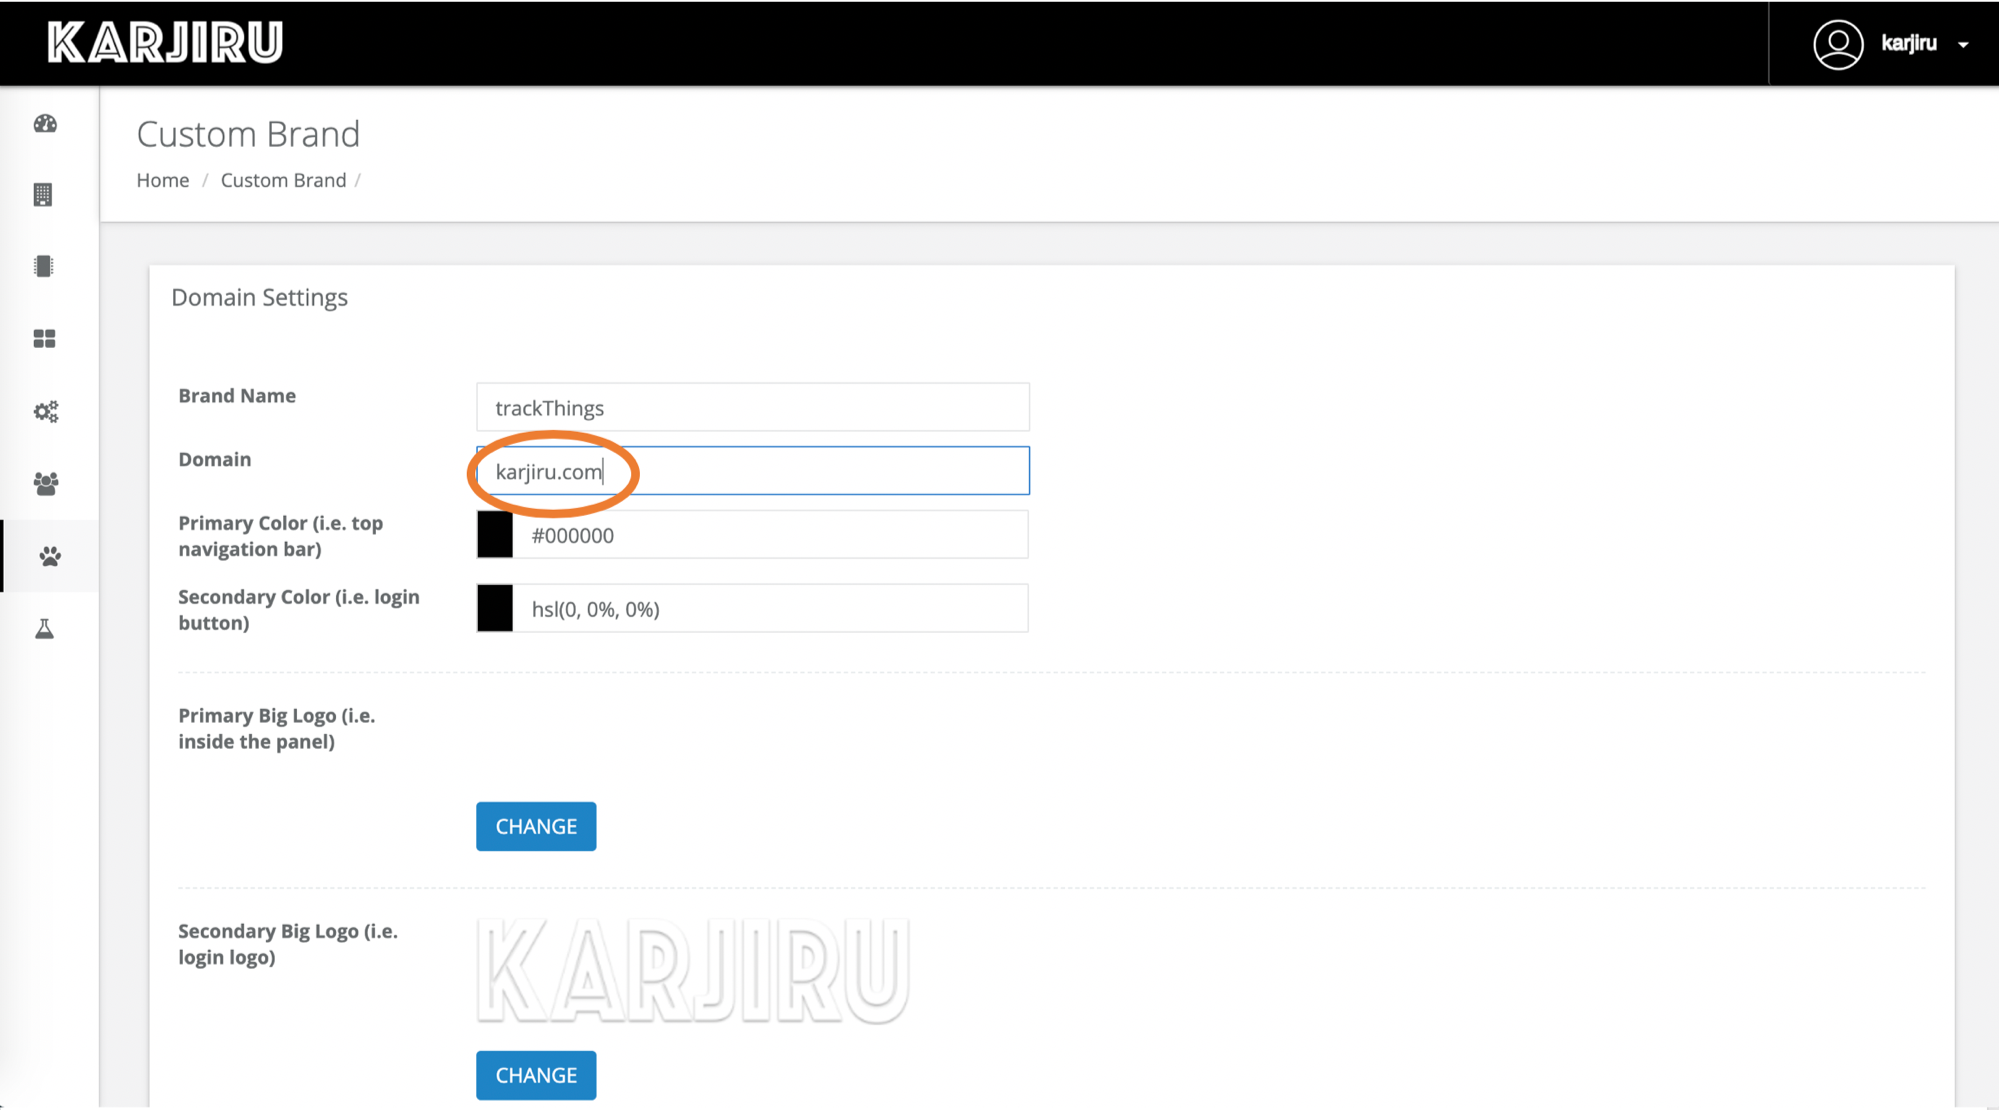
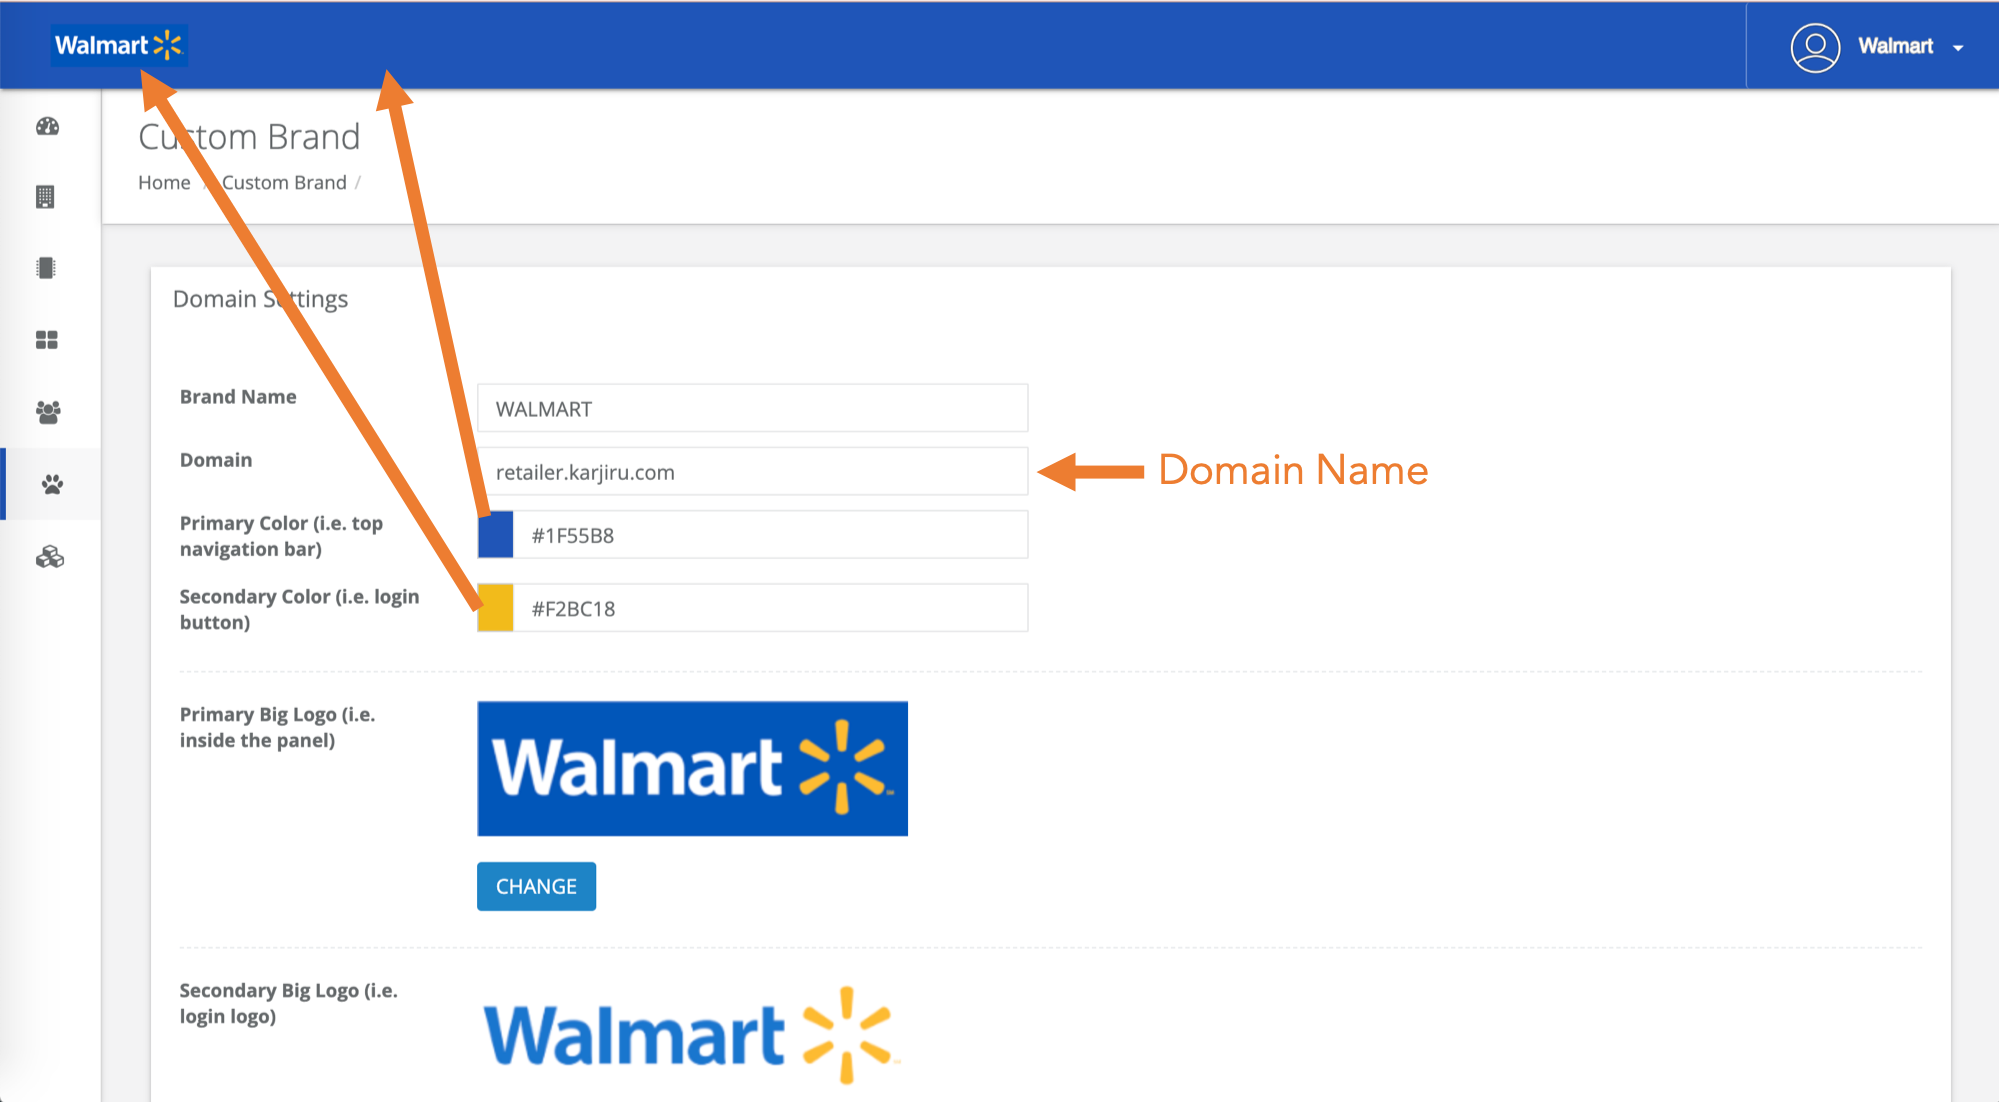
Go to “Custom Brand” in the sidebar on your dashboard. The domain name there is where you will go to log into your retailer’s dashboard initially. You will be able to change this link in the future. Remember, your username and password are the ones you used to create the retailers.

Note: You can always use the “parent” organization to log in for the “child” (using the child’s username and password).

Editing the Dashboard

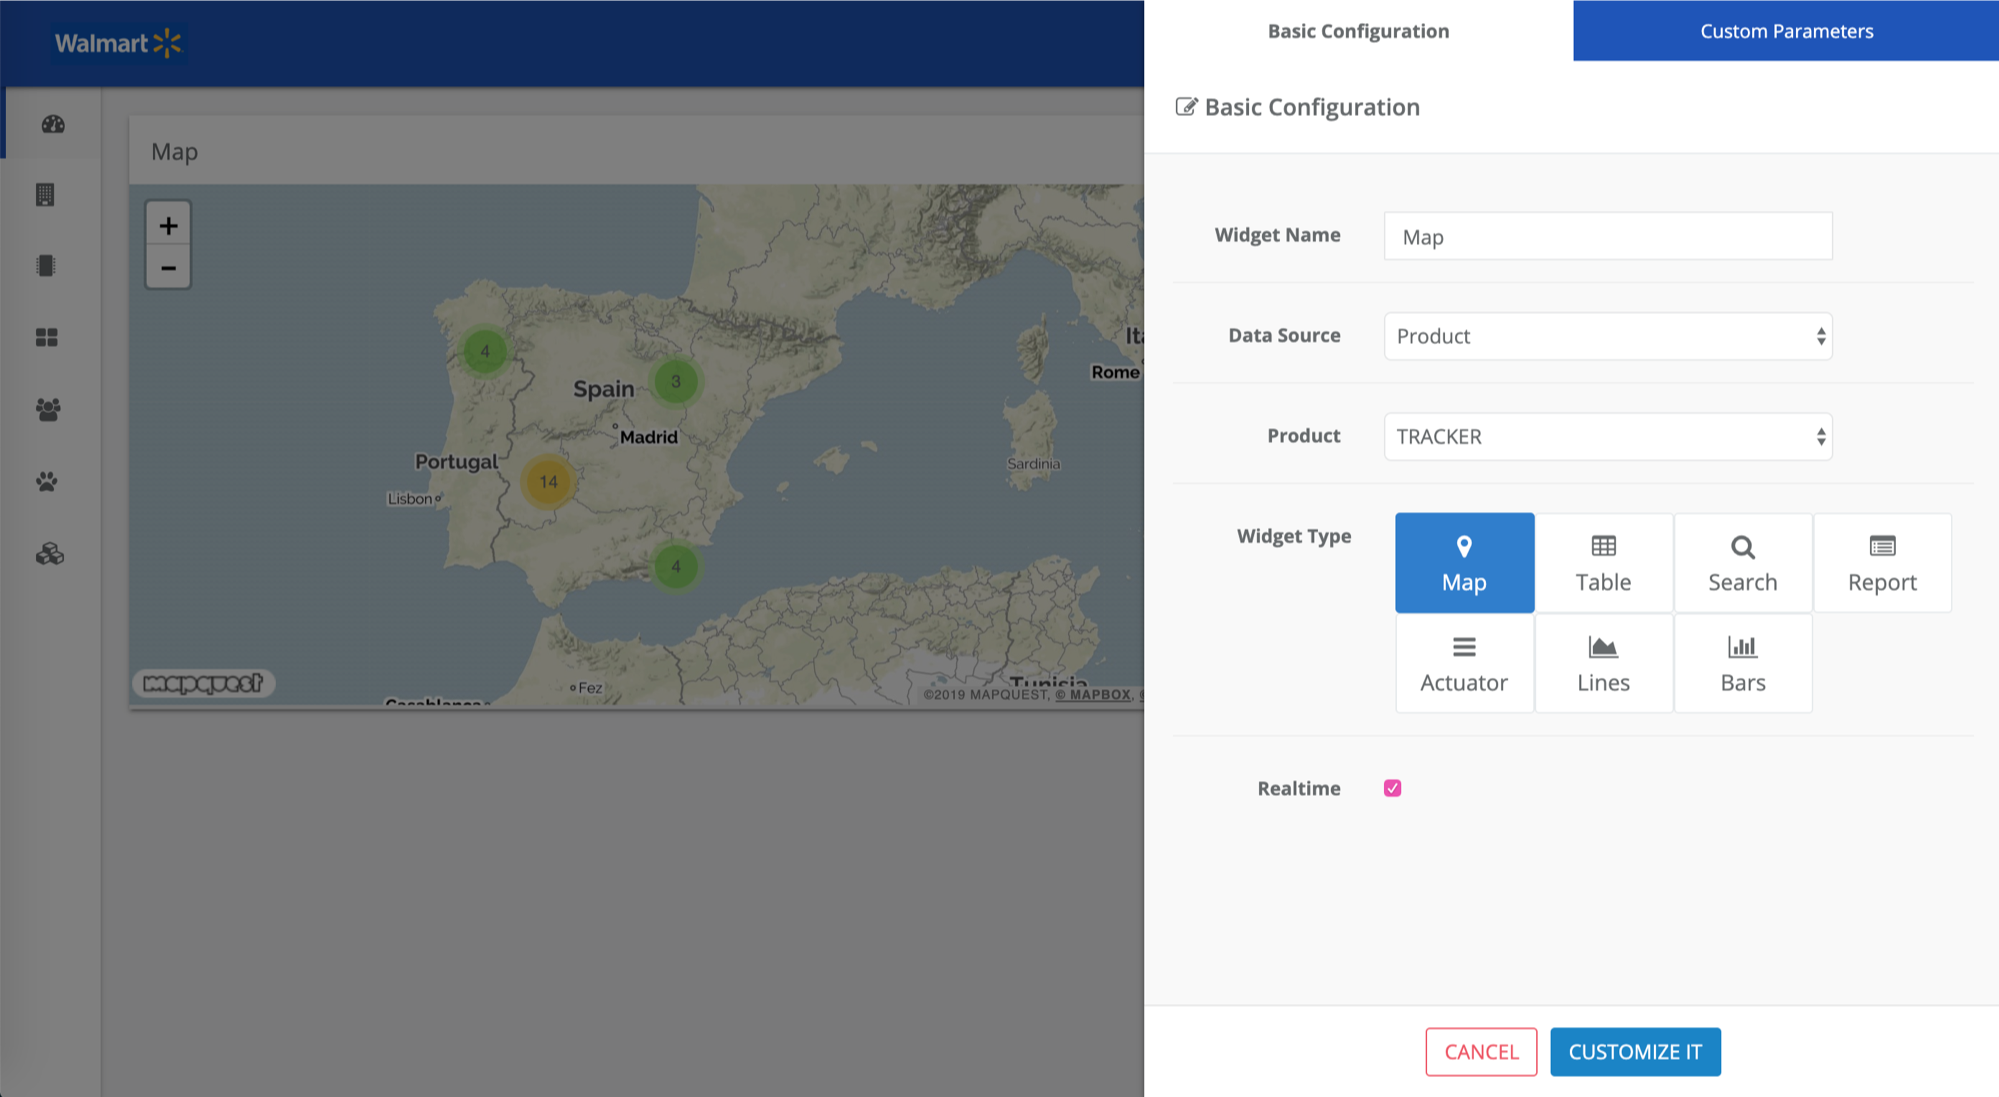
You can get to the dashboard by clicking “Dashboard” in the sidebar. The Dashboard will have automatically generated widgets. You can edit the dashboard by clicking the “Edit Dashboard” icon in the lower right corner and delete these widgets if you choose. Below is a picture of how to create a map:

Note: Above (under “Giving Retailers tags”), I added a tag to my Walmart retailer called “companyA” which 25 of my products also have. Now, when I view my things under Walmart’s dashboard, I only see those 25 with tag “companyA.”

Customizing your dashboard

You may want to style your dashboard to look more like your or your retailer’s company. To do this, click “Custom Brand” in the sidebar.

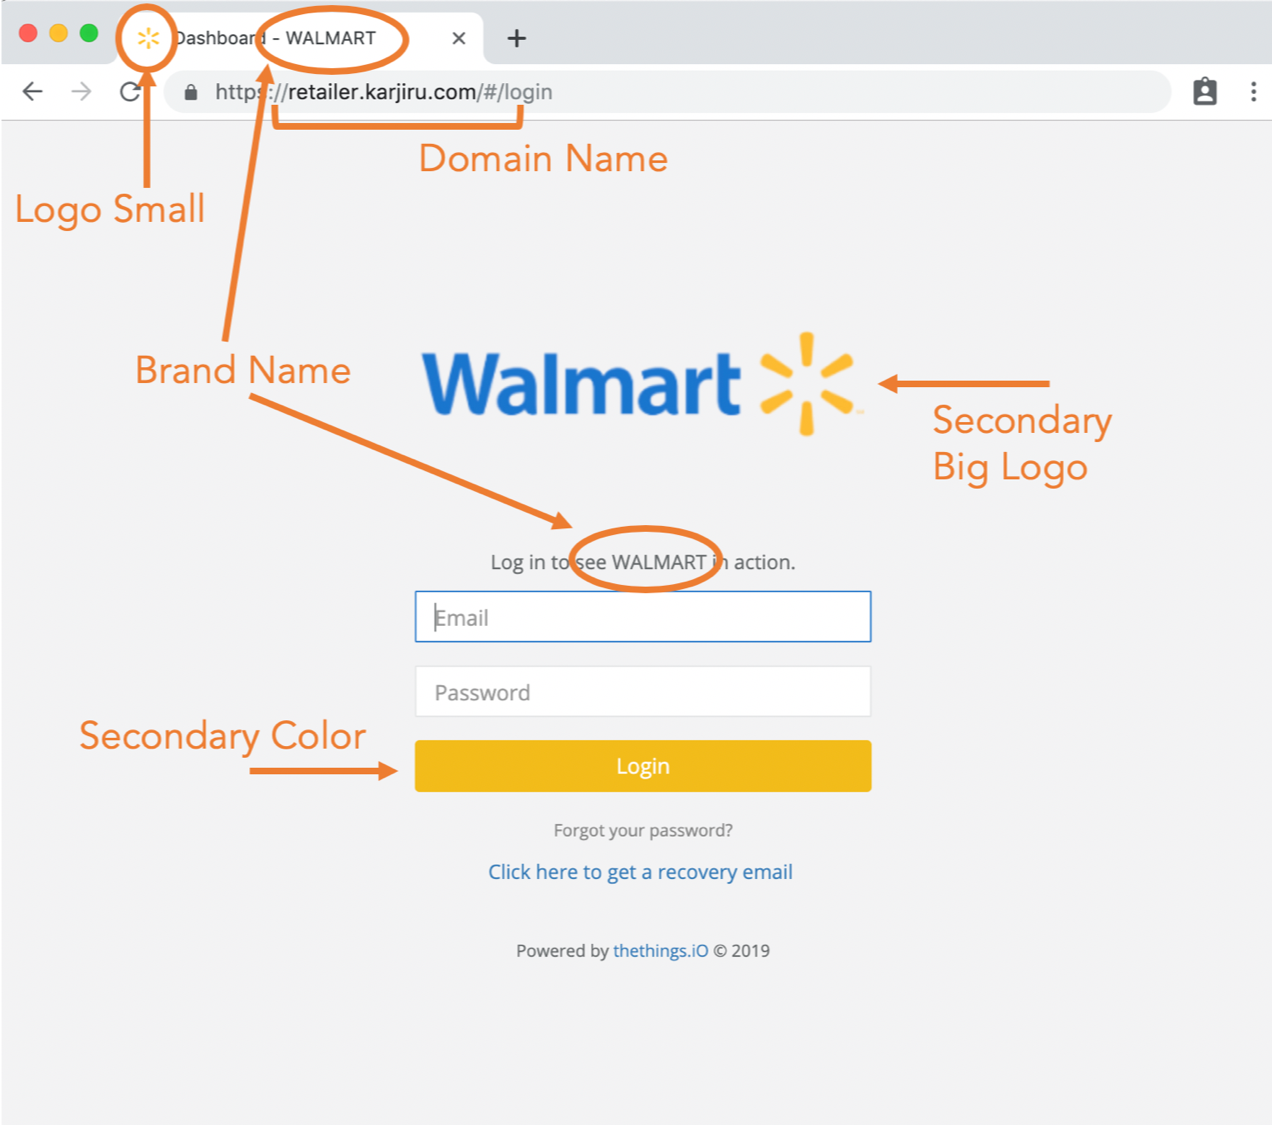
Here is how the styling changes will come into play:

The domain name is the link you use to get to your retailer’s login screen as well as the domain name of your retailer’s dashboard site. You can change your domain name to: …?

You will see “Primary Color” and “Primary Big Logo” in the top bar of the main dashboard.

You will see the “Brand Name”, “Secondary Color” and “Secondary Big Logo” on the retailer’s login screen.

The “Logo Small” is the icon in the tab of your browser.

Note: You can enter colors in the form of hex code(#000000), hsl(hsl(0, 0%, 0%)), or rgb(rgb(0, 0, 0)). 

Seeing the visibility settings in action

If you gave your retailer the “Create Organizations” ability when adjusting its visibility settings, then within the retailer’s dashboard, you can create sub-retailers. These sub-retailers work in the same way that your retailers did. You can log in under their own dashboard, give them tags so that they can only see certain products, and you can adjust their visibility settings to specialize the view they see in their dashboard.


I hope you enjoyed this tutorial! Feel free to contact us if you have any questions on thethings.iO IoT platform and thethings Blinders.

IoT Platforms for Dummies ebook

We are pleased to announce a new ebook made by thethings.iO‘s CEO Marc Pous and Blai Carandell about the IoT Platforms. We named it IoT Platforms for Dummies and we try to explain what is an IoT platform is and why a digital business needs to use an existing IoT Platform asap.

Today is the best day to launch a digital product. Seriously! Never before in the human history has it been easier to build a prototype, design the mechanics of a product, manufacture it anywhere and sell millions of units through crowdfunding campaigns, pre-sales or direct channels. And the good news is that tomorrow will be even easier. The bad news is that having a team with all the knowledge to launch it smoothly is hard and super expensive. Sometimes the IoT platforms are the pieces of the digital product which are less appreciated, nevertheless they are an essential backbone of any business.

Success on IoT is not easy journey, at all. As you are going to read, too many stages are needed to reach success and too many complex decisions need to be taken. Even sales and marketing need to excel. So we hope that with this ebook about IoT Platforms for Dummies we can help you to understand why an IoT Platform can help you to reach success on your digital project.

And if you think that you need an IoT platform, just ping at thethings.iO. thethings.iO is the most simple enterprise IoT platform.

, ,

thethings.iO IoT Blinders Retailer Manager

If you sell your digital product via distributors and retailers, thethings.iO’s Blinders are for you. The Blinders tool provides privacy and security to your retailers and suppliers and all their network of sub-retailers. Let’s learn more!

What is thethings.iO Blinders?

Imagine you are a thethings.iO customer with smart lightbulbs you wish to sell to retailers such as Walmart and Amazon. You sell 1 million lightbulbs to Walmart and Amazon. People then buy them and set them up with your app, giving you their email.

Now, when you will sell another product in the future, you will not need your retailers any more probably. You will sell directly to the customers through their emails and with marketing campaigns tailored to the clients of your current solutions.

This is obviously a problem for your retailers, who just lost customers, a lot. Most likely, your retailers would have realized this could happen and never would have made a deal with you in the first place. That means you never would have had any business to begin with either. So now what? How can you ensure privacy and security for your retailers? 

At thethings.iO, we have created a tool to solve this problem: the Blinders Retailer Manager. This tool “closes the blinds on you” to protect the retailer’s customers’ information and also lets you give the retailers a dashboard for them to manage your products. The Blinders tool also allows retailers to have a network of sub-retailers, each with their own dashboard.

For example:

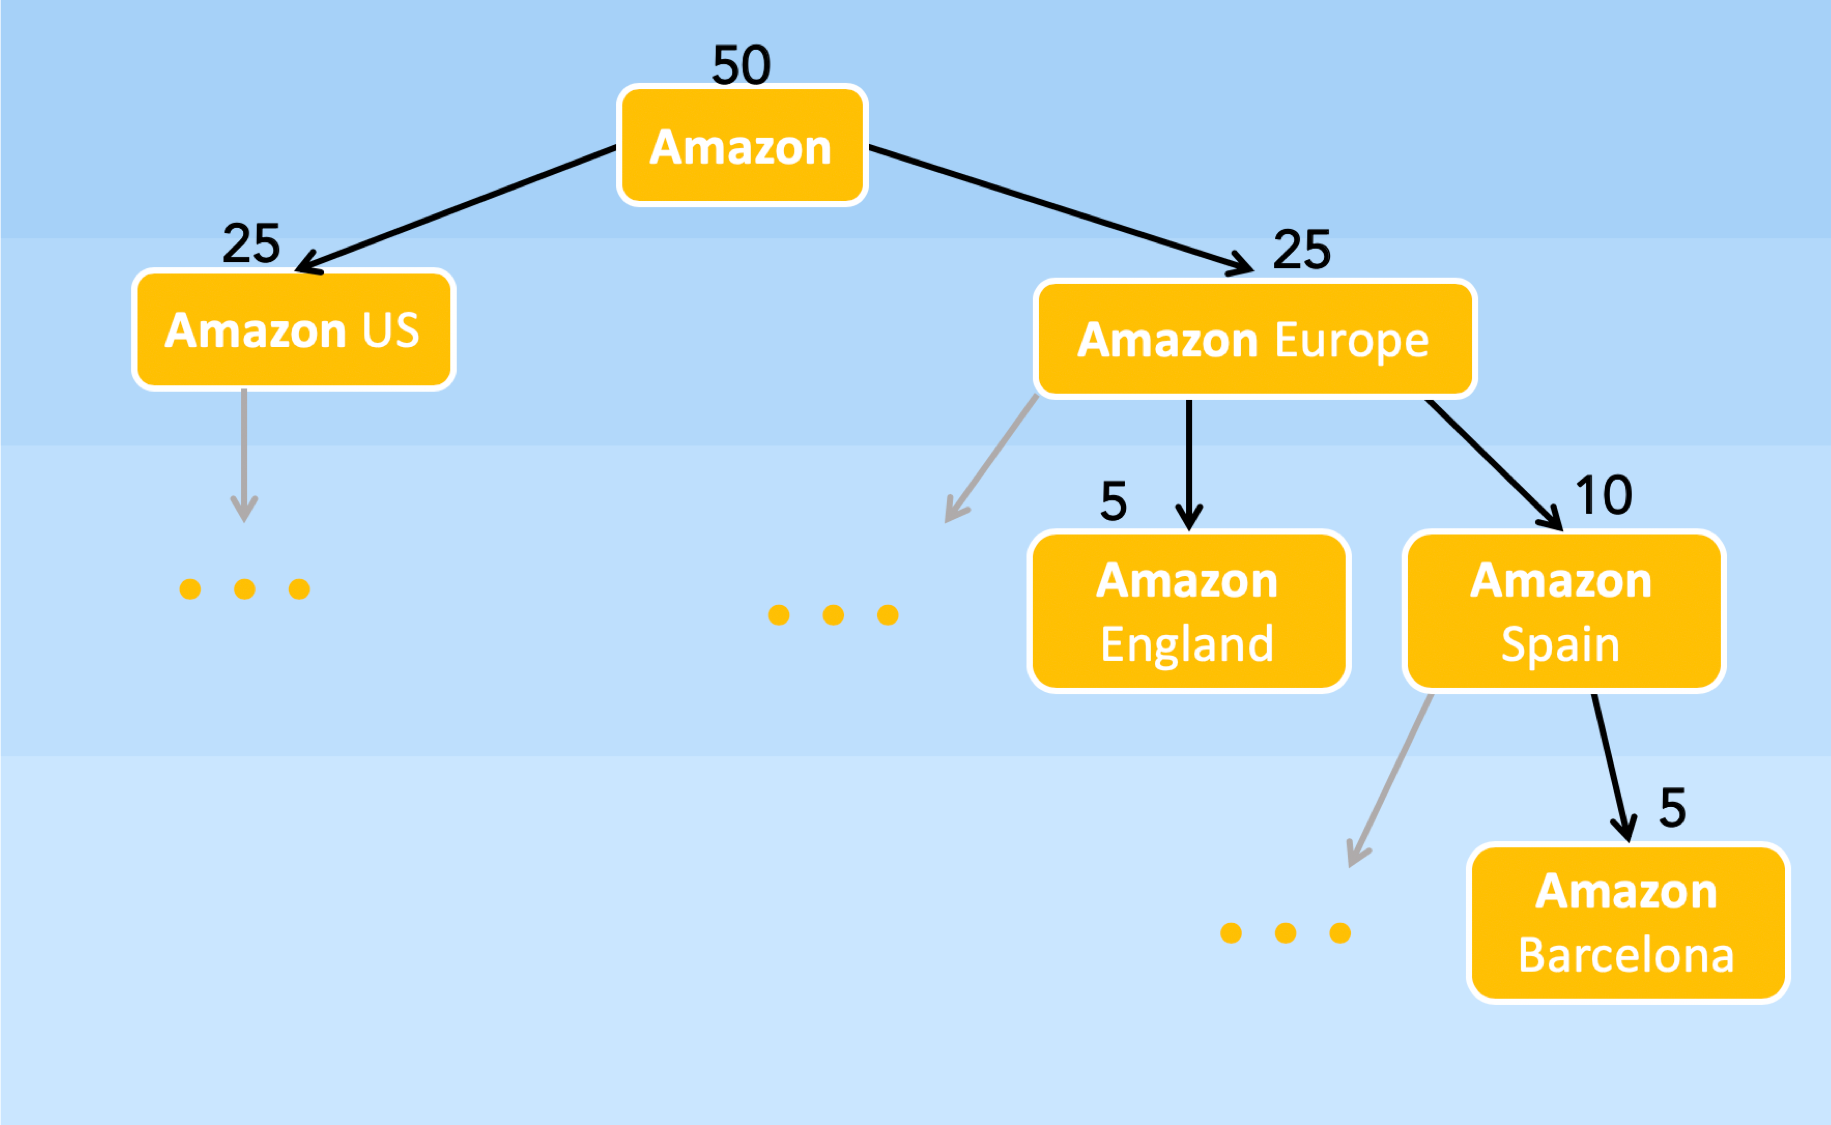
Now imagine you are Amazon. You have two branches, Amazon US and Amazon Europe. You have 50 products, 25 for each location, but you want Amazon US to see their only 25 and Amazon Europe to see their only 25. With thethings.iO’s 

Blinders, you can make them each their own separate login where they can only see their products.  Now, you are Amazon Europe and you want to give 10 products to Spain for only them to view. You can do the same thing, creating a tree like this one:

The thethings.iO Blinders solution for retailers is a very complete solution to empower your retailers and partners with a top-notch IoT solution.

Do you want to try it? Just contact us at hello at thethings.iO.

IoT retailers need better privacy and security? Meet thethings.iO blinder for retailers

Let me tell you a true story. We have a client connecting their products to the Internet with thethings.iO IoT platform. Let’s say that they are manufacturing fridges. And they are the second-best company in the world. Nevertheless, they do not sell directly to clients, they sell through retailers. Some of them are industrial retailers, others are brick and mortar stores, among others. And they sell a lot of connected fridges.

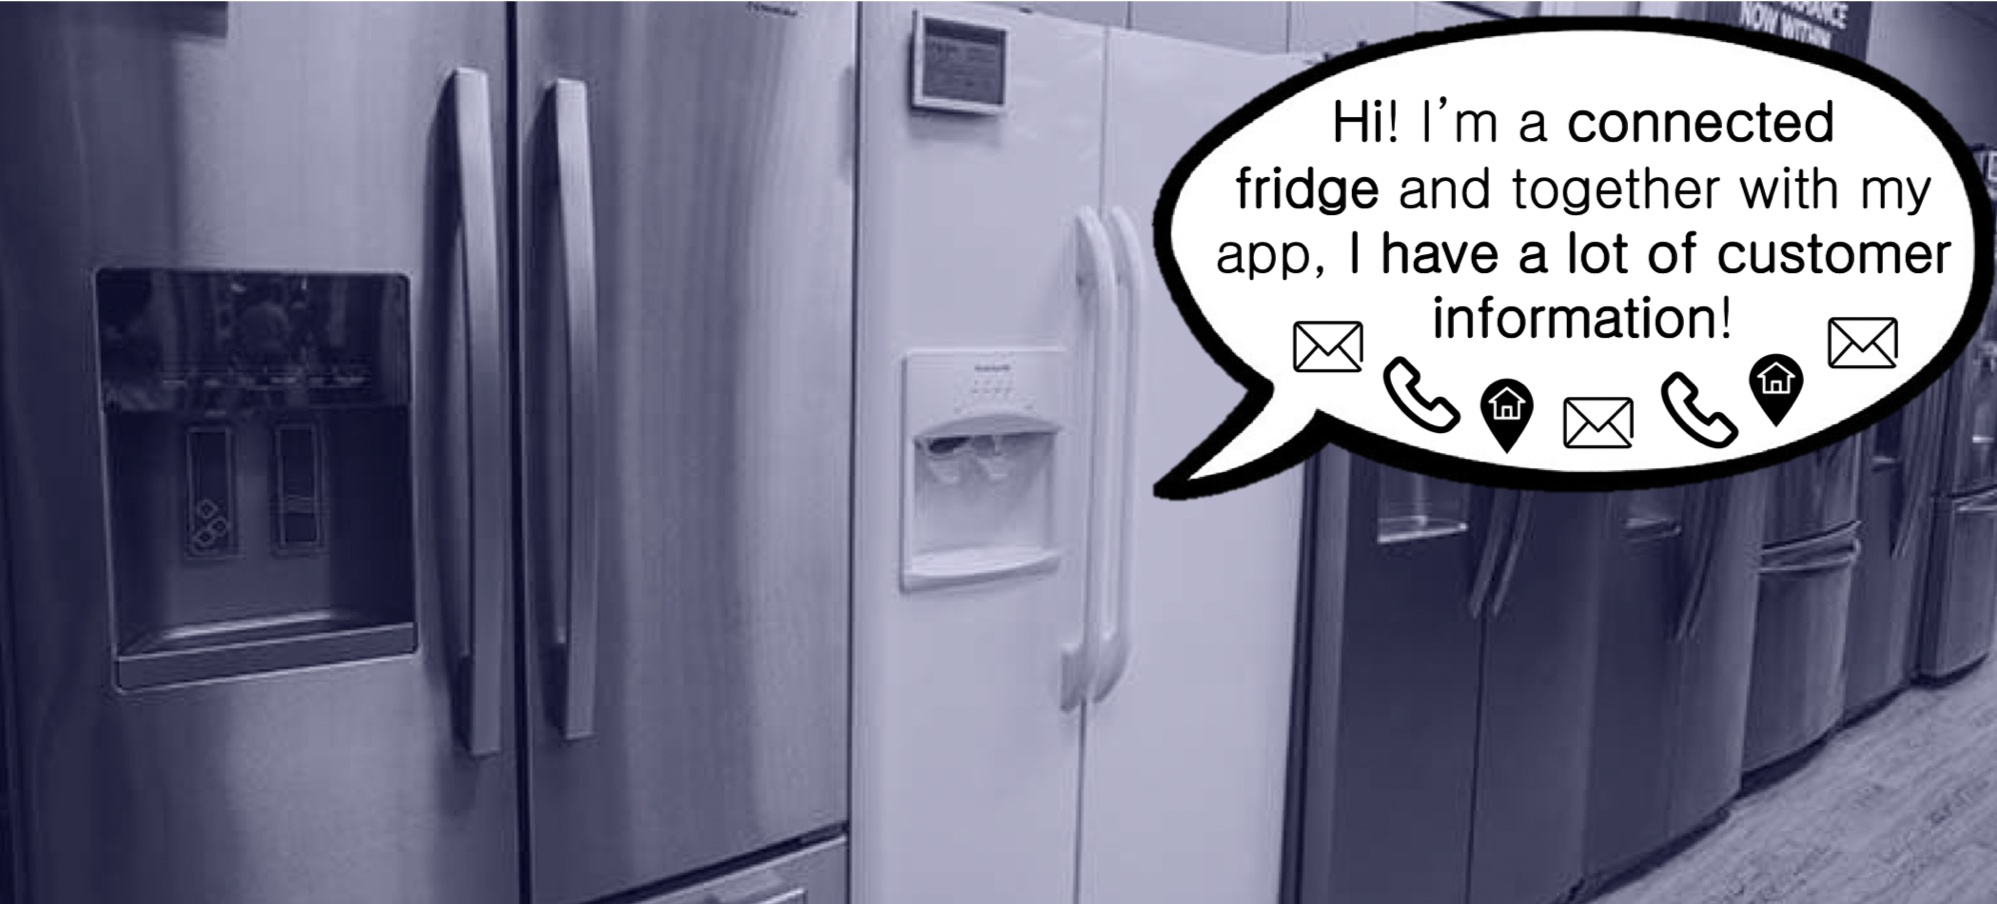
The fact that the fridge is connected enables their final clients to install a mobile application and get added value. Then with the app, the manufacturer is getting a lot of information about their clients, plus their e-mail, phone number, and address; even more information and better classified than that which is available to the retailers.

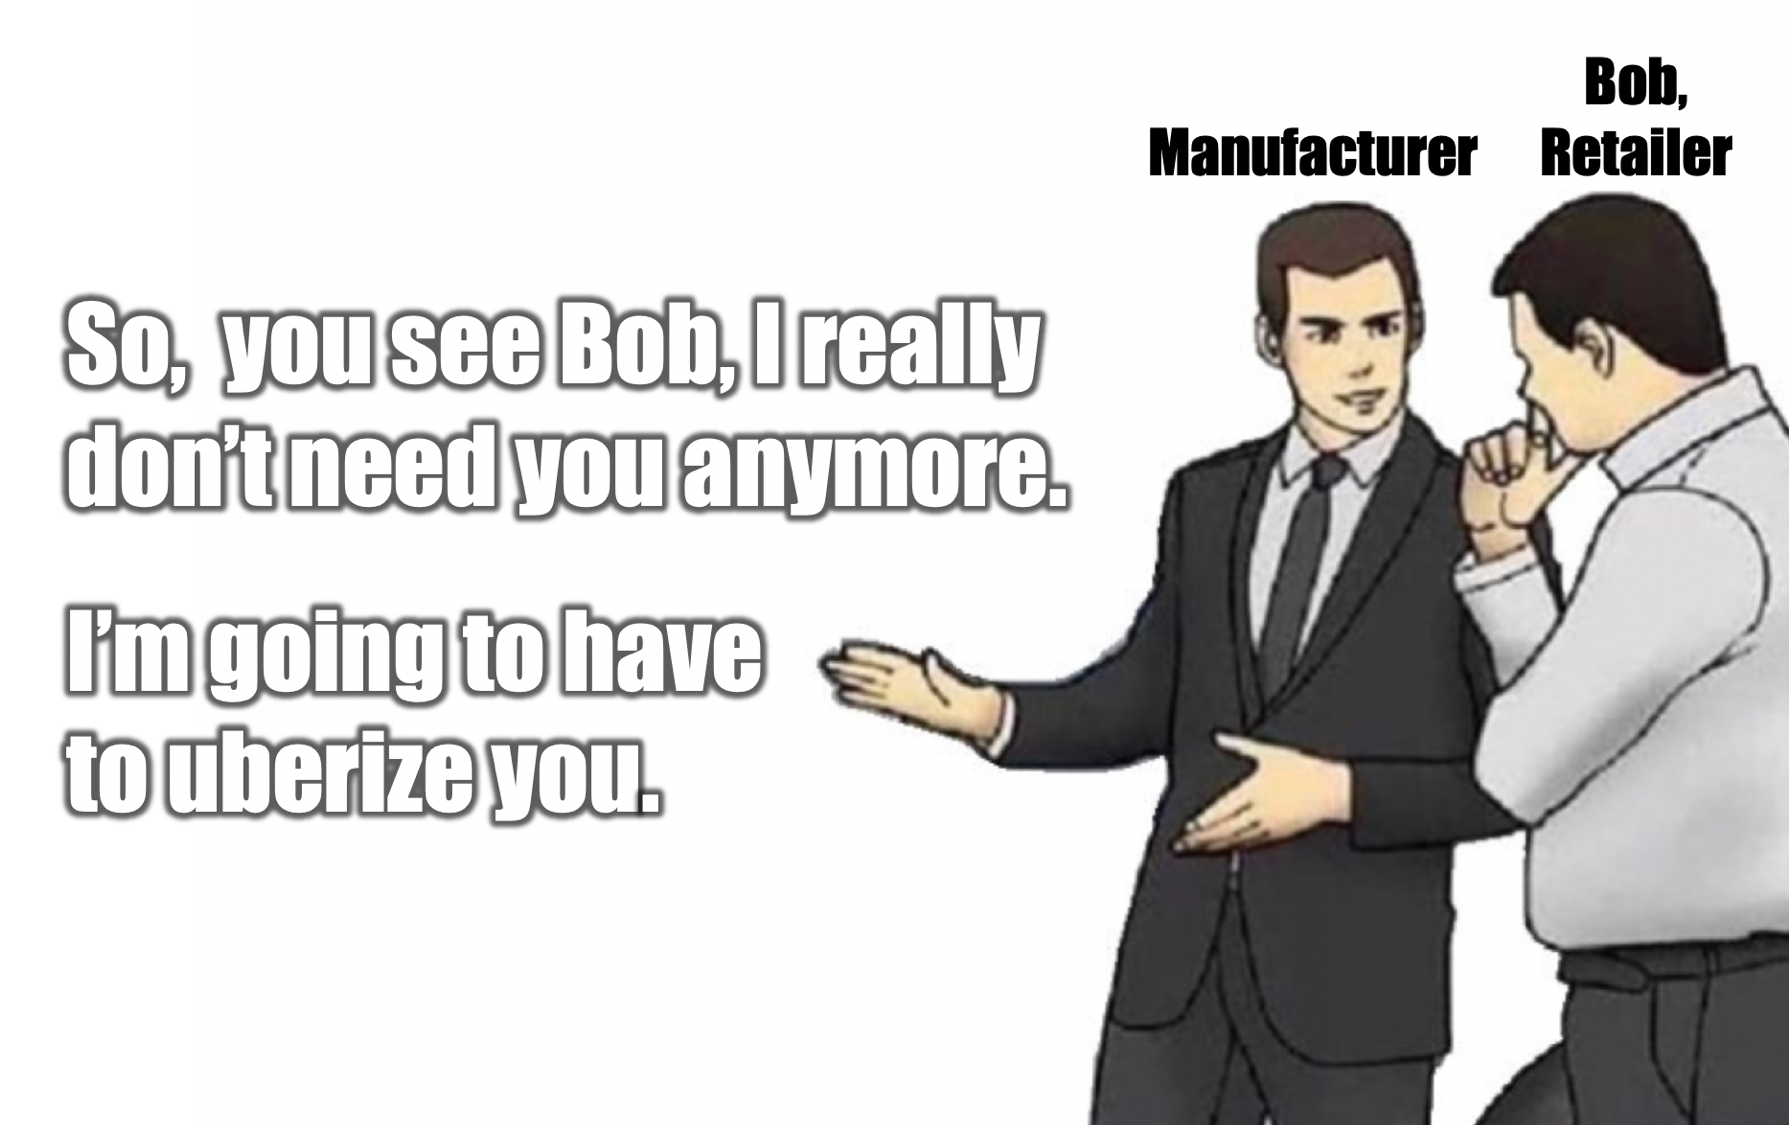
The manufacturer decided that with the information of thousands of their clients, they do not need retailers anymore. They are going to create an installation team for all the countries where they have a presence, and work through on-line campaigns and others. As a result, they will go to the final customer directly getting rid of the retailers and distributors: the uberization of the retailers.

Do you know that some hardware manufacturers have uberized their vendors? Certainly, we are seeing more and more retailers out of business with the digitalization.

The manufacturer that couldn’t find retailers

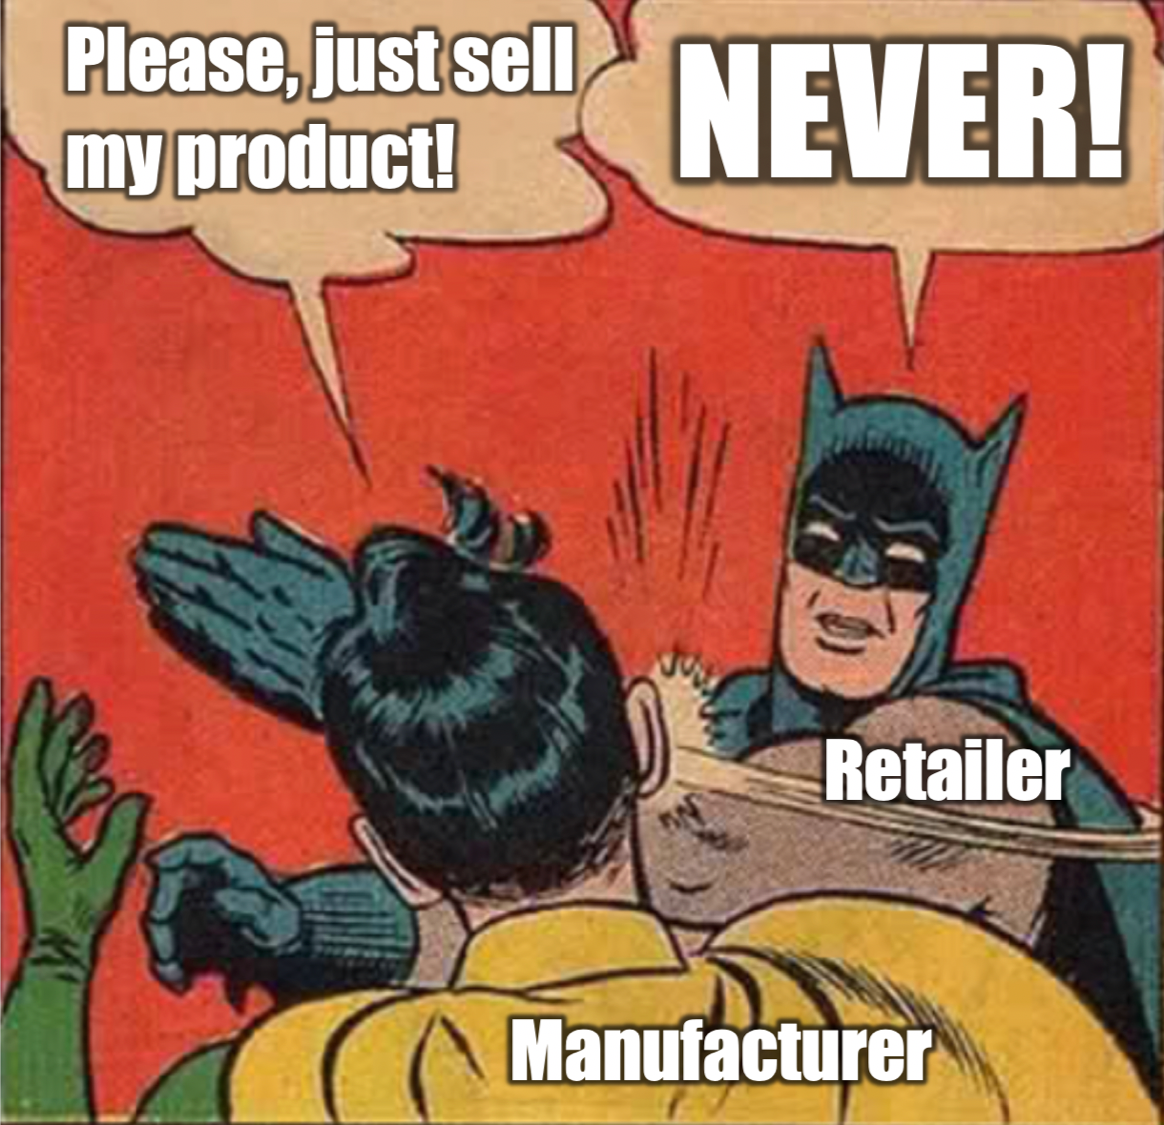
Let me tell you a second story. A thethings.iO IoT platform customer contacted us because none of their current retailers wanted to sell (or resell) their digital newest product. Even with the value proposition and the market demand for their product, they didn’t want to give to the manufacturer all the market information; they needed a warranty of privacy.

The solution for the IoT retailers

At thethings.iO we think that this is an important topic on the IoT security and privacy. And we handle this IoT security issue with an innovative tool in the market.

thethings.iO has a solution for the IoT retailers. Imagine an IoT solution that makes sure that your data sits secure and you are not going to be by-passed by your current partners in the future.

If you are not being protected today, meet thethings.iO Retailer Solution and separate the market information from your clients from your vendors, make it impossible to get uberized.

And if you are an IoT manufacturer who suffered at some point of these types of problems, find at thethings.iO your solution to enable your retailers to keep safe and offer a double added value digital product to their clients.

Welcome to the new generation of IoT security and privacy methods for retailers and manufacturers. Welcome to thethings.iO blinders feature.

Create alerts with thethings.iO IoT platform

At thethings.iO IoT platform we love to give power to the IoT developers. This is the reason why since the very beginning we created the Cloud Code framework. The Cloud Code framework enables anyone to apply any algorithm on the top of the data, in real-time, every hour, every day or whenever. Nevertheless, a lot of clients requested a more simple solution to create alerts, set up thresholds, and get e-mails or SMS.

From now, you are ready to create alerts on thethings.iO. Furthermore, any of your clients (with apps or with retailers feature) is going to be able to do it by themselves. That’s awesome right?

How to create an Alert?

Let’s imagine that you want to create an Alert when the temperature is lower than 10. That means that every time the temperature of a device gets lower than 10 you want to send an e-mail to the manager of that device.

Set up the marketplace e-mail system credentials

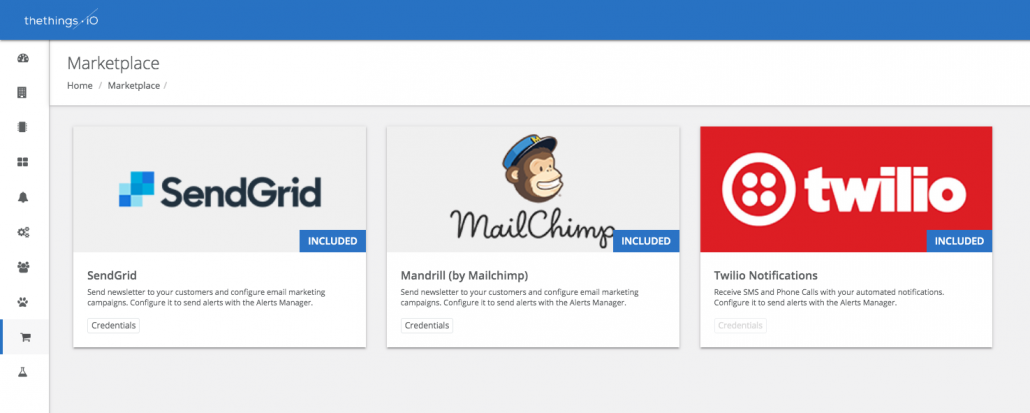
First of all, we need to introduce another new awesome feature of thethings.iO, the Marketplace. The marketplace is a market where you will find all the available integrations with thethings.iO IoT platform. From mailing systems, to SMS integrations or with a ticketing system.

First step to create an Alert is that you need to set up a mailing system. At the moment at the marketplace we support Sendgrid or Mailchimp (in the future we will support more, or contact us in order to integrate more e-mail services). Once the credentials are set up, you are ready to create an alert.

Create the IoT Alert

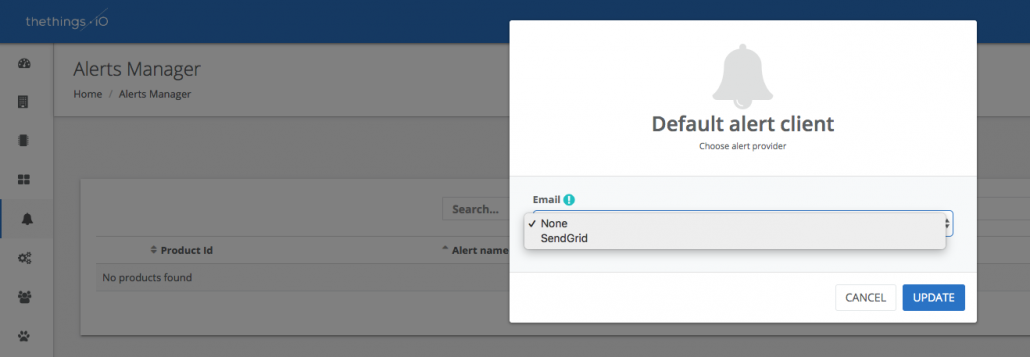
After that go to the Alerts section. Select the e-mail notification system that you are going to use to send e-mails to the people you need to alert.

In this case, we set up Sendgrid credentials, so Sendgrid will be our alerting system client (by e-mail). Take into account that, all the alerts by e-mail will use the same e-mail client.

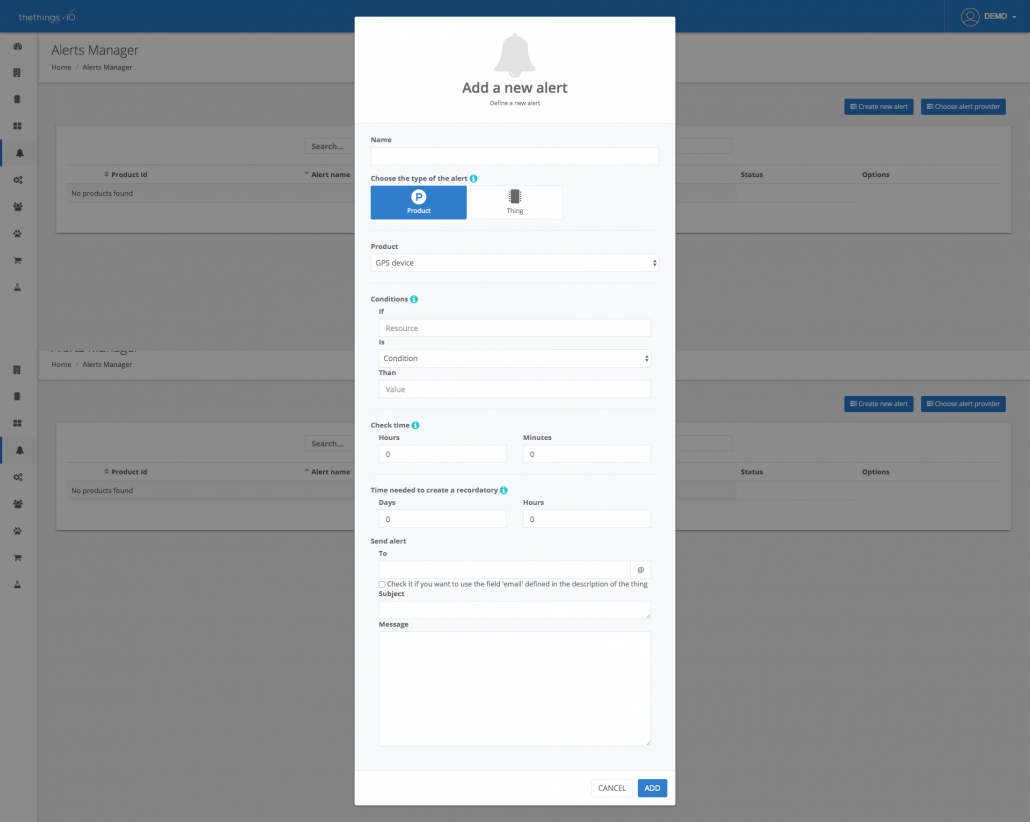
At this point you are ready to add a new Alert. Click the button “Create new Alert” and fill the form.

First you need to define if this alert affects all the Product or just one thing.

In case of a Product Alert, take into account that you will be able to group things for clients. The idea is similar as the tags concept but just for alerts. Then select the Product. After that, it’s time to define the conditions. Remember that you will need to type the resource name (no selector available yet).

The Alerts enable you to define the Check Time of the Alerts. The Check Time means the time that a certain value needs to be out of parameters to generate the first Alert. For example, imagine that the temperature below 10 will launch an alert when during 3 hours the temperature is below 10. If you introduce Zero, it means that the Alert will be activated immediately in real-time.

Then, you will need to introduce the time needed to create a reminder. Once the first Alert gets launched, this time is the time needed to send a reminder if the value is still out of parameters. Zero means no reminder. So, let’s imagine that after launching the first alarm of 3 hours with the temperature below 10, we want to send maximum one message every day.

Finally, you can define the alert that you will send. Choose among e-mail or SMS. In this case you will send an e-mail. Introduce the To, in case there is only one person who is going to receive the e-mail, or check the checkbox in case all your things have the property $settings.email with the e-mail of the manager of each thing. Then introduce a Subject and Body.

That’s how simple is to create an Alert with thethings.iO IoT platform. What do you need more? Just let us know!

Tracking the coffee from production to the cup with Blockchain, IoT and thethings.iO

At thethings.iO IoT platform, we love to work with students. In this case, Carles was doing his engineering thesis at Universitat Politècnica de Catalunya (UPC) on a very exciting topic, Blockchain on the asset tracking coffee world.

The necessity to improve the working conditions of coffee exporting countries combined with the high demand of this product in the world opens a great opportunity to work hand in hand with technology. In the case of the high quality coffee, where production, field and manufacturers need to be tracked, it’s the perfect scenario to bring up state of the art technologies. The goal is to improve the trust and transparency on the chain. And this is the context of the bachelor final project, developed at thethings.iO during the last 5 months.

So, the goal of the project is not only to track coffee manufacturers, exportation and further steps. Moreover, also to show all of this with transparency and traceability to the high quality coffee drinkers.

The project pretends to connect coffee production towards the consumption. From the farmers with the final client. The espresso client should be able to know each step of the production line, starting at the very beginning, when the farmer collects the grain or even previously, until the cup of espresso is on the table, ready to be tasted. Moreover, we do a transparency exercise: The farmer is flesh and blood and we want the client to know the names and surnames who made it possible.

Challenge: Blockchain and IoT

This challenge has brought us the opportunity to implement a solution with a technology widely used these days: Blockchain and IoT. Blockchain is massive replicated ledger formed by blocks where each other is linked by hashes. Nobody can delete neither modify transactions. That way, when a client checks the steps of the production line he or she has the certainty that the coffee comes from the field, manufacturer and country that the distributor says and with a certain working conditions for the farmer. And the Internet of Things (IoT) to automatize, in some parts of the flows, the data acquisition from sensors, trackers and coffee machines, among others.

The result of these months of hard work has been a prototype implemented on thethings.iO IoT platform with a Blockchain platform. On the other hand, we have designed the network, the chaincode (smart contracts for all the actors of the workflows) and deployed a development and production environment.

This final work was presented on July 2019 at the University with a demo where the Blockchain and thethings.iO IoT platform were connected to sensors on the coffee farmlands.

From now, thethings.iO IoT Platform can bring Blockchain systems to you. Contact us if you need to connect any of your assets with a inmutable and secure database for you and all the actors of the project.

, ,

Using Geofencing with thethings.iO

What is geofencing?

Geofencing is a technology that allows you to create geographical boundaries and set up triggers based on location information.

For example, you could send a message to someone when a “thing” has entered or left a specific area defined by your geofence.

Some of the great uses of geofencing include location tracking, monitoring assets, alerts when assets enter/leave, monitoring turnaround time, and more!

Setting up geofences with thething.iO’s IoT platform

Creating geofences

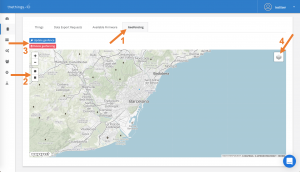
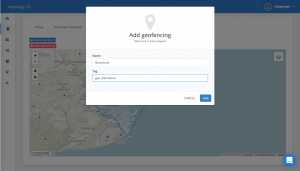
To create a geofence, go to “things” in the sidebar, then click on details next to one of your products (it does not matter what product, the geofence made under one will show up under the others). Then scroll down to the bottom of the page and (1)click the tab “Geofencing.”

Once there, you can (2)click either the polygon or the square to draw your geofence. If you choose polygon, remember to click the first point again to close the shape.

(3)If you select one of the shapes you have already drawn, you have the option to “update geofence” or “delete geofencing”.

(4)You also have the option to change the look of the map to best suit your needs.

When you are finished drawing your geofence, you will be prompted to give it a Name and Tag. You can make the Name whatever you choose, but make sure the Tag is “geo_” followed by the location. For example, “geo_barcelona” (This format will make execution easier later).

Putting tags on a “thing”

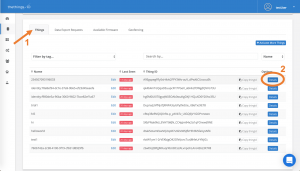
Now that you have a geofence, you will want to tag some of your “things” to that geofence. To do this, click back over to the (1)“things” tab, and (2)click details next to one of your things.

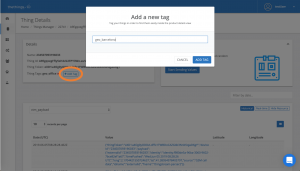
Next, click “+Add Tag”. Give this tag the same tag name as you gave to the geofence. For example, I will give this tag the name “geo_barcelona”, to tie this “thing” to my Barcelona geofence.


Making your geofences execute a Job

In order to use your new geofences, you will want to create a Job. Jobs are Javascript code that can be executed once every hour or once a day depending on what you set their Frequency to.

Creating a new Job

To create a new Job, go to “Cloud Code” in the sidebar, then find the section that says “Jobs” and click the “add job” button in the upper right. Give it a name, assign it to the correct product and set its frequency. Now, let’s talk about the code.

Understanding this Job

Here, I have provided an example and explanation of what your Job could look like to get your geofences working.

Overview: This Job goes through all of your “things” under a product and compares their “geo_” tags to the geofences you have made to check if your “thing” is inside/outside one or more geofences. If it is inside/outside one or more geofences, it will send an email to you saying what geofences your thing is inside/outside and it will update any widgets that are using the “alert_inside-outside” resource we will talk about later.

This Job has four functions: job, getGeofences, checkPosition, and checkInsiders.

job: Makes all your “things” under this product available to work with in the rest of the helper functions and calls the helper functions

getGeofences: Makes your geofences avaliable to work with

checkPosition: First, checks to see if a “thing’s” tag matches any of the geofences’ tags. For every match, it checks to see if the “thing” is inside/outisde that geofence. If so, it writes that to the geofencesInside/geofencesOutiside array, respectivaly. It does this for every “thing” under this product.

checkInsidersOutsiders: checks to see if a thing is inside/outside a geofence using the geofencesInside and geofencesOutside arrays you just created. If so, creates a resource that says what geofences the “thing” is inside/outside, and creates a strings of all the geofences a thing is inside/outside and sends this string in an email. It does this for every “thing” under this product.


function job(params, callback)
{
 async.waterfall([
    thethingsAPI.getProductThings,
    getGeofences,
    checkPosition,
    checkInsidersOutsiders
 ], function(err, res) {
    if (err) return callback(err);
    callback(null, res);
 }); 
}


function getGeofences(things, callback)
{
 async.eachLimit(things, 10, (thing, next) => {
    thethingsAPI.getGeofences(thing.thingToken, (err, geofences) => { 
       if(err) return next();
       thing.geofences = geofences;
       next();
    });
 }, (err) => {
 callback(null, things);
 });
}


function checkPosition(things, callback)
{
 console.log("======== CHECK POSITION =========");

 async.eachLimit(things, 10, (thing, next) => { 
    thing.geofencesInside = [];
    thing.geofencesOutside = [];

    if(!thing.hasOwnProperty('tags') || !thing.hasOwnProperty('geofences')) return next(); 
    if(!thing.description.hasOwnProperty('geo')) return next(); 
    for(let i=0; i<thing.tags.length; i++){ 
       if(thing.tags[i]._id.startsWith("geo_")) { 
          for(let j=0; j<thing.geofences.length; j++){ 
             if(thing.tags[i]._id === thing.geofences[j].tag.toLowerCase()){ 
                if(geolib.isPointInside({latitude: thing.description.geo.lat, longitude: thing.description.geo.long}, thing.geofences[j].points)){ 
                   thing.geofencesInside.push(thing.geofences[j]); 
                   console.log("INSIDE --> "+thing.geofences[j]);
                } 
                else
                {
                   thing.geofencesOutside.push(thing.geofences[j]); 
                   console.log("OUTSIDE --> "+thing.geofences[j]);
                }
             }
          }
       } 
    }

    next();
 }, (err) => {
 callback(null, things);
 });
}


function checkInsidersOutsiders(things, callback)
{
 let resultInside = [];
 let resultOutside = [];

 console.log("##### CHECK INSIDERS & OUTSIDERS #####");
 
 async.eachLimit(things, 10, (thing, next) => {

    if (thing.geofencesInside.length > 0)
    {
    console.log("this thing is inside of a geofence");
       var txt_geofenceInside = "";
       for (let i=0; i<thing.geofencesInside.length; i++){
          if (txt_geofenceInside!= "") txt_geofenceInside +=", ";
          txt_geofenceInside += thing.geofencesInside[i].name;
       }
       thing.insideFences = txt_geofenceInside;
 
       console.log("WRITE RESOURCE");
       resultInside.push({
          key : 'alert_inside-outside',
          value : "Inside: "+txt_geofenceInside
       });
       thethingsAPI.thingWrite(thing.thingToken, { values: resultInside }, {lib:'panel'}, next);
    }
 
 
    if (thing.geofencesOutside.length > 0)
    { 
       console.log("this thing is outside of a geofence");
       var txt_geofenceOutside = "";
       for (let i=0; i<thing.geofencesOutside.length; i++)
       {
          if (txt_geofenceOutside!= "") txt_geofenceOutside +=", ";
          txt_geofenceOutside += thing.geofencesOutside[i].name;
       }
       thing.outsideFences = txt_geofenceOutside;
 
       console.log("WRITE RESOURCE");
       resultOutside.push({
          key : 'alert_inside-outside',
          value : "Outside: "+txt_geofenceOutside
       });
       thethingsAPI.thingWrite(thing.thingToken, { values: resultOutside }, {lib:'panel'}, next);
    }
 
    if (txt_geofenceInside !== undefined || txt_geofenceOutside !== undefined) {
       console.log("thingToken: " + thing.thingToken + ", Inside: " + thing.insideFences + ", Outside: " + thing.outsideFences);
    }
 next();
 }, (err) => {
 callback(null, things);
 });
}

Testing your Job

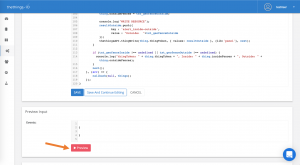
If you want to run some tests manually, you can click on Developers in the sidebar>Developer’s Console. Now on the edit screen for your Job, scroll down and find the button “Preview“.

Click this, and all of your logs will show up in your Developer’s Console. You will also see new data on your geofencing widget in your Insight Dashboard which we will set up next.

Geofencing with your Dashboards

Your geofences will automatically show up on the maps in your main dashboard.

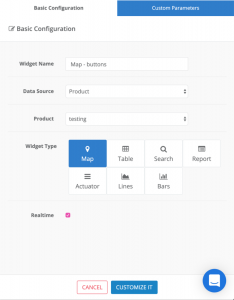
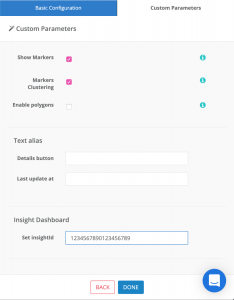
You can create a map by doing the following:


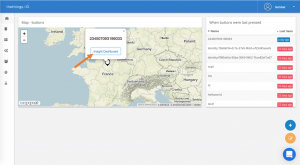
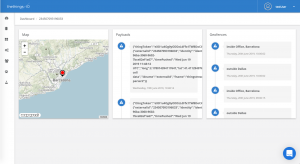
If you have an Insight Dashboard set up with your map widget, you can click on one of the “things” to get a closer look.

For more information on the magic of Insight Dashboards, check out this blog post.

Now, let’s make a widget on our Insight Dashboard that shows us where this “thing” has been.

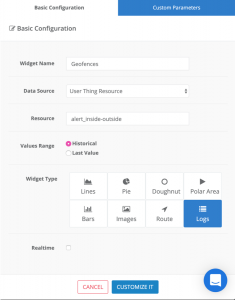
Once in the Insight Dashboard you wish to edit, click the add widget “+” icon, and do the following:

Note: you don’t need to click Realtime, because the widget will update automatically every hour or every day depending on what you set the Frequency to in your Job.

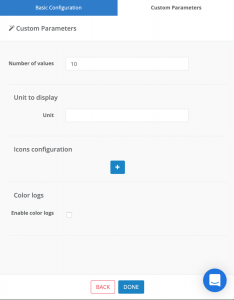
Under Custom Parameters, you may want to set a limit to the number of entries you will see in the widget. For example, I set mine to 10 values.


Don’t worry if the data looks odd; the data you see when editing an InsightDshboard is randomly generated because you are building a template.

Now save your Insight Dashboard and you are ready to use it!

When on your Main Dashboard, click on one of the “things” in the widget connected to this Insight Dashboard and you should see the results of where this thing has been in terms of the geofences you connected it to.


I hope you enjoyed this tutorial! Feel free to contact us if you have any questions on thethings.iO IoT platform.