Connect a thermostat with OpenMote and thethings.iO

thethings.iO + openmote
During the last months we have seen dozens of amazing projects being connected at thethings.iO. Here we are going to show you how to connect a heating system and a thermostat for your house using thethings.iO as the IoT platform and OpenMote as a hardware.

OpenMote and OpenWSN
During the project, the maker Roberto connected a heating system with a thermostat using the OpenMote with OpenWSN (IEEE 802.15.4e) and thethings.iO. On the project there is also a Raspberry Pi with Internet and the OpenBase and OpenMote-CC2538 modules connected by USB at the Raspberry Pi. The Raspberry Pi was converting the messages from the OpenWSN(802.15.4e) to Ethernet (HTTPS) to send the data to thethings.iO
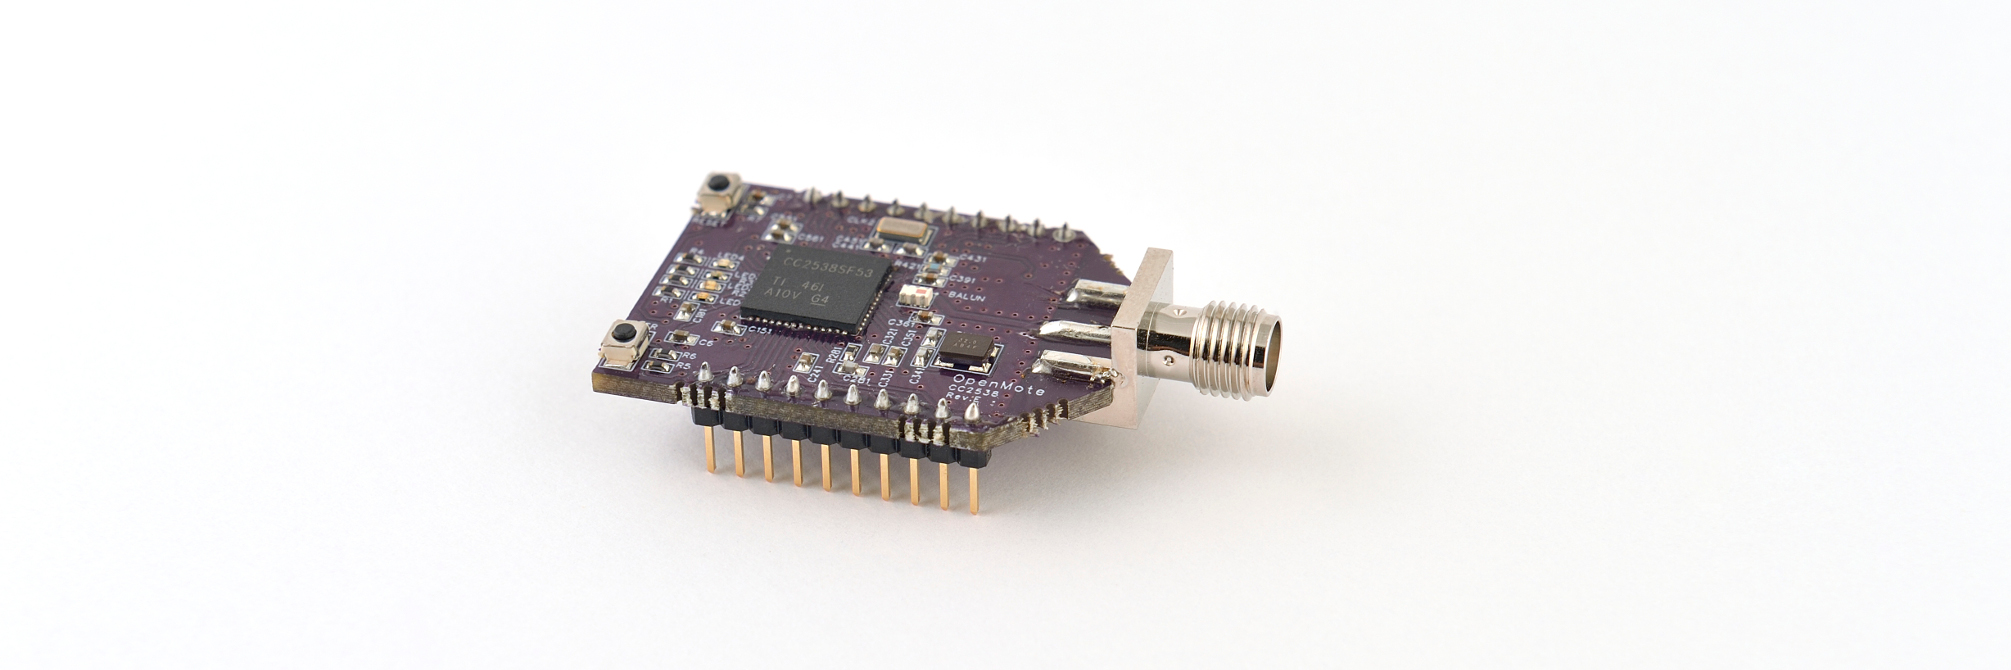
The OpenMote platform consists on:
- OpenMote-CC2538: which uses SoC TI format for Cortex-M3 and CC2520. This SoC can support Contiki, OpenWSN (which is also the protocol we are going to explain later in this post) and FreeRTOS.
- OpenBase: a plate with different ports such as Ethernet, USB and JTAG.
- OpenBattery: also a plate with 3 digital sensors and batteries. Its operation is autonomous.
Reliable Low Power Wireless OpenMote
The OpenWSN is a collection of different Internet of Things protocols. It counts on the OpenOs, which is a collaborative of OpenWSN, an OpenVisualizer, the visualization program and a Python CoAP library.
The IoT platform
thethings.iO is the IoT platform of the project. It also provides write and read methods. In the first case (ThingWrite), it allows users to collect data in JSON format with POST request at the URL through the CoAP API:
coap://coap.thethings.iO/v2/things/{{THING_TOKEN}}
In the case of the ThingRead, it allows the user to read the data from a resource (KEY) with GET request at the URL:
coap://coap.thethings.iO/v2/things/{{THING_TOKEN}}/resources/{{KEY}}

How to make things work together
The real question in here is how to connect the OpenMote with thethings.iO?
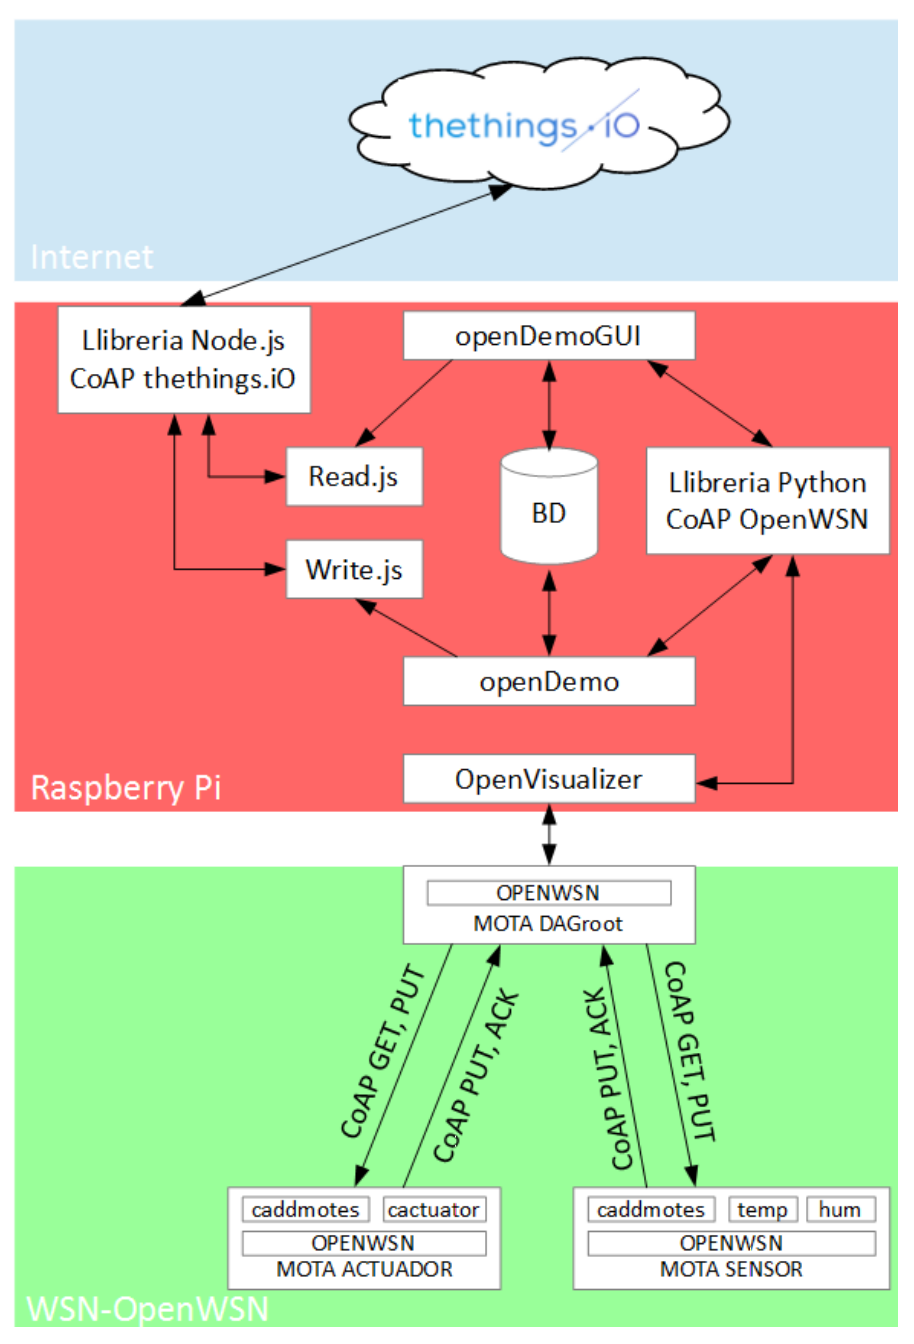
Project’s architecture
The key is the integration of thethings.iO API on the OpenMote implementation with the Raspberry Pi. Let’s explain the two basic functions of thethings.iO that enables the thermostat to read data and write sensor’s data from and to thethings.iO.
First of all, the thermostat wants to send new data from its sensors (temperature, humidity, etc). How do we do it? Remember that we have to consider that the OpenMote is connected to a Raspberry Pi through a TCP socket. That means that thethings.iO as the IoT platform receives the data through CoAP from the Raspberry Pi thread that listens the TCP socket from the OpenMote.
Once they are connected one to each other, the client sends the Raspberry Pi process the data. All this data collected is sent by the Raspberry Pi to thethings.iO IoT platform using a CoAP POST request. thethings.iO gives an answer which can be “Success” or “Error”. Finally, when the OpenMote receives the answer, the connection ends.
The reading operation from thethings.iO is similar, the OpenMote tries to establish a socket connection with the Raspberry Pi, and the Raspberry Pi sends a request of polling to thethings.iO. Once they are connected to eachother, the client sends a request to read its data to the server. All the data is requested to thethings.iO by the server using a CoAP GET request. Then, thethings.iO sends the answer to the Raspberry Pi, giving a “Success” with the JSON, which is translated in sending all the data requested, or an “Error”.
If you want to know more about Roberto Romero’s project (in catalan) and the public code on Roberto’s github account.
And if you want to start connecting things with thethings.iO you can register here.