thethings.iO library for Electric Imp

We love Electric Imp, its simplicity and how it works. This is the reason why this is the very first tutorial explaining with detail how to connect Electric Imp with thethings.iO. The ElectricImp + thethings.iO library that we implemented let you read, write and activate things through the REST API from thethings.iO.
From now if you need to store data from your Electric Imps you will be able to use our Electric Imp class to access the thethings.iO services.
Electric Imp board
Keep reading if you want more information about the Electric Imp + thethings.iO library…
![]()
The Electric Imp
The Electric Imp is a WiFi enabled development platform powered by a Cortex-M3 processor core embedded into an SD card package. In essence, the Imp provides an easy, integrated way to connect almost any hardware device both to other devices and to internet services. It is an integrated platform that deals with the drudgery of connectivity, allowing you to concentrate on the application instead of the mechanics.
Every Electric Imp boards or “device” are equipped with its own unique “agent” that is a fully programmable cloud-hosted micro-server dedicated to supporting the hardware device. The agent is the device’s personal assistant and gatekeeper rolled into one. The agent manages communication with the wider Internet (it speaks HTTP and HTTPS). As a security guard, the agent protects the device from harm. It authenticates every request using your preferred technology, secures the data passing to and from the device, and shields your product from attacks.
thethings.iO class for Electric Imp
The Electric Imp class “TheThingsAPI” allows you to access the most common services of the thethings.iO cloud. This object uses the REST API of the thethings.iO which you can consult for further reference.
In this post, we will explain how to use it through a simple example. Please notice that, this tutorial assumes basic programing knowledge with Electric Imp.
Circuit design
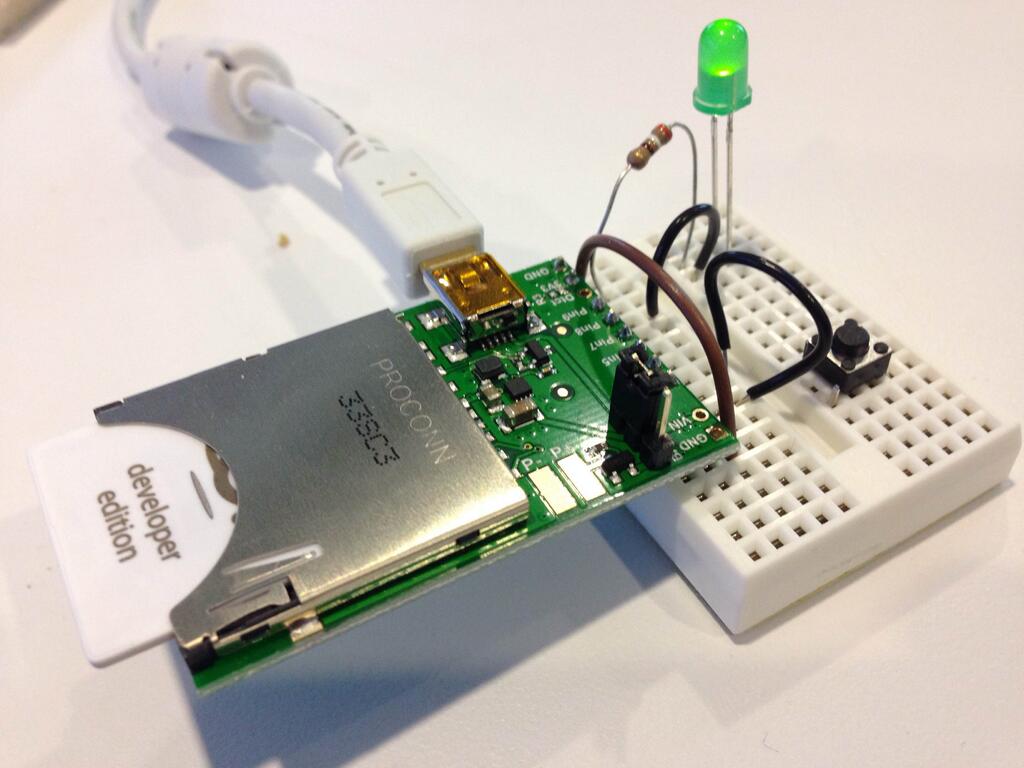
To show its behaviour, we have attached a button (with a pull down resistor) and a led to an Electric Imp board as shown in the following scheme:

Our scheme on Electric Imp
Every time the button is pressed, the program will write the current number of pulsations to the thethings.iO cloud.
Also, the Electric Imp agent will retrieve this number from the cloud every 5 seconds and will turn on the led if the value it’s an pair number or off if it’s an odd number.
The following code fragments configure the behaviour just described.
This is the code running on the device (Electric Imp).
// Configure button and led

button = Button(hardware.pin9, DIGITAL_IN, Button.NORMALLY_LOW);
ledRead = hardware.pin7;
ledRead.configure(DIGITAL_OUT, 0);

// Callback function for button, just call agent.
button.onPress(function() {
    agent.send("button", true);
});

// Register agent's callback function to turn on and off the led
agent.on("ledReadOnOff", ledReadOnOff)
This is the code running on the Agent (Electric Imp)
// Main loop. Read every 5 secons the theThings.iO cloud
// and turn on or off the led.

function loop() {
    imp.wakeup(5, loop); // Check every 5 seconds
    local data = /* TODO: read the numClicks value */

    // If the number of clicks is multiple of 2,
    // turn on the led. if not, turn it off.

    if (data[0].value%2 == 0) {
        device.send("ledReadOnOff", 1)
    } else {
        device.send("ledReadOnOff", 0)
    }
}

function button(state) {
    numClicks++;
    /* TODO: write the numClicks to theThings.iO */
}

numClicks = 0; // Initialize number of clicks.
device.on("button", button);// Register "button" function.

loop(); // call main loop to read the theThings.iO cloud
Create the thing’s object to access the theThings.iO services.
![]()
To create your thing’s object it’s possible to use an already activated thing or activate a new one. A thing is identified by its unique token. With the thing token we can access the cloud’s services. To get the token we have to activate the thing. The activation can be done through the thethings.iO web site, this class or directly using the REST API. To activate a thing we need the activation code which can be obtained from the thethings.iO web site. The activation of a thing only needs to be done once per thing.
The activation of a new thing can be automatically done after declaring a TheThingsAPI object without arguments and calling the object’s activate function afterwards:
tt = TheThingsAPI();

tt.activate("YourActivationCodeHere");

token = tt.getToken();
server.log ( "Thing token: " + token );
To declare an already activated object use instead:
tt = TheThingsAPI("YourThingTokenHere");
First, the value is queued to be sent:
tt.addVar("button", numClicks);
Notice that numClicks is named as “button” in the cloud, but any name could be used here.
The addVar function can be called any number of times to add more values.
Also, It’s optional to add a geographical location or a custom timestamp bounded to a specific value. Calling addGeo(lat, long) or addTimeStamp(time) just after adding a specific value with addVar will do so respectively. A default time stamp will be added if anyone has been specified.
Finally, the value(s) are written:
tt.write();
From now on, the queue has been flushed and it’s possible to start again.
Read from the cloud
To read the “button” last value, just call:
local data = tt.read("button");
The variable “data” is an array with just one position. The desired values are organized into an structure:
- data[0].value: Actual value of the retrieved variable.
- data[0].datetime: TimeStamp
- data[0].geo.lat and data[0].geo.long (optional): geographic coordinates of the value if specified when wrote.
Therefore, the wanted value is found into data[0].value.
It’s also possible to retrieve up to 100 of values in one call. Additionally, the query can be delimited between dates. The date is specified as “YYYYMMDDHHmmss”. In the following example, 5 values are retrieved starting from 19/05/2015, 8:30:00 to 19/05/2015, 15:30:00.
local data = tt.read("button", 5, "20150519083000", "20150519153000");

local i;
for (i = 0; i < data.len(); i++) {
    server.log("Data value " + i + ": " + data[i].value + " Data time: " + data[i].datetime);
}
Currently it’s not possible to subscribe a thing using Electric Imp due a problem regarding how Electric Imp and thethings.iO manage TCP connections.
If you are connecting your devices to the Internet with Electric Imp and need to store real-time data, don’t doubt to use thethings.iO cloud solution.
Let us know what are you connecting with ElectricImp + thethings.iO