Connecting the SmartEverything to thethings.iO with Sigfox
In today’s post we are going to show you Step by Step how to connect the SmartEverything board to thethings.iO with SigFox technology. If you need to visualize Sigfox data through an IoT dashboard or analytics you can use thethings.iO.
During this tutorial you will need:
- A SmartEverything board.
- A button (optional)
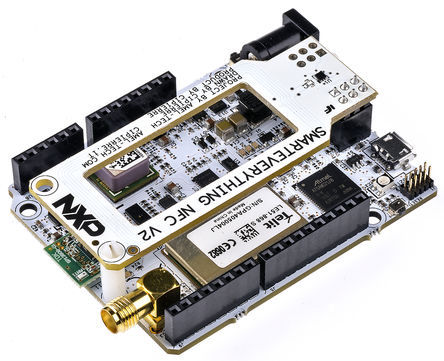
Smart Everything shield
Now, make sure you have an account at thethings.iO. If not, register quickly by clicking here.
Once you have done this, you can start with this Step by Step.
Step 1: Preparing the environment
First you need the Arduino software installed. After that, open the Arduino IDE and go to Tools > Boards Manager. On the search box, search and install the Arduino Zero core and the AMEL-Tech Boards.
Now, select the Smart Everything FOX (Native USB) board at Tools > Boards > Smart Everything FOX (Native USB).

You will need to install 3 libraries, go to Sketch > Include Library > Manage Libraries and search and install the next libraries: SE868 (for the gps), HTS221 (for the temperature and humidity) and LSM9DS1 (for the 3d accelerometer).
If you want to use the other sensors, you can find the list of the libraries at https://github.com/ameltech.

Step 2: Sending Values
Now, it is time to code the board! Go to our github example, copy the code and paste it into a new sketch.

Then click on upload in order to install the code on the board.
Consider reading our previous post about connect Sigfox to the IoT platform thethings.iO before step 3-4. It contains a video showing those steps.
Step 3: Connecting Sigfox to thethings.iO
In order to receive the data from Sigfox, you’ll need to redirect all the messages using a callback from our Sigfox profile. You’ll need to configure our thethings.io profile for this:
- Navigate to Things Manager
- Create a new IoT product: Insert your product name, select the Smart Everything board and the Sigfox format.

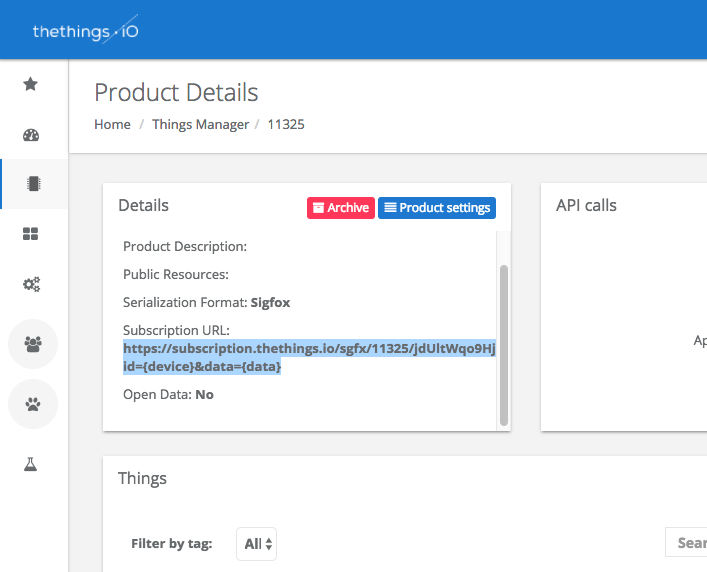
- Go to the product page by clicking to the created product at the products list.
- At the top left, there is a details box with a Subscription URL that we will have to copy.
- Navigate to the Sigfox backend webpage to activate the smarteverything board by selecting the smarteverything and the network. Next, fill out the form with the Sigfox ID and the PAC. You will find both at the back of your device. Last but not least, you will have to fill out the registration form so you will be able to access the Sigfox backend with your own email and password.
- Log in and go to Device. You will see a list of your devices. Select the one that you have just added, take a look at the sidebar and click on Callbacks.
- Click New (placed Top-Right)
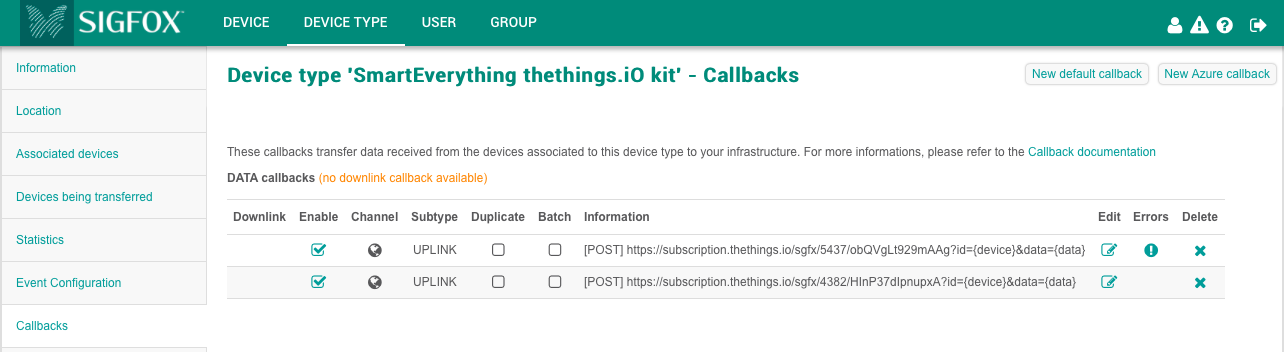
- Choose the following configuration:
- Type: DATA UP-LINK.
- Channel: URL.
- Url pattern: Paste your previous subscription URL from thethings.iO.
- Use HTTP method: POST and click Ok.


Step 4: Parsing data from Sigfox
Now go to thethings.iO IoT platform and you will need to specify how to parse the data that Sigfox forwards to thethings.iO, in order to display the correct values:
- Go to Cloud Code
- Navigate to Functions and Edit the parser with the name that you gave before.
- Parse your resources by splitting the string that Sigfox sends (An hexadecimal number containing all the sensor values, one after the other).
- In the preview input, copy the sigfox payload that you send from Sigfox and change “quote” to “data” to prove your function.
You can find the parser code here.
Step 5: Creating the dashboard Widgets
It’s time to create an IoT Dashboard with thethings.iO to show all the values of your sensors!
- Click on Add widget.
- Introduce a name for the widget.
- Select Thing Resource.
- Select Sigfox.
- Select your thing Token.

- Select the resource that you want to show.
- Select how you want to show your resource (Lines, bars, log…)
Repeat this process until you finish your awesome IoT Dashboard!

And that’s it! Isn’t it easy? Connect Sigfox devices from now with thethings.iO and get cool customizable IoT Dashboards as the one we have shown you here.
And do not forget to follow us on Twitter in order to keep you posted about the IoT World and the latest news of thethings.iO.