Posts

4 Steps to Build Your IoT Dashboard

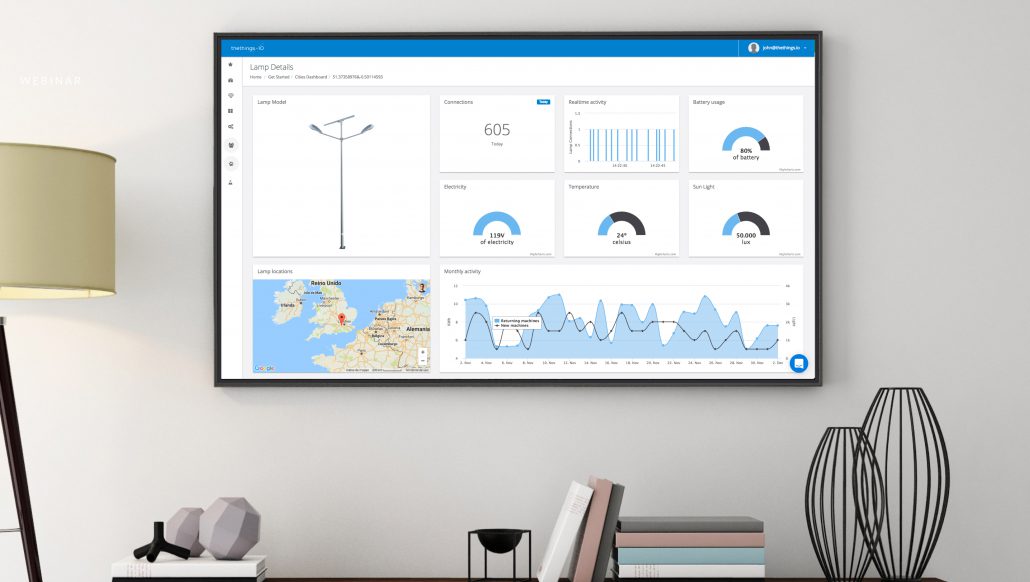
As you know, thethings.iO is the Internet of Things platform that allows you to connect things to the Internet quickly and easily. We allow you to monitor and manage your networked devices in real-time and get flexible analytics reports. And the product goes further, as you will see in this post about the IoT Dashboard that we deployed some weeks ago.
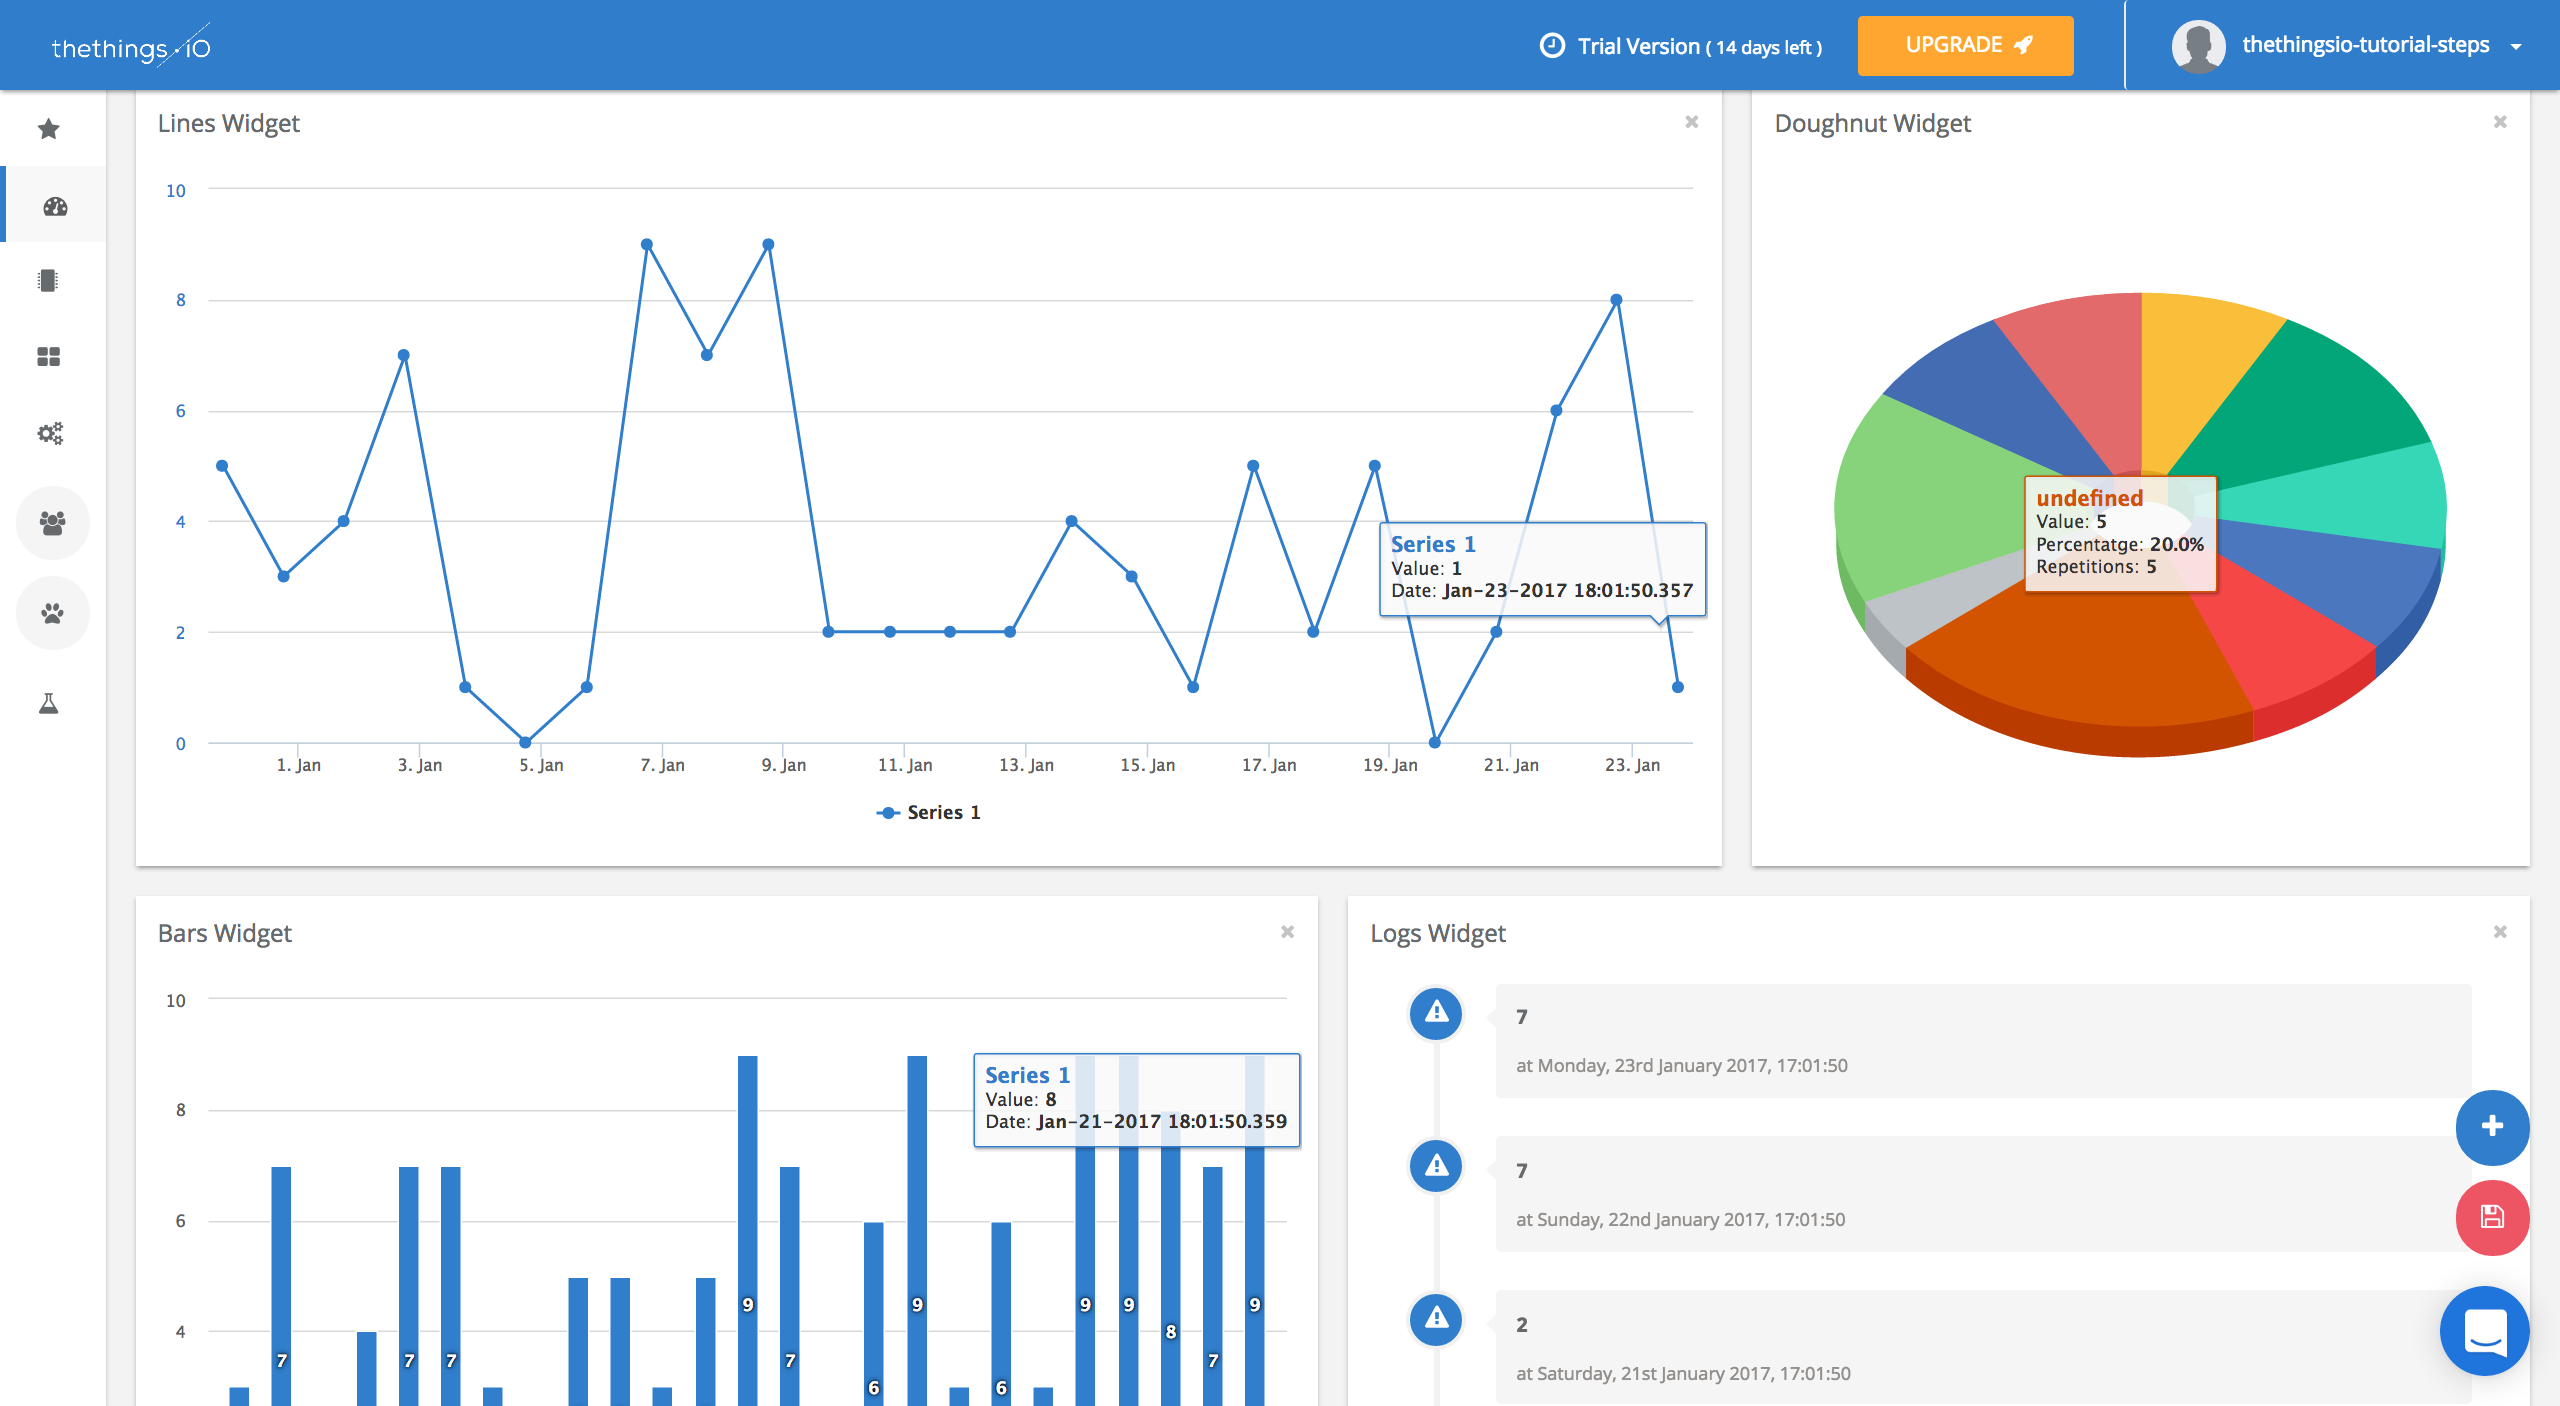
thethingsio-dashboard
This is a quick tutorial of how to build your IoT dashboard and also how to customize it in order to make it more “yours”.

Step 0: Sign Up or Log In at thethings.iO

The first thing you need to do is, in case you have not registered yet, create a new account and Sign Up to our platform. Otherwise, if you already have an account, you just need to Log In to move to your IoT Dashboard.

Primarily you’ll notice that when you first access to your IoT Dashboard, a new window appears to introduce yourself to the platform and specifically, to the IoT Dashboard. The message is the following one:

hello-dashboard
>

Step 1: Starting with thethings.iO IoT Dashboard

The IoT Dashboard is the place at thethings.iO where all the data generated by your things will be displayed. Depending on which kind of information you want to see you may prefer one widget or another. Before start building your IoT Dashboard you should have at least one thing connected using our platform. If you want to start connecting things fast, you should not miss this quick guide of how to connect your first thing in 1 minute! Why? Because you need data to display!

Once you have done that, we can move to the option “Edit Dashboard”, on the lower right section of your screen. The icon is yellow and this tool is the one we are going to use most during this post, so keep an eye on it!

Step 2: Create a Widget

Above the yellow “Edit Dashboard” there is a a blue “Add Widget” icon. So now we are going to click on it and a pop-up you will have to work with will appear. Your screen should look like this:

add-widget

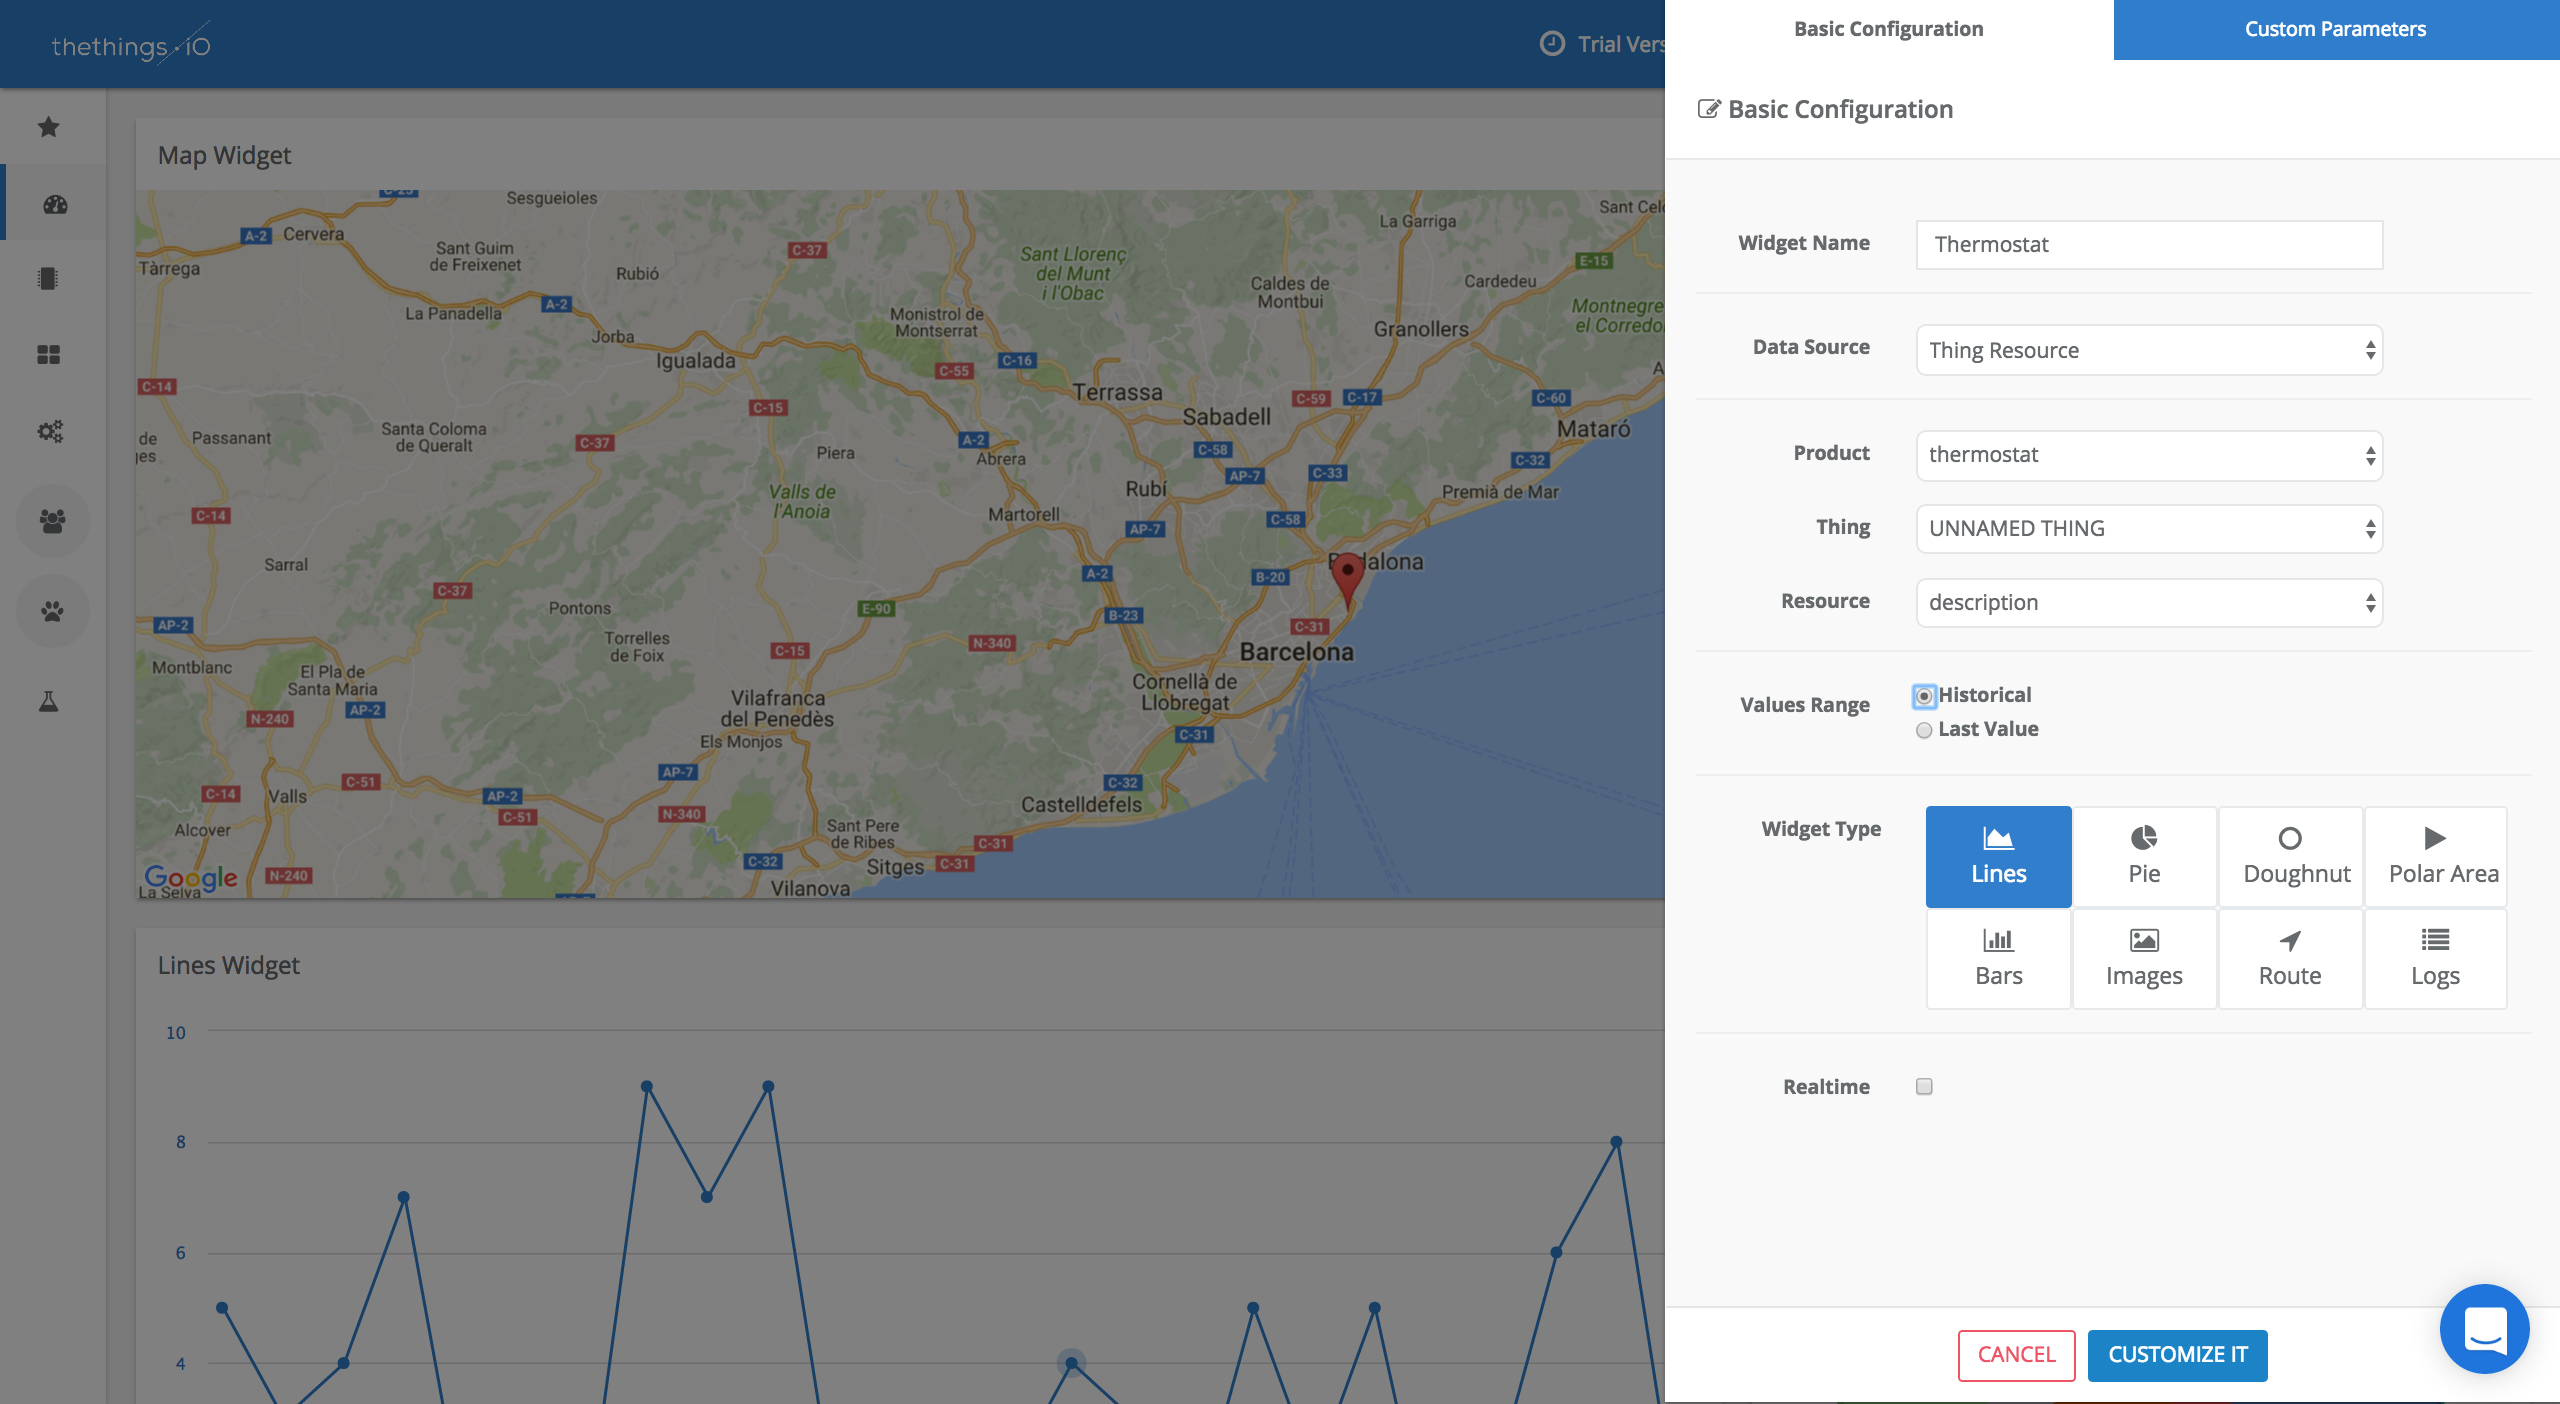
The only thing you need to do now is to complete the fields that appear in this pop-up, such as we have done in the following example:

add-widget-2

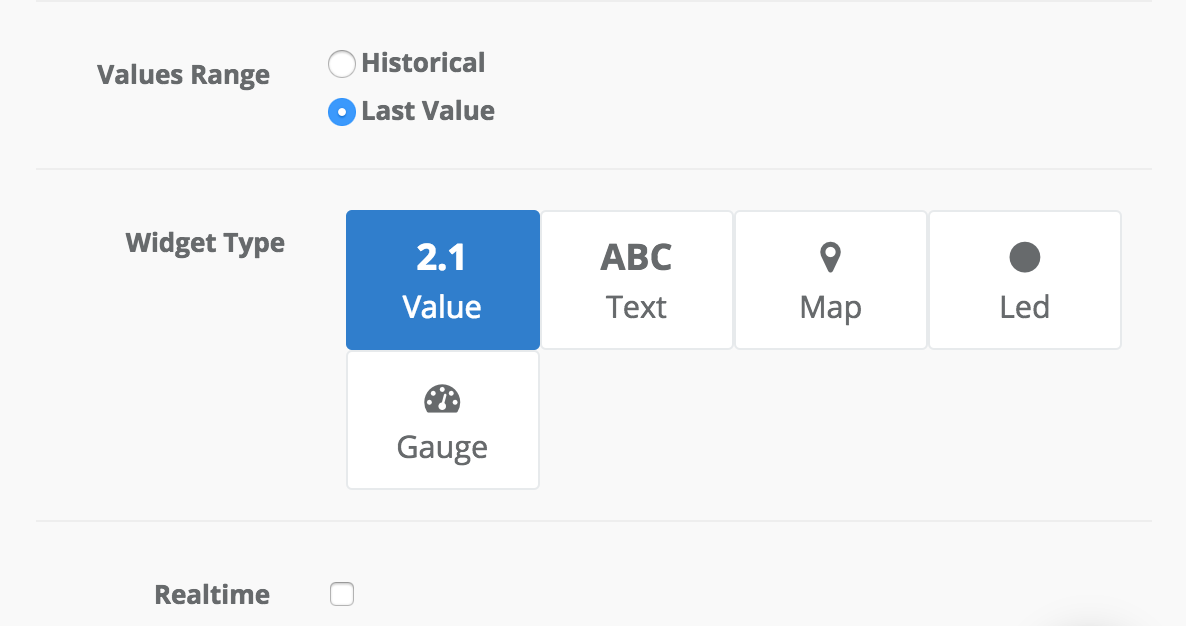
At this point, you can choose the kind of widget you want your data to be displayed on your IoT Dashboard. You have different options, such as:

  • Map
  • Doughnut
  • Lines
  • Bars
  • Logs
  • Value
  • Pie
  • Polar Area

Depending on the option you choose in “Values Range” you’ll find one or the other.

Screen Shot 2017-01-25 at 3.30.56 PM


Finally, you can add your new widget to your IoT Dashboard.

Step 3: Customize your IoT Dashboard

One of the coolest things you can do with your IoT Dashboard is to add, remove and replace your widgets easily. To do it you just need to click on “Edit Dashboard” again and just touch one of the widgets. Now you can change its place just moving it, change its size, and also the kind of widget you want it to be!

Look the changes we have done in our example screen:

drag-drop-widgets


Once you finish editing your IoT Dashboard do not forget to save it!

Step 4: Create an Image

You may think that’s all we can offer, but right now we do offer more! Now you can add images to your IoT Dashboard. How?

  1. Go to Edit Dashboard button and Add Widget.
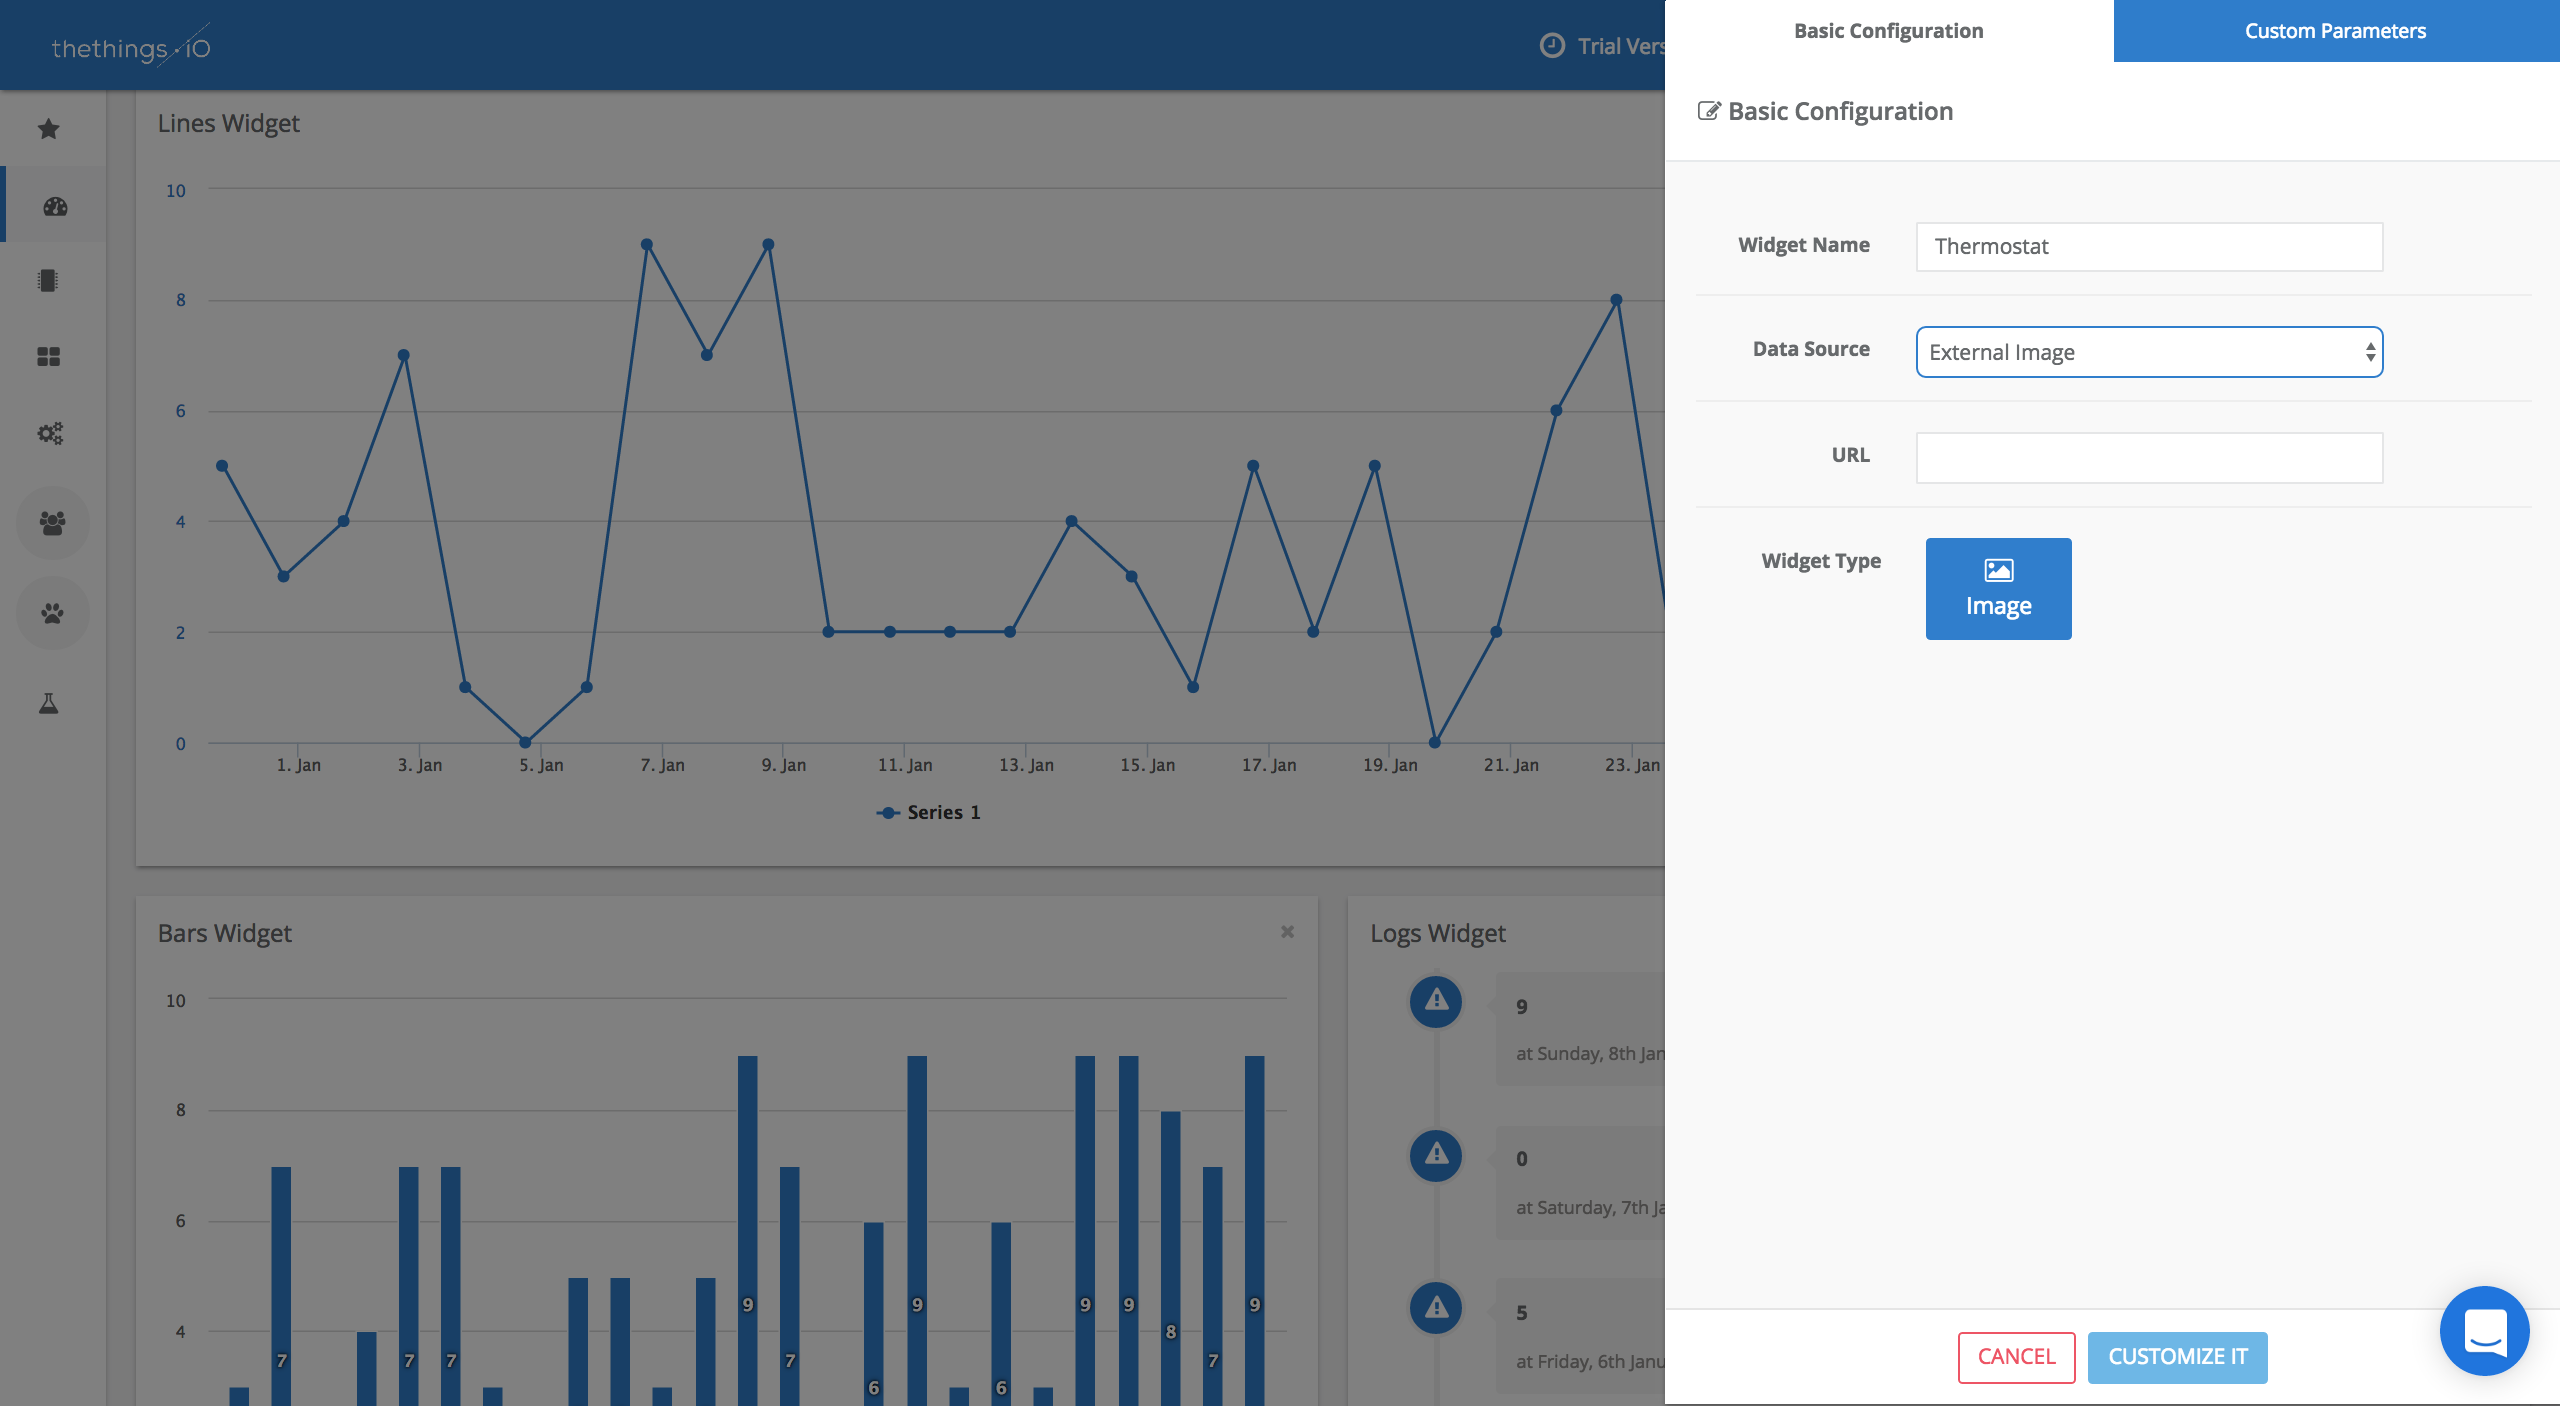
  2. Once you are in the pop-up window, in the “Data Source” field you have to choose the option “External Image”. Here you will be able to add images from your computer or directly from an URL.

widget.extrenalimage

3. Add your Widget to your IoT Dashboard.

Step By Step Video Tutorial

You can also check these 2 tutorials in which we explain how to build and customize your IoT dashboard. In this case we use a Thermostat we’ve recently connected to thethings.iO to show you how it works.

And that’s it. Isn’t it easy? Start connecting things now with thethings.iO and get cool customizable IoT Dashboards as the one we have shown you here.
And do not forget to follow us on Twitter in order to keep you posted about the IoT World and the latest news of thethings.iO.
Quick Guide to Cloud Code

As you know, Internet of Things is the next big thing. Considered the fourth biggest revolution (as important as the industrial and the Internet ones), all the machines connected to the Internet are saving huge amounts of data. But data on its own form does not matter. What is really important is the information we can get from it and services that you can build on top of the information. Here is where thethings.iO can help you make IoT simple!

Cloud Code

Welcome to the new Cloud Code feature. The business logic could not be in your things or Apps but in the Cloud. thethings.iO Cloud Code feature transforms the data from your connected things into information that will be useful to your daily activities.

Nowadays, the Cloud Code is a Javascript runtime programmable tool that enables you to program business logics, artificial intelligence algorithms or others on the top of the data stored. We can find 3 different categories: triggers, jobs and functions. Let’s talk a little bit more about each one. In the future we are going to integrate other languages such as Python, GO or others. What languages would you like to have?

Triggers

Firstly, we find Triggers. A trigger is a piece of code that is executed automatically on our Cloud, after a write command is received. That means that every time a temperature sensor sends the temperature, a trigger is launched in order to convert that data into celsius degrees or launch an alarm if the temperature goes below zero.

A typical use of a trigger is to create an alert. You can code the trigger in a way that when an alert condition happens, you can send an email, send an SMS and make a call with Twilio or tweet a message. And of course, store an event to build reports later. The execution of a trigger is limited to 2 seconds.

Following the previous example, if you have a temperature sensor you can build a Javascript code with the logics of the trigger to alert you when the temperature is higher than X value. When it happens, a message is sent (SMS, e-mail or tweet) to your smartphone or tablet to notify you about the condition. Additionally, if you store an event, later via Jobs, you can generate a report that shows how many times in one day this event get triggered.

Jobs

The Jobs is Javascript code that can be executed once every hour or once a day. The Jobs allow you to set up long running tasks. The execution of a job is limited to 10 minutes. Jobs lets you create map-reduce functions, reports and analytics aggregating the data from the events that your triggers or functions generate.

Current examples of the Jobs are related with mathematical functions or artificial intelligence and predictive maintenance scenarios. For example, a job synchronized with a trigger can help you to predict malfunctions every hour. Another example is a Job that analyzes how your customers use their devices and sends a daily report to the marketing people of your company.

Functions

Finally, we have Functions. Functions are algorithms that could be executed when they are needed. Functions can be called by triggers or jobs and even from outside thethings.iO via an API REST endpoint. Jobs encapsulate business logic that you don’t want to couple into a trigger or a job and of course not into the devices or mobile apps. The execution of a Function is limited to 20 seconds.

If you are using Sigfox, the functions are the place where you need to code the Sigfox payload parser in order to visualize the Sigfox data at thethings.iO.

All Cloud Code plugins

These are thethings.iO Cloud Code plugins:

  • emailing: it sends emails.
  • httpRequest: it sends an http request.
  • console: logs in your code.
  • analytics.events: allows to create and retrieve events.
  • analytics.kpis: to create metrics to be displayed on your dashboard.
  • thethingsAPI: allows to read and write on a device resource.
  • DataSet: represents the data returned from analytics.events.getByName.
  • Twilio: it sends SMS or phone calls. In case you missed it, read the post about Twilio here.
  • Geolib: Integrates Geolib library to provide basic geospatial operations like distance calculation, conversion of decimal coordinates to sexagesimal and vice versa, etc.
  • Twitter.

You can find more information on thethings.iO documentation site.

Know how our Cloud Code works

Do you want to see how it works? Discover how easy it is to use thethings.iO’s Cloud Code! We have created a thing which measures temperature. The next screenshot shows how our Dashboard looks like, with the ‘Thermostat Alerts’ graphic.

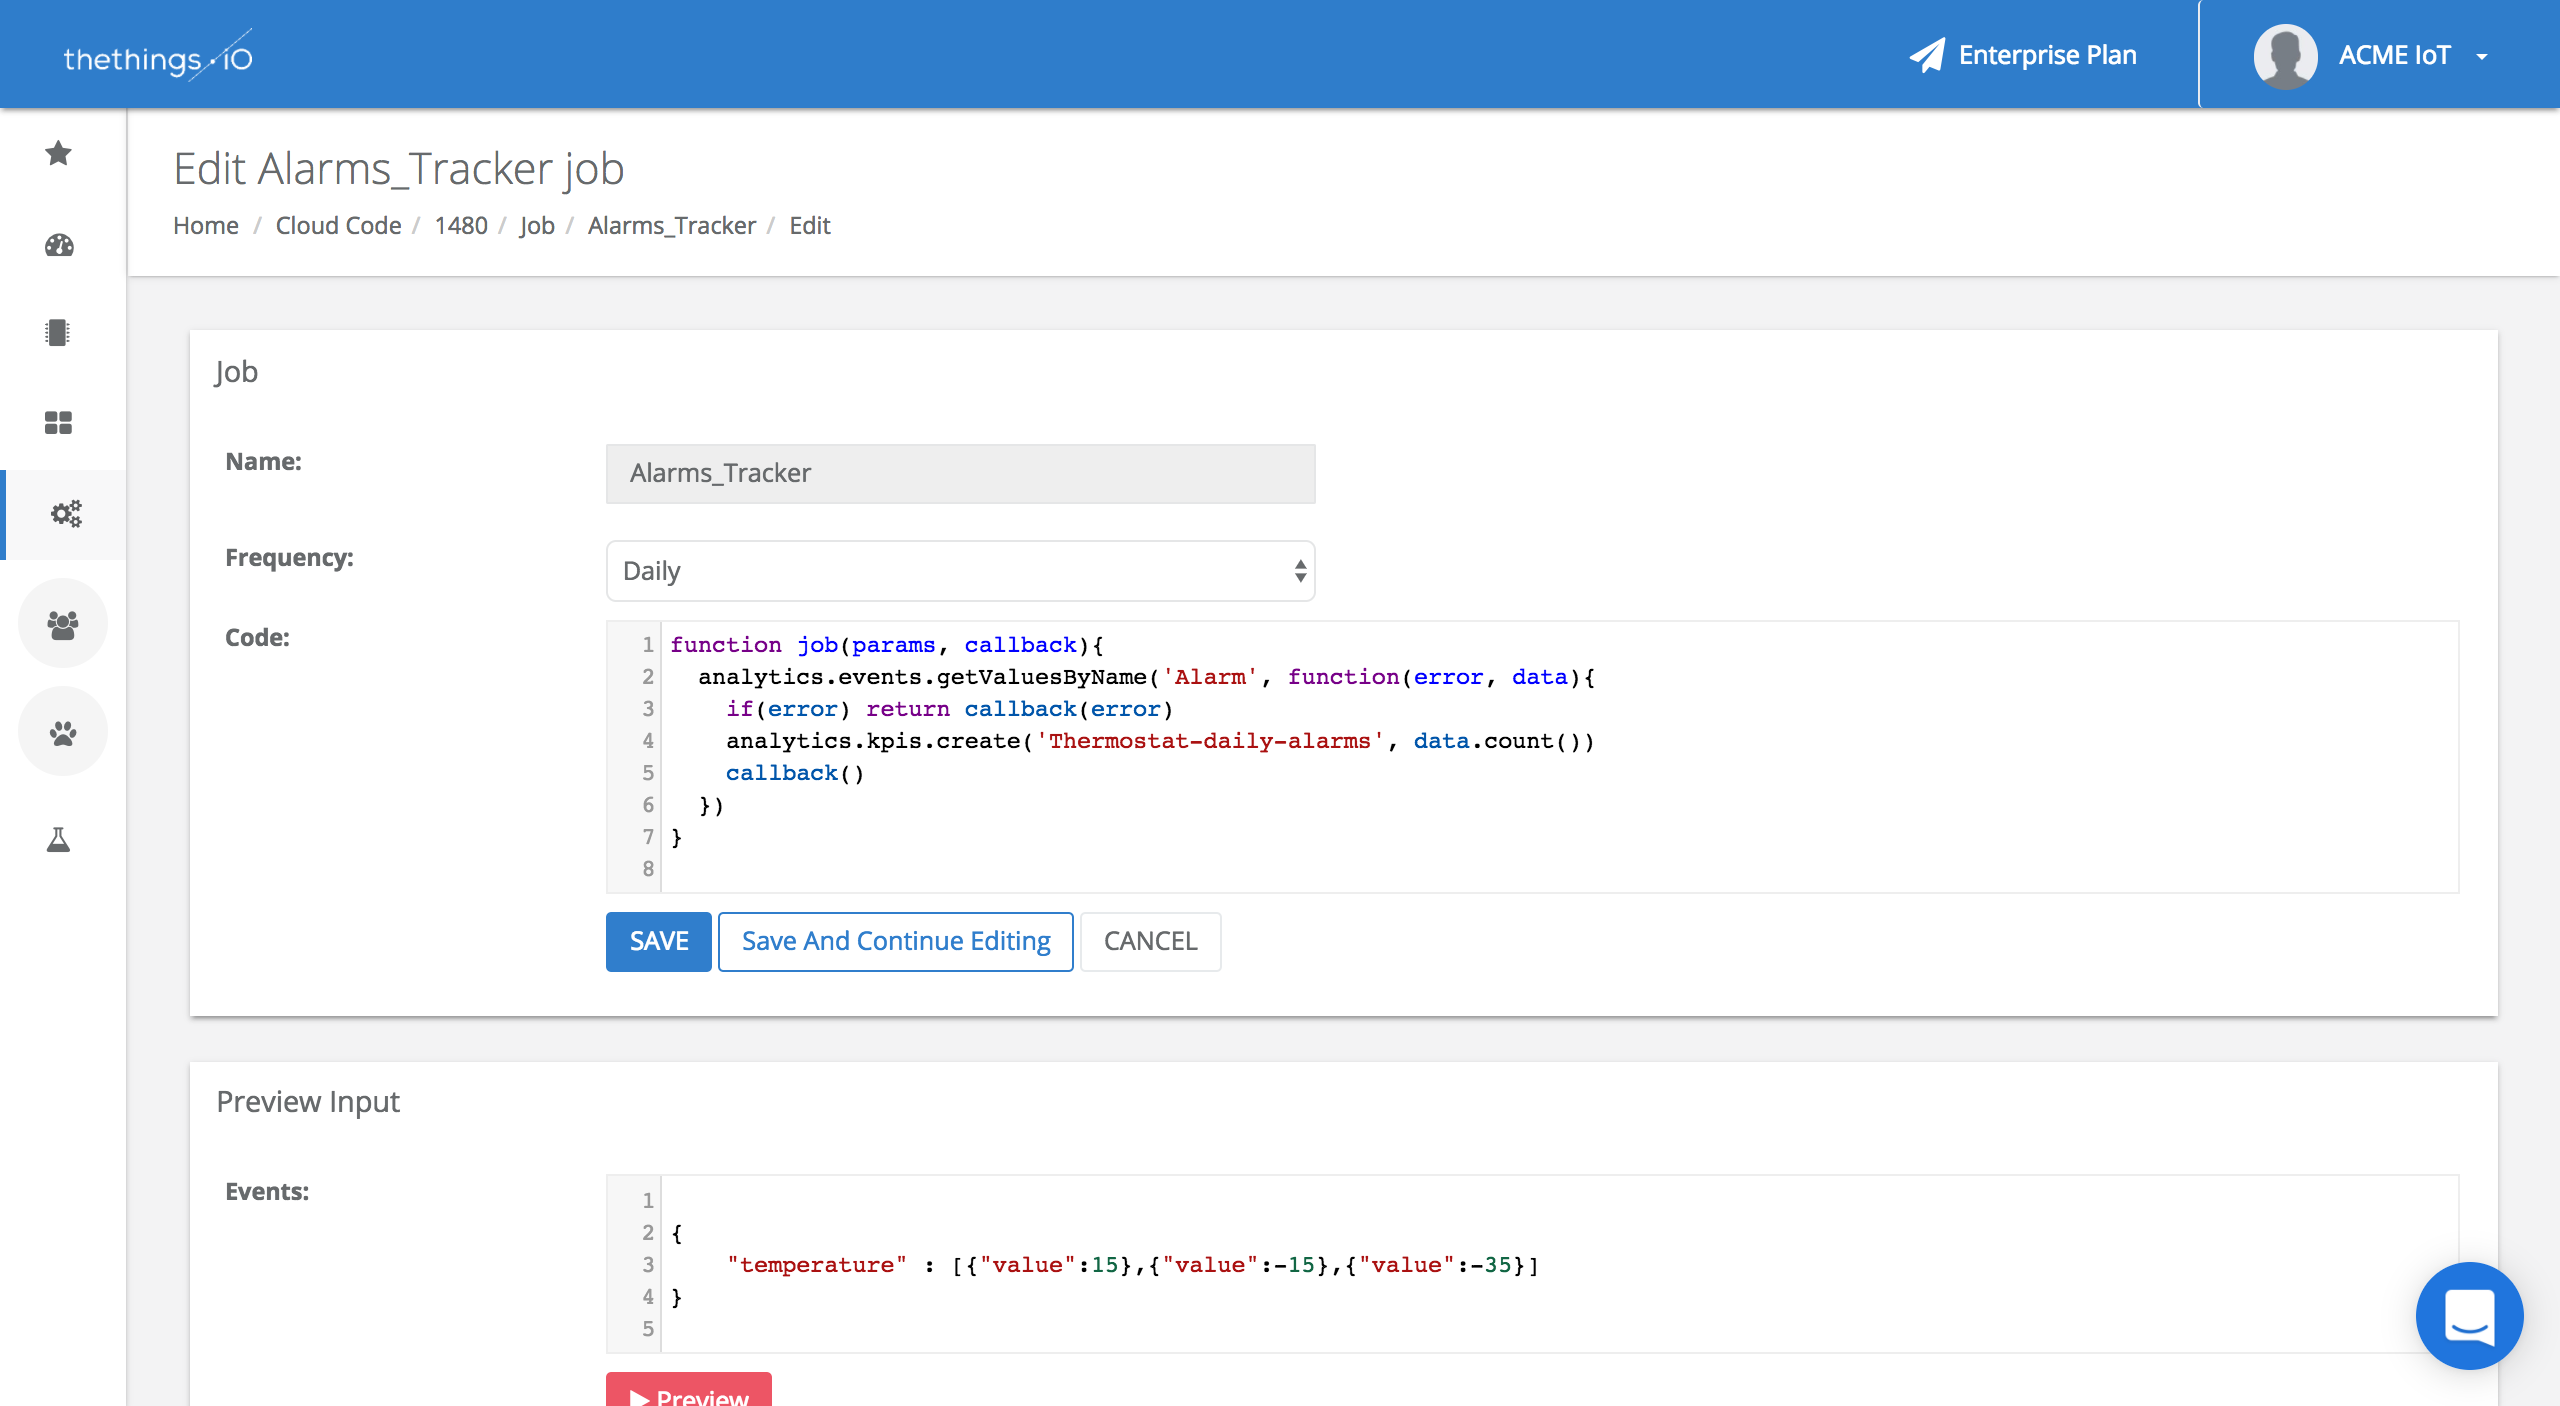
In this second screenshot, we see the Job code. In this case, the job get all the Alarm events of the day and store a KPI with the total events. This KPI is consumed by the dashboard widget ‘Thermostat Alerts’ to generate the graphic.

And finally, we see the screenshot of the Trigger code. In this case, we wanted to be notified with an alarm in case the sensor gets a temperature of 50ºC or above. We also store the event ‘Alarm’, which is later consumed by the previous Job.

If you want to learn more about thethings.iO features then you can not miss these posts about Twilio and Sigfox! And make sure you follow us on Twitter to keep you posted about the Internet of Things world and thethings.iO latest news!

Keep IoT Simple, Stupid!

Innovation brings enthusiasm when you are making a product. Launching a connected device is hard and expensive. 2015 has been amazing at thethings.iO; we worked together with great projects and awesome people. The most valuable thing we discovered is that things must be more simple, from the UX to the most technological part of the projects.

Inspired by the KISS principle (“Keep It Simple, Stupid”), thethings.iO would like to advocate towards the “Keep IoT Simple, Stupid”!

The “Keep It Simple, Stupid” principle states that the most basic rule in every design is to make it simple rather than complex. That means that simplicity should be more important in design and unnecessary complexity should be avoided. The Internet of Things is a complex scenario and simplicity is much needed, so unnecessary complexity shouldn’t be made.

At thethings.iO IoT platform we have grasped this concept in the essence of our system. Among the connected product and the mobile application, there are hundreds of things to worry about: electronics, mechanicals, manufacturing, packaging, logistics, data security, cloud storage, mobile applications, interoperability with other things, among dozens more.

Simply put the “Keep IoT Simple, Stupid” principle in your project. We suggest that companies focus on what they do best. Some companies are very good at design, other very good with electronics and others with algorithms. How can they bring a connected device into the market faster? The answer is by looking for partners who can make the process less complex. The best projects we worked on 2015 were projects where the consortium of companies that joined the founder team was fantastic. Don’t waste your time and money reinventing the wheel! It’s 2016!

Everyday it becomes easier and easier to connect things to the Internet. This is the main reason why the number of companies building new connected devices in China, Europe, United States or Latam has been on the rise. So, “Keep IoT Simple, Stupid”!

What is thethings.iO’s main role here?

thethings.iO IoT platform

thethings.iO IoT platform

Under this concept of keeping things simple, thethings.iO IoT platform wants to offer a solution to all IoT and digital companies, helping them into the connection, storage, monitoring and data analysis of their cool new devices and products. Outsourcing IoT platform cloud service results in a faster implementation and reduced time to market for the new launches on the IoT landscape. Our advice is to consider taking the “simple, stupid” way to connect your product to IoT: it will be a smart choice.

Hardware companies should focus on building things. At the same time, thethings.iO makes the connectivity development from the prototyping phase until the certification and massive production. thethings.iO offers:

  • IoT Back-End solution to store data that can be accessible in real-time.
  • Customizable front-end user interface with your brand and under your URL.
  • Real-time data analysis with AI and data mining algorithms.
  • Security, Scalability and Data Privacy.
  • Interoperability with the majority of the IoT available.

Yes, it is better when you Keep IoT simple have you not seen it yet?