Create alerts with thethings.iO IoT platform
At thethings.iO IoT platform we love to give power to the IoT developers. This is the reason why since the very beginning we created the Cloud Code framework. The Cloud Code framework enables anyone to apply any algorithm on the top of the data, in real-time, every hour, every day or whenever. Nevertheless, a lot of clients requested a more simple solution to create alerts, set up thresholds, and get e-mails or SMS.

From now, you are ready to create alerts on thethings.iO. Furthermore, any of your clients (with apps or with retailers feature) is going to be able to do it by themselves. That’s awesome right?
How to create an Alert?
Let’s imagine that you want to create an Alert when the temperature is lower than 10. That means that every time the temperature of a device gets lower than 10 you want to send an e-mail to the manager of that device.
Set up the marketplace e-mail system credentials
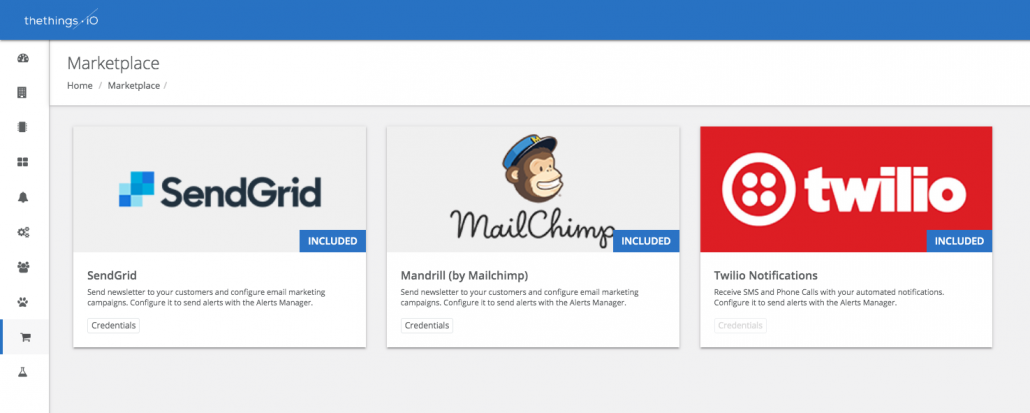
First of all, we need to introduce another new awesome feature of thethings.iO, the Marketplace. The marketplace is a market where you will find all the available integrations with thethings.iO IoT platform. From mailing systems, to SMS integrations or with a ticketing system.

First step to create an Alert is that you need to set up a mailing system. At the moment at the marketplace we support Sendgrid or Mailchimp (in the future we will support more, or contact us in order to integrate more e-mail services). Once the credentials are set up, you are ready to create an alert.
Create the IoT Alert
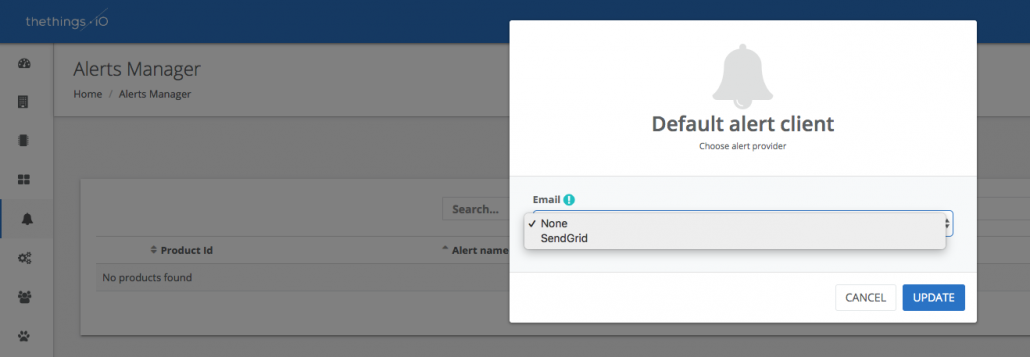
After that go to the Alerts section. Select the e-mail notification system that you are going to use to send e-mails to the people you need to alert.

In this case, we set up Sendgrid credentials, so Sendgrid will be our alerting system client (by e-mail). Take into account that, all the alerts by e-mail will use the same e-mail client.
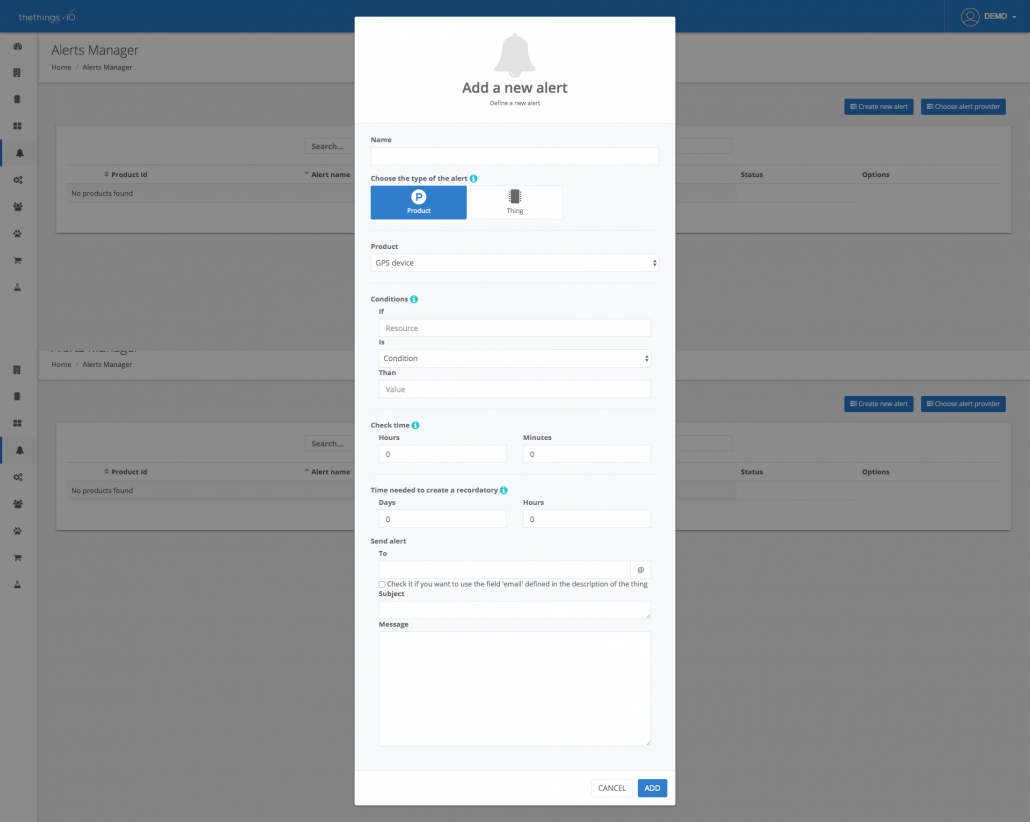
At this point you are ready to add a new Alert. Click the button “Create new Alert” and fill the form.

First you need to define if this alert affects all the Product or just one thing.
In case of a Product Alert, take into account that you will be able to group things for clients. The idea is similar as the tags concept but just for alerts. Then select the Product. After that, it’s time to define the conditions. Remember that you will need to type the resource name (no selector available yet).
The Alerts enable you to define the Check Time of the Alerts. The Check Time means the time that a certain value needs to be out of parameters to generate the first Alert. For example, imagine that the temperature below 10 will launch an alert when during 3 hours the temperature is below 10. If you introduce Zero, it means that the Alert will be activated immediately in real-time.
Then, you will need to introduce the time needed to create a reminder. Once the first Alert gets launched, this time is the time needed to send a reminder if the value is still out of parameters. Zero means no reminder. So, let’s imagine that after launching the first alarm of 3 hours with the temperature below 10, we want to send maximum one message every day.
Finally, you can define the alert that you will send. Choose among e-mail or SMS. In this case you will send an e-mail. Introduce the To, in case there is only one person who is going to receive the e-mail, or check the checkbox in case all your things have the property $settings.email with the e-mail of the manager of each thing. Then introduce a Subject and Body.
That’s how simple is to create an Alert with thethings.iO IoT platform. What do you need more? Just let us know!


