Sigfox IoT Dashboard with thethings.iO IoT platform
In today’s post we are going to show you how to create (step by step) a Sigfox IoT Dashboard with thethings.iO IoT platform. Literally it’s 5 minutes time, no more.

In this example we will use a Sigfox board with temperature and humidity sensors, same as the previous post (Connecting the SmartEverything to thethings.iO). On this video you can see how we do all the process of creating a product on thethings.iO, introduce the callback URL on the Sigfox backend and parsing the Sigfox message at thethings.iO cloud code function plus designing a beautiful dashboard. As said, all in 5 minutes! Watch it on Youtube!
Let’s start the step-by-step Sigfox thethings.iO tutorial
First, make sure you have an account at thethings.iO. If not, register quickly at the free account of thethings.iO by clicking here.
Once you have done this, you can start with this Step by Step tutorial to connect a Sigfox device to an IoT platform.
In order to receive the data from Sigfox, you’ll need to redirect all the messages using a callback URL from our Sigfox profile. You’ll need to configure our thethings.iO IoT profile for this:
- Navigate to the Things Manager (2nd row at the left).
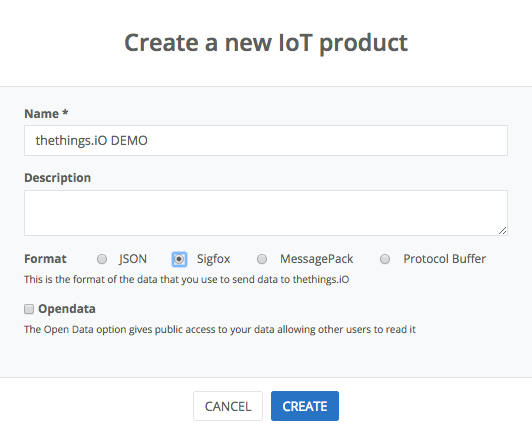
- Create a new product (have in mind that a thethings.iO product is similar than a Sigfox Device Type) : Insert your product name. Choose Sigfox payload Format. Check the image to see how this works.
- Press on the product you have created. Copy the URL in the Product Settings widget that is called Callback URL.
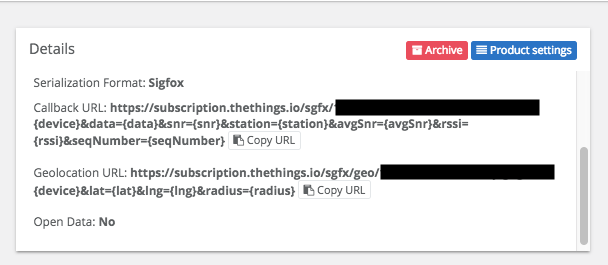
thethings.iO Product Details for Sigfox products
Now lets move to the Sigfox backend:
- Select your DEVICE TYPE on the Sigfox Backend
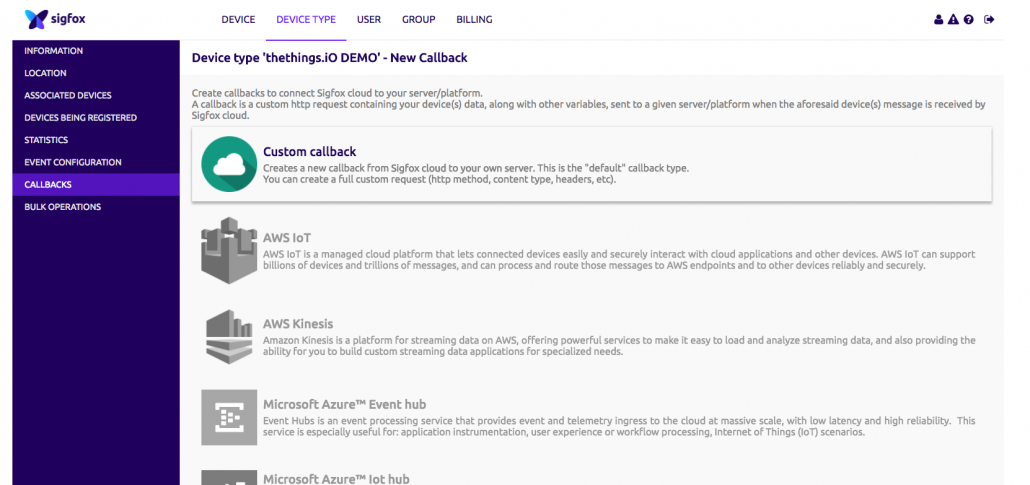
- Click on CALLBACKS on the left menu.
- Click the (tiny) button “New” on the top right.
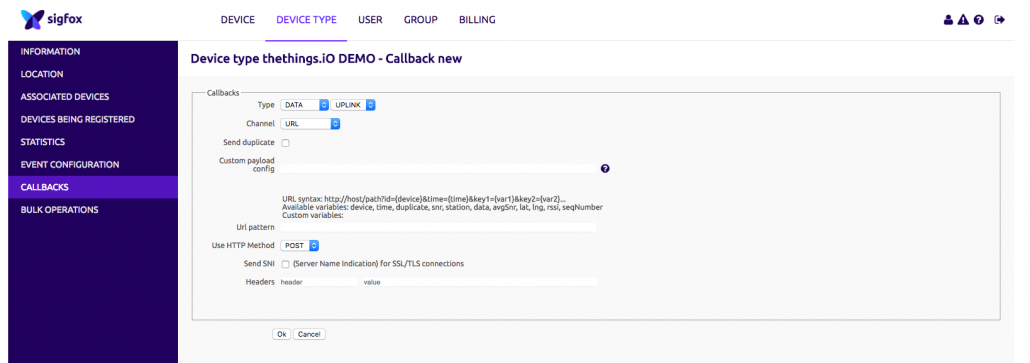
- Choose the following configuration:
- Type: DATA – UP-LINK (or BIDIR if you have bidirectional communication with the device)
- Channel: URL.
- URL pattern: Paste your previous callback URL from thethings.iO.
- Use HTTP method: POST and click Ok.
- Leave body and the other options empty.
Parsing data from Sigfox
Now go to thethings.iO IoT platform and you will need to specify how to parse the data that Sigfox redirects to thethings.iO, in order to display the correct values. At this point thethings.iO is going to collect all the sigfox messages (12 bytes) and provision all the Sigfox devices that you have on your Sigfox account automatically. To parse properly the Sigfox payload, follow these instructions:
- Go to Cloud Code
- Navigate to Functions and Edit the sigfox_parser generated function with the name that you gave to the product.
- Parse your resources by splitting the string that Sigfox sends (generally an hexadecimal number containing all the sensor values, one after the other). In the preview params, copy the Sigfox payload you send from Sigfox and change “quote” to “data” to prove your function.
function parseF(s) { // Use this function in order to patch the GPS data stored as floats in the code
 var a = ((s & 0x7FFFFF | 0x800000) * 1.0 / Math.pow(2,23) * Math.pow(2, ((s>>23 & 0xFF) - 127)));
 if (s >= 2147483647) { //If >= (it's a negative latitude or longitude)
 a =-a;
 }
 return a;
}

function main(params, callback){
 var result = [
 {
 //Replace with your own payload parse
 "key": "temperature",
 "value": parseF(parseInt(params.data.substring(8,16),16))
 },
 {
 "key": "humidity",
 "value": parseF(parseInt(params.data.substring(0,8),16))
 }
 ]
 callback(null, result)
}
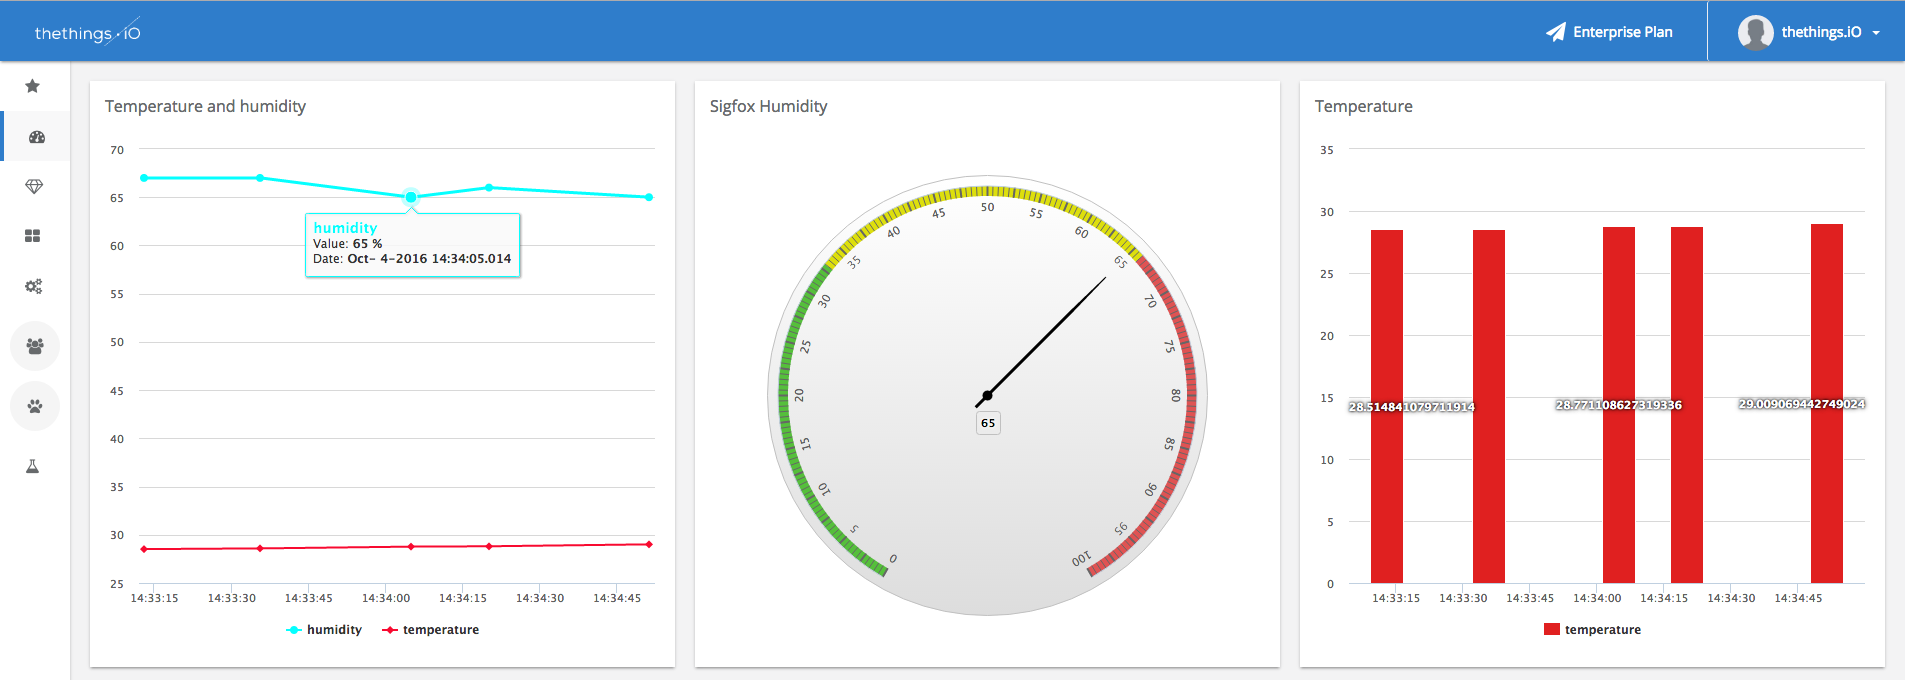
Create an IoT dashboard
It’s time to create an IoT Dashboard with thethings.iO to show all the values of your Sigfox sensors with thethings.iO widgets!
- Go to the Dashboard (1st icon on the left)
- Click on the bottom right cross (+)
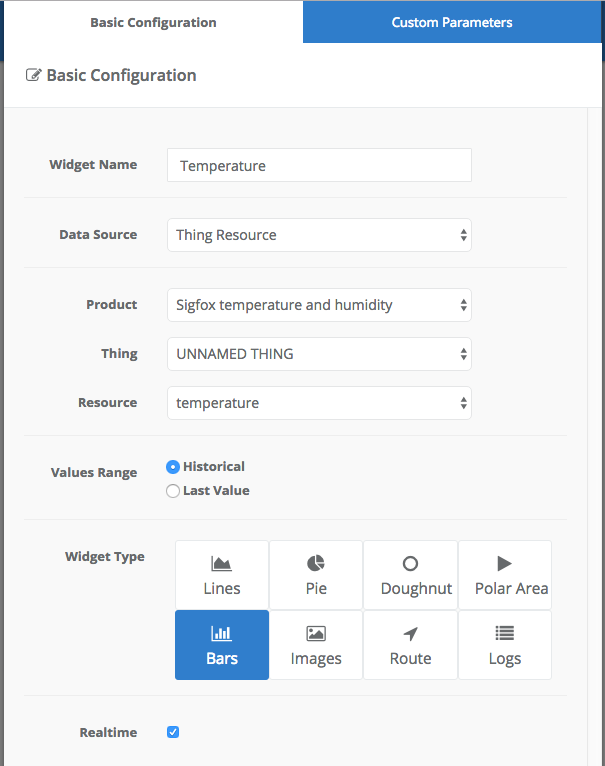
- Introduce a name for the widget.
- Select Thing Resource (for example) as a Data Source.
- Select the name of the product that we created for this Sigfox device.
- Select your thing (automatically they should have the Sigfox ID as name).
- Select the resource that you want to show (the name will be generated by the sigfox_parser function).
- Select how you want to show your resource (Lines, bars, log…) and choose real-time (if you want to see the values updating in real-time). Play with the value inside Custom Parameters.
Repeat this process until you finish your awesome IoT Dashboard!
If you have any question just contact us through the chat and enjoy the most simple Sigfox IoT plaform for your projects.

