Connect KEPServerEx to an IoT platform
Industry is getting into the Internet of Things, some call it Industry 4.0 some other use other names. The hard thing of the industry is that sometimes the companies still use old protocols, legacy machines and systems. The protocol OPC UA (Unified Architecture) is one of the most extended IoT industrial standard for automation. At thethings.iO we want to lead industrial companies to get into the Internet of Things (IoT) and Industry 4.0. This is the reason why we are enabling our industrial customers with IoT gateways and compatibility with existing industrial products such as KEPServerEX, to seamlessly stream real-time industrial data to thethings.iO and apply all the operational tools and Big Data with cloud code and build dashboards and apps for final customers, among other features.

Step 1: Install KEPServerEX
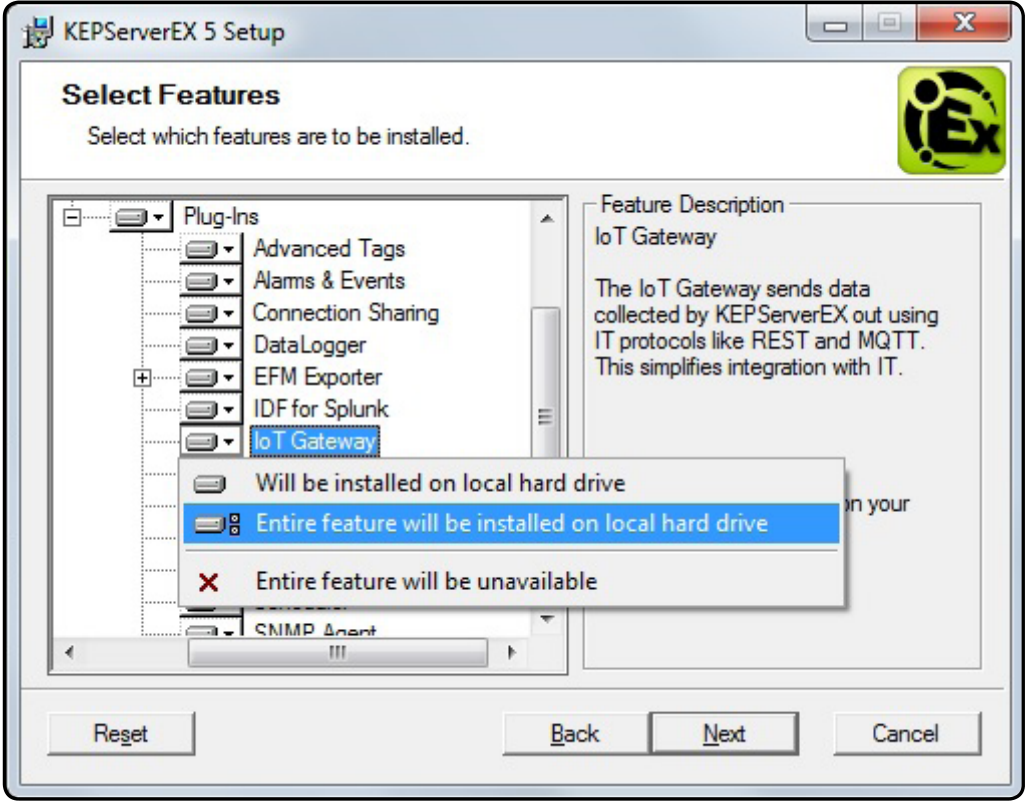
First, during the installation of KEPServerEx, we choose the IoT Gateway under Plug-Ins to be installed as well. We select ‘Entire feature will be installed on local hard drive’.
Step 2: Add an agent with REST client
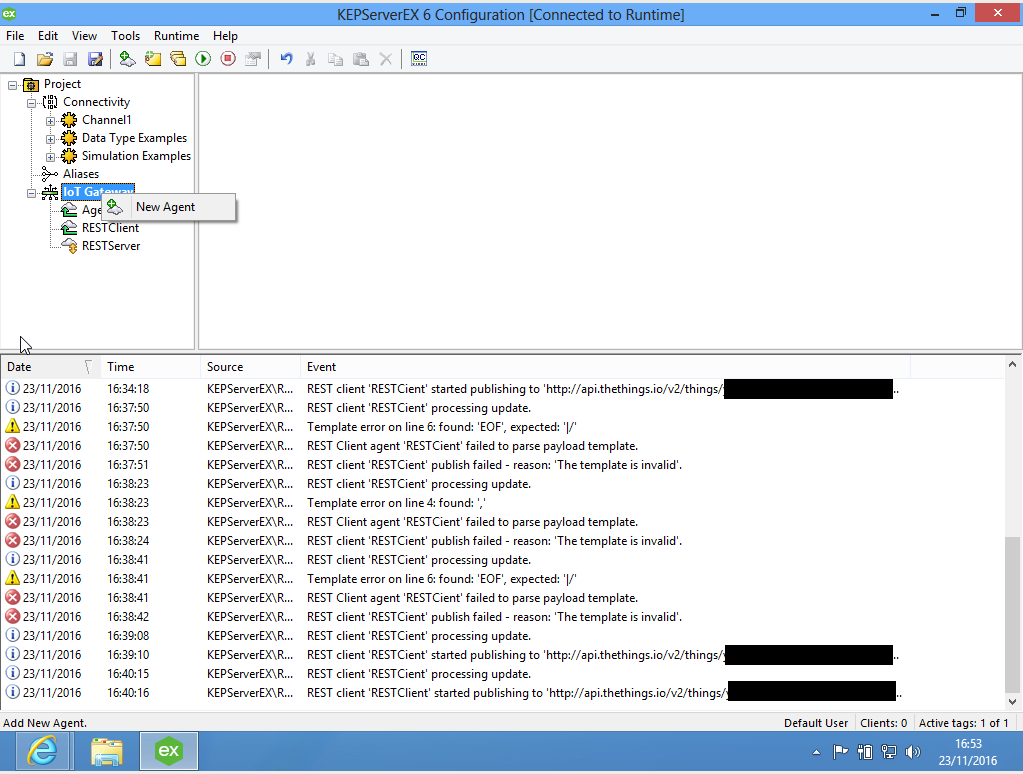
After the installation is finished, we open KEPServerEX and then right-click on ‘IoT Gateway’ and select ‘New Agent’.
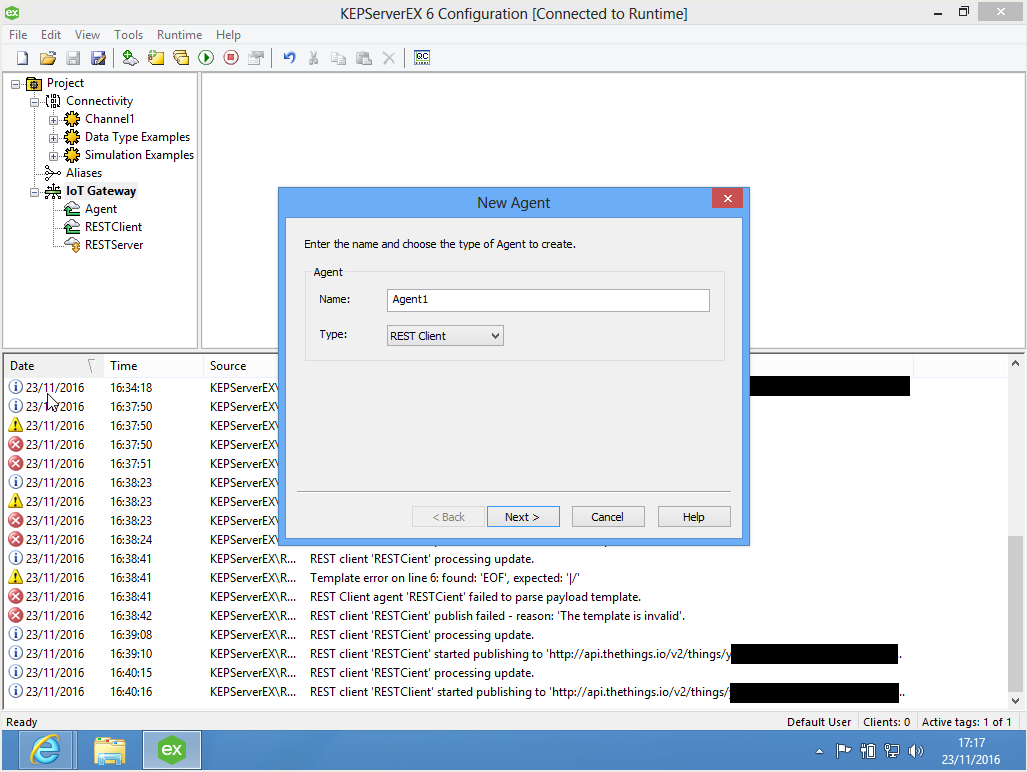
Then we choose a name for your agent and as type “REST Client”. Click ‘Next’.
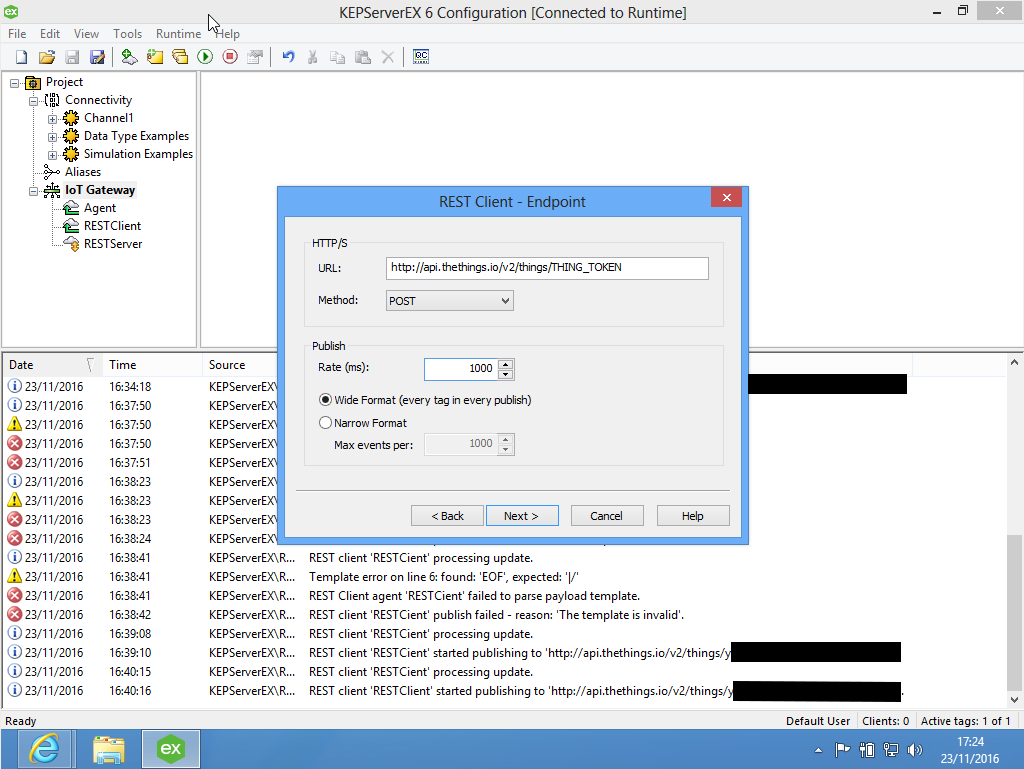
Now, at the endpoint configuration, at the URL field we insert http://api.devices.thethings.io/v2/things/THING_TOKEN where THING_TOKEN is the token of the thing you want to send the data to. As method, we choose POST, put the publish rate to 1000 and select ‘Wide Format’.
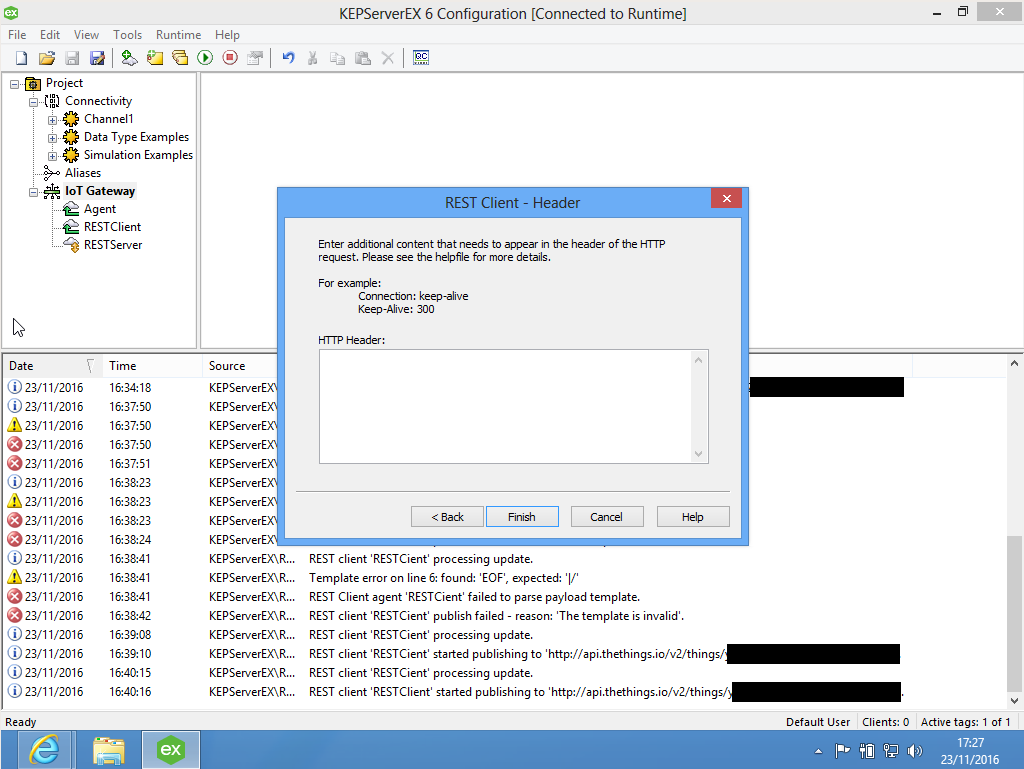
After that, we leave the header configuration empty and click ‘Finish’.
Step 3: Add IoT Items
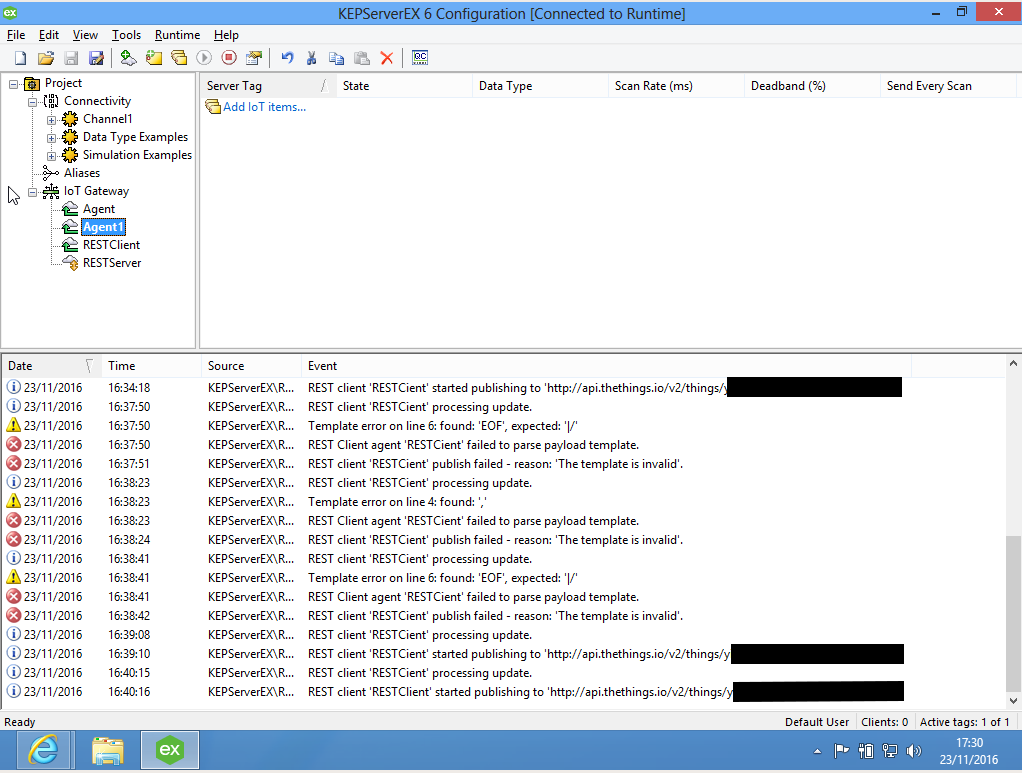
The next step is to add an IoT Item to send data from. In order to do that, we click on our freshly created Agent and then on ‘Add IoT items…’.
For this tutorial we will use a simulator which generates random numbers and send them to thethings.iO
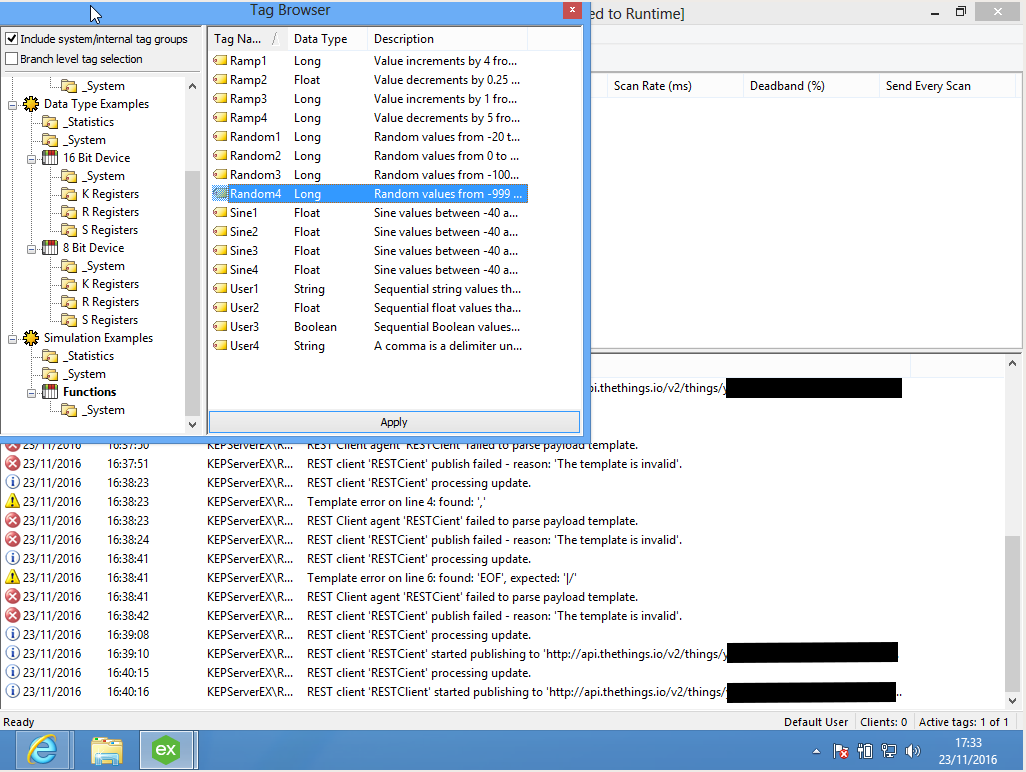
In the Tag Browser, we click on Simulation Examples, then on ‘Functions’ and choose Random4. Then we click ‘Apply’.
At the window for the item configuration that opens next, in the publish field we select ‘Every Scan’, leave everything else as it is and click ’OK’.
Step 4: Configure the agent
The last step is to do some final configuration on the agent we created before. For that, we right click on the agent and choose ‘Properties’.
Then, in the body tab, we choose ‘Advanced Template’ and put the following:
{
    “values”:[
    |#each VALUES|
        {“key”: “test”, “value”: “|VALUE|”}#unless @last|,|/unless|
    |/each|
    ]
}
After that, we click on ‘OK’. If everything went well you will see the following message:
We can now go to our panel at thethings.iO and see how the random numbers are arriving!
thethings.iO is the most simple enterprise IoT platform. Do not hesitate to sign up and test it with your KEPServerEX with OPC UA. We are the IoT platform that you are looking for.

