Connect the ESP8266-V12 Wemos to thethings.iO
One of our favorite WiFi device is the ESP8266. After explaining how to connect ESP8266 v1 to the IoT platform thethings.iO, here we would like to explain how to connect ESP8266 v12 or WEMOS to thethings.iO. In this case we are working on a Wemos D1 Mini.
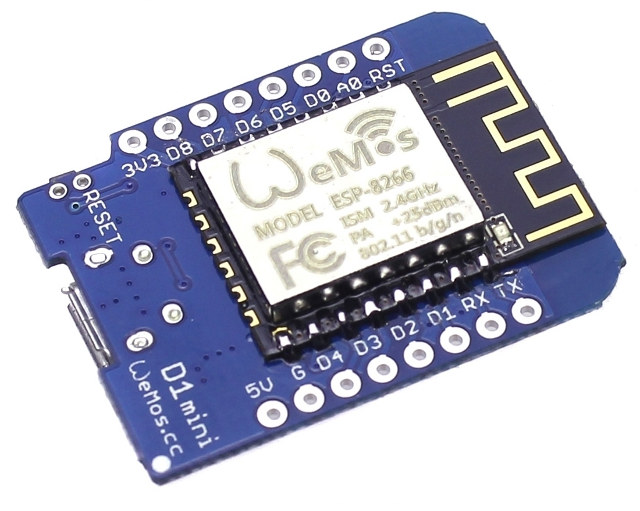
Wemos esp8266v12
We decided to work in some projects with the Wemos D1 Mini (that brings the esp8266 v12) because they work great. For less than 5$ you get a very powerful SOC (System On Chip) of 32 bits at 160MHz with RAM and EEPROM plus the WiFi. Just to tell you more information about the Wemos, this is a WiFi board based on the microcontroller ESP8266EX and it brings 11 digital pins and 1 analog input. The digital pins are input and output pins with support of interrupt, i2c and pwm. The analog input support a maximum of 3.2V input. The Wemos is compatible with Arduino and nodemcu.

Wemos D1 Mini
Today we’re going to connect the ESP8266 v12 (a wemos) to thethings.iO using MQTT protocol and the Arduino language.
Let’s get started!
- Create a thing to work with:
- Login to thethings.iO (or quickly register here).
- If you already have a thing to work with, skip two steps. Navigate to Things (third row on the left) and click on “Create new IoT product”. Insert a name, choose 8266 as the board and JSON as the format.

- Click on the created product and click on “Get activation codes”. If you don’t have enough activation codes, generate more using “Genereate Activation Codes”. Now press on the “+” below “Activate” Row and copy the thing Token.

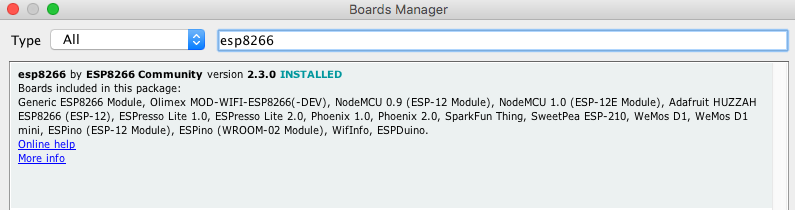
- Installing the esp8266 libraries for the Arduino IDE:
- Make sure you have the latest Arduino (check here). Install it in your computer.
- Open Arduino and navigate to preferences.
- Enter
http://arduino.esp8266.com/stable/package_esp8266com_index.jsoninto Additional Board Manager’s field. You can add multiple URLs, separating them with commas.
- Open Boards Manager from Tools > Board menu and install esp8266 platform (and don’t forget to select your ESP8266 board from Tools > Board menu after installation).
- Uploading the code to the board:
- Clone or download the code from our repo. Link here. First read the README to understand how to use the addValue and send calls.
#include #include // Update these with values suitable for your network. const char* ssid = "SSID"; const char* password = "PASSWORD"; const char* mqtt_server = "mqtt.thethings.io"; #define TOKEN "YOURTOKEN" String topic = "v2/things/" + String(TOKEN); WiFiClient espClient; PubSubClient client(espClient); long lastMsg = 0; int cont = 0; String msg ="{\"values\":["; void addValue(String key, String value) { if (cont == 0) msg += "{\"key\":\""+key+"\",\"value\":\""+value+"\"}"; else msg +=",{\"key\":\""+key+"\",\"value\":\""+value+"\"}"; cont++; } void addValue(String key, int value) { if (cont == 0) msg += "{\"key\":\""+key+"\",\"value\":\""+value+"\"}"; else msg += ",{\"key\":\""+key+"\",\"value\":\""+value+"\"}"; cont++; } void addValue(String key, float value) { if (cont == 0) msg += "{\"key\":\""+key+"\",\"value\":\""+value+"\"}"; else msg += ",{\"key\":\""+key+"\",\"value\":\""+value+"\"}"; cont++; } void send() { msg += "]}"; client.publish((char*)topic.c_str(),(char*)msg.c_str()); msg = "{\"values\":["; cont = 0; } void setup() { pinMode(BUILTIN_LED, OUTPUT); // Initialize the BUILTIN_LED pin as an output Serial.begin(115200); setup_wifi(); client.setServer(mqtt_server, 1883); client.setCallback(callback); } void setup_wifi() { delay(10); // We start by connecting to a WiFi network Serial.println(); Serial.print("Connecting to "); Serial.println(ssid); WiFi.begin(ssid, password); while (WiFi.status() != WL_CONNECTED) { delay(500); Serial.print("."); } Serial.println(""); Serial.println("WiFi connected"); Serial.println("IP address: "); Serial.println(WiFi.localIP()); } void callback(char* topic, byte* payload, unsigned int length) { Serial.print("Message arrived ["); Serial.print(topic); Serial.print("] "); for (int i = 0; i < length; i++) { Serial.print((char)payload[i]); } Serial.println(); } void reconnect() { // Loop until we're reconnected while (!client.connected()) { Serial.print("Attempting MQTT connection..."); // Attempt to connect if (client.connect("ESP8266Client")) { Serial.println("connected"); client.subscribe((char*)topic.c_str()); } else { Serial.print("failed, rc="); Serial.print(client.state()); Serial.println(" try again in 5 seconds"); // Wait 5 seconds before retrying delay(5000); } } } void loop() { if (!client.connected()) { reconnect(); } client.loop(); long now = millis(); if (now - lastMsg > 2000) { lastMsg = now; addValue("value", (int)random(1,5)); send(); } }- Connect the board to the computer and select your esp8266 board inside “Tools” > “Board”. Also don’t forget to select the proper port.
- Change “YOURTOKEN”, “SSID” and “PASSWORD” with your credentials.
- Flash the code.
Now you are ready to build a dashboard with the IoT platform thethings.iO and store, visualize and analyze all the data from your Wemos in real-time.

IoT platform dashboard
If you work with ESP8266 or Wemos, you need an IoT platform. Don’t hesitate to try thethings.iO and keep us updated with your projects.

