Posts

IoT platforms, what are they and why can they really help your business to grow?

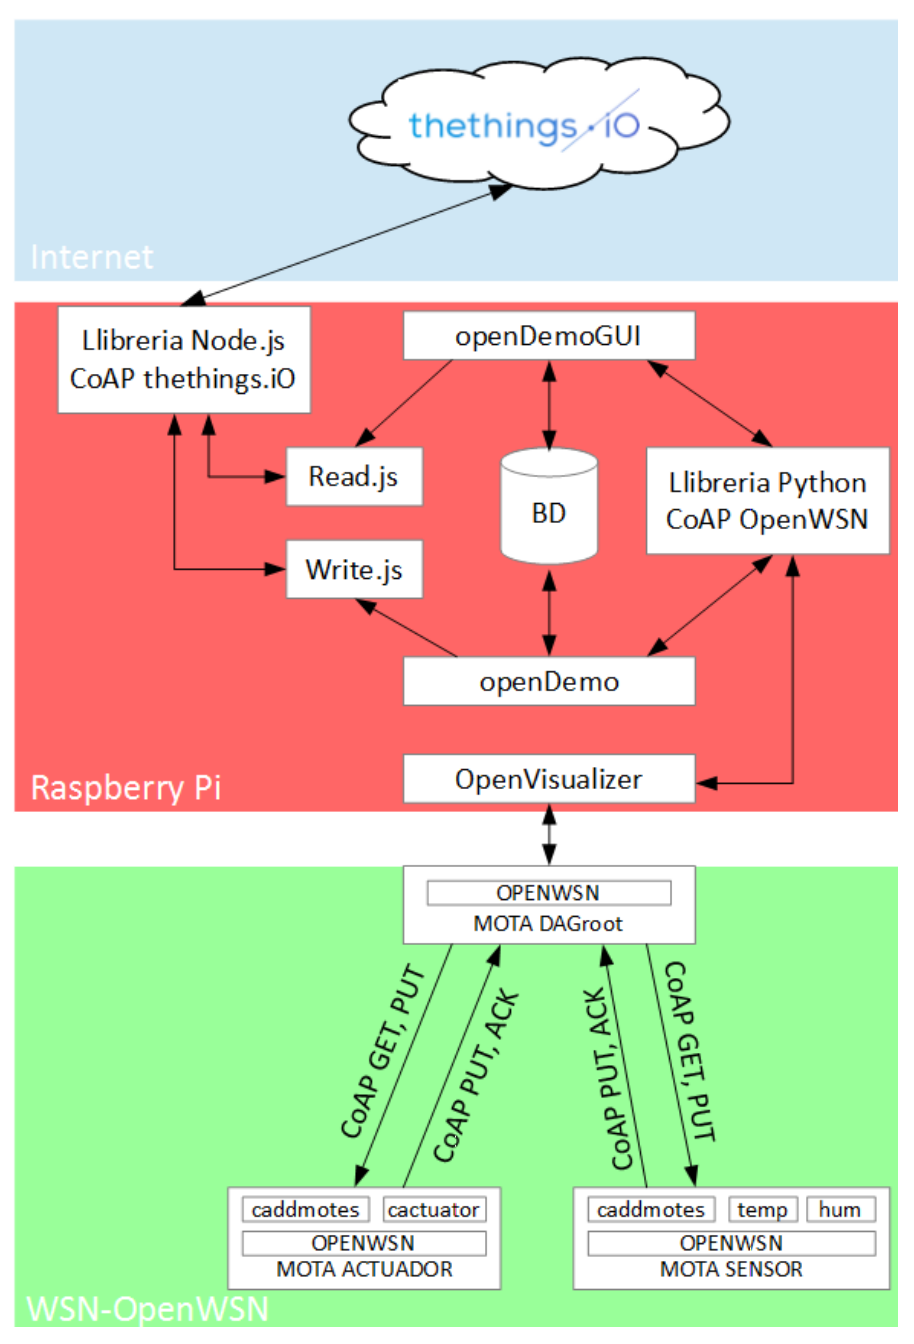
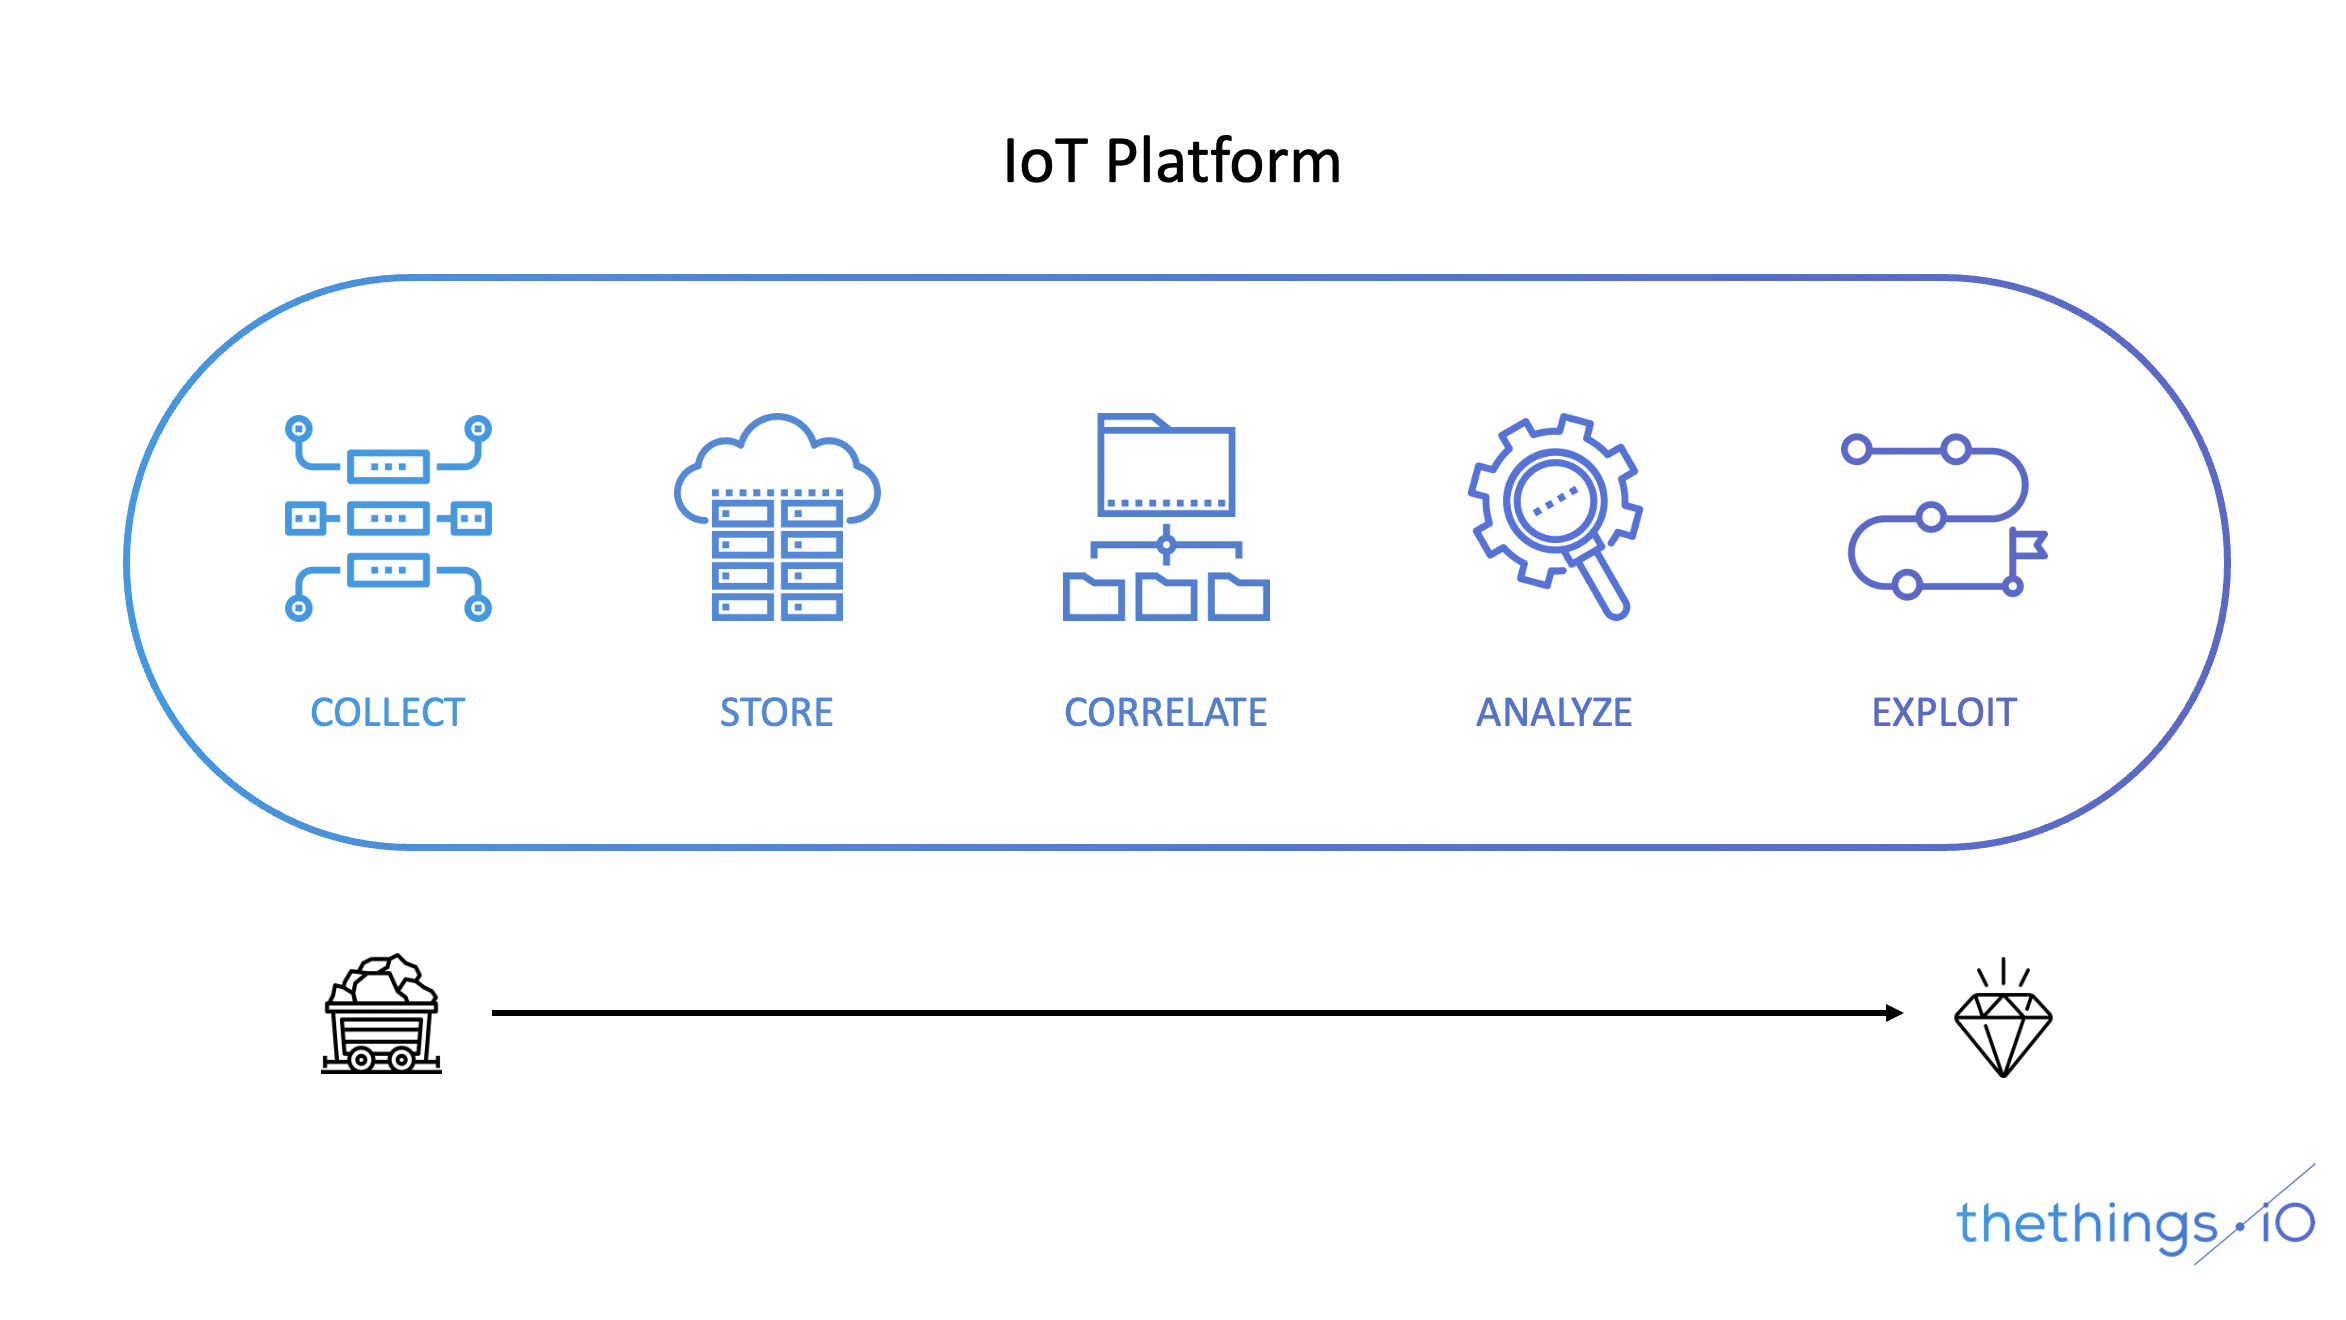
An IoT platform is a set of services to collect, store, correlate, analyze and exploit data. A platform is therefore a set of APIs and communication drivers, databases, processing and calculation services and often a web service to generate visualization and exploitation dashboards.

As a result, an IoT platform is designed to reduce the development time of your IoT project by providing a ready-to-use and reusable technology stack.


Why you should use an IoT platform?

An IoT platform will get you started in terms of technology development. But the first goal of every IoT project is to determine if the business case holds. And so that’s where the first place an IoT platform helps.


1.It helps you to validate your business plan early

The very first objective of a project is to validate your business case and demonstrate it to your stakeholders.

Business case validation should be done as soon as possible, preferably before you begin extensive engineering efforts.

Many IoT platforms allow you to quickly create a proof-of-concept prototype, in weeks instead of months. Thus, getting the prototype into the hands of your target users allows you to quickly validate the business case and quickly leverage customer feedback.

2. It helps you get quickly to market

Once the business case is validated, you’ll want to get to market as quickly as possible. Your first customers are eager to start using your product and your competitors may be getting closer.

But sometimes, setting your product into production can poses technical and organizational challenges:

  • Device manufacturing,
  • Cloud scalability,
  • Software versioning and deployment,
  • Defect handling…

Since IoT platforms are used in multiple projects and products, most IoT platforms provide mechanisms and support during this process.

3. IoT Platforms can include ready-to-use software, tools, hardware that you can use…

IoT projects share many aspects with each other. Because of this, IoT platform providers often have ready-made and white-label hardware that you can use for your own project.

Examples include:

  • Web-based administration dashboard software
  • Smartphone applications for customers
  • Smartphone applications for installers
  • Training materials for installers
  • Ready-to-use marketing materials and videos
  • Customer’s FAQs with prepared answers

These materials both reduce your development time and help you sell your project to your customers. Customizing off-the-shelf materials to meet your own needs is faster than developing them from scratch!

4. IoT platforms help you avoid pitfalls… security, certifications, compliance

There are aspects of IoT systems that are necessary requirements, but don’t provide much perceived business value. Security, certifications and regulatory compliance are among them. Most IoT platforms offer relief on one or more of these levels.

Security is a must for every connected system. Security is not a one-time thing, but an ongoing process that requires keeping software versions up-to-date and being aware of the latest security threats. IoT platform vendors have expertise in this area that keeps them up to date on security.

Regulatory compliance and certifications are important at the wireless and hardware levels of the system. Many IoT platforms also cover these aspects.


5. It provides features that could be critical to your project

Every IoT platform has unique features and a number of features that are common to most platforms.

There are a lot of chances that your project will require many of these features.

Generally speaking, typical IoT platform features include:

  • Low power operation

Some IoT systems require battery-powered devices. The batteries require a special mechanism to ensure extremely low power consumption. This issue is supported by many IoT platforms.

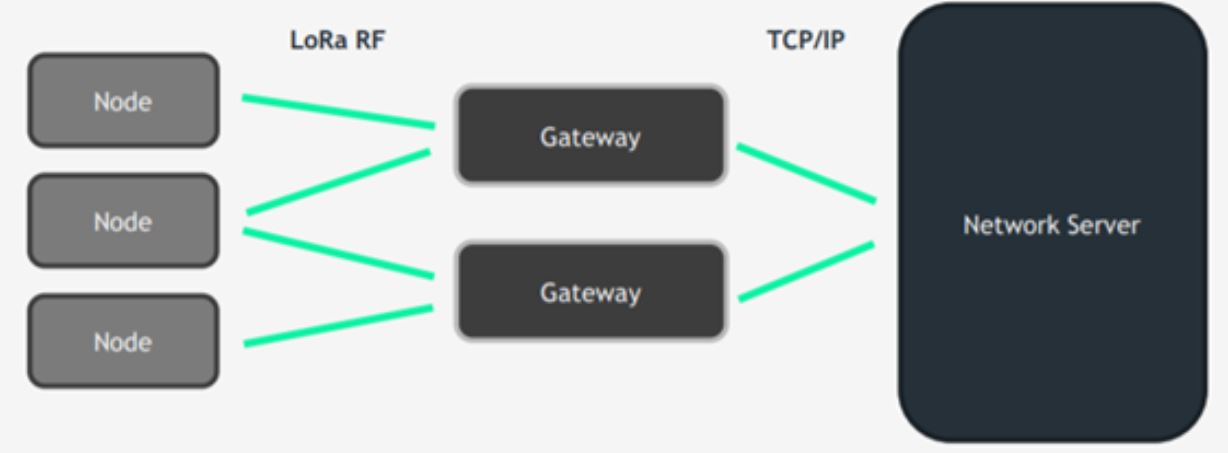
  • Long-range unattended network

Large-scale IoT systems often need connectivity to function even if the devices are far from their users. Some IoT platforms specifically support such use cases.

  • Ease of installation

For many IoT systems, installation is the most labor-intensive activity. So having a good installation process pays off quickly. Many IoT platforms have built-in installation procedures and smartphone apps that use Bluetooth, NFC, or QR codes.

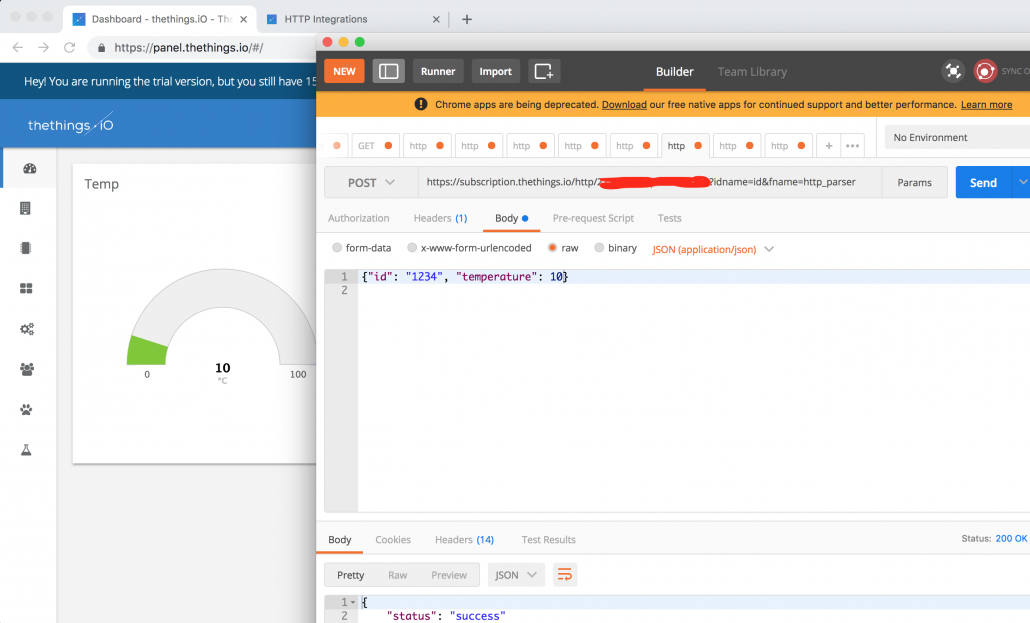
  • Integration with third-party software

Most IoT platforms have Javascript API to access backend data, and others have out-of-the-box integrations with third-party services such as Salesforce or Google Cloud.
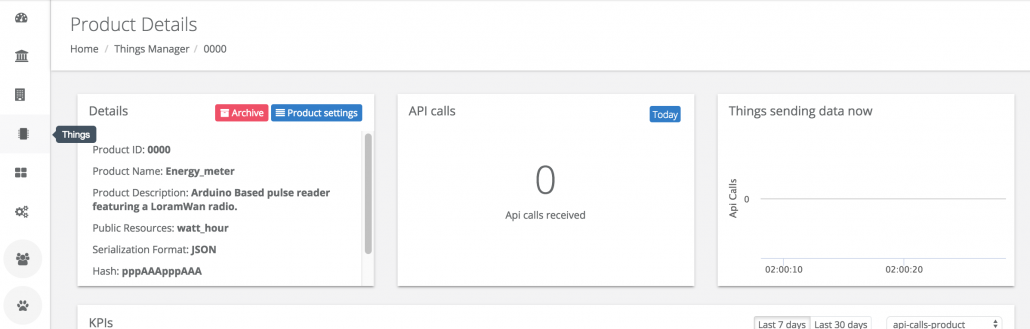
  • Device management

IoT projects involve a large number of IoT devices. These devices can break or need to be replaced. This is where a device management feature comes in handy.

  • User management

IoT systems are used by many people… So having user management built into the system is essential to prevent unauthorized access and errors. Most, if not all, IoT platforms therefore include user management as an essential feature.

  • Software updates

IoT systems are software intensive and that software will need to be kept up to date. IoT platforms include mechanisms for updating software, even over the air for installed IoT devices.

  • Push notifications or email alerts

In many cases, you want to alert users or customer support personnel when things happen in your IoT system. Many IoT platforms provide built-in support for alerts and notifications that you can tailor to your specific use case.
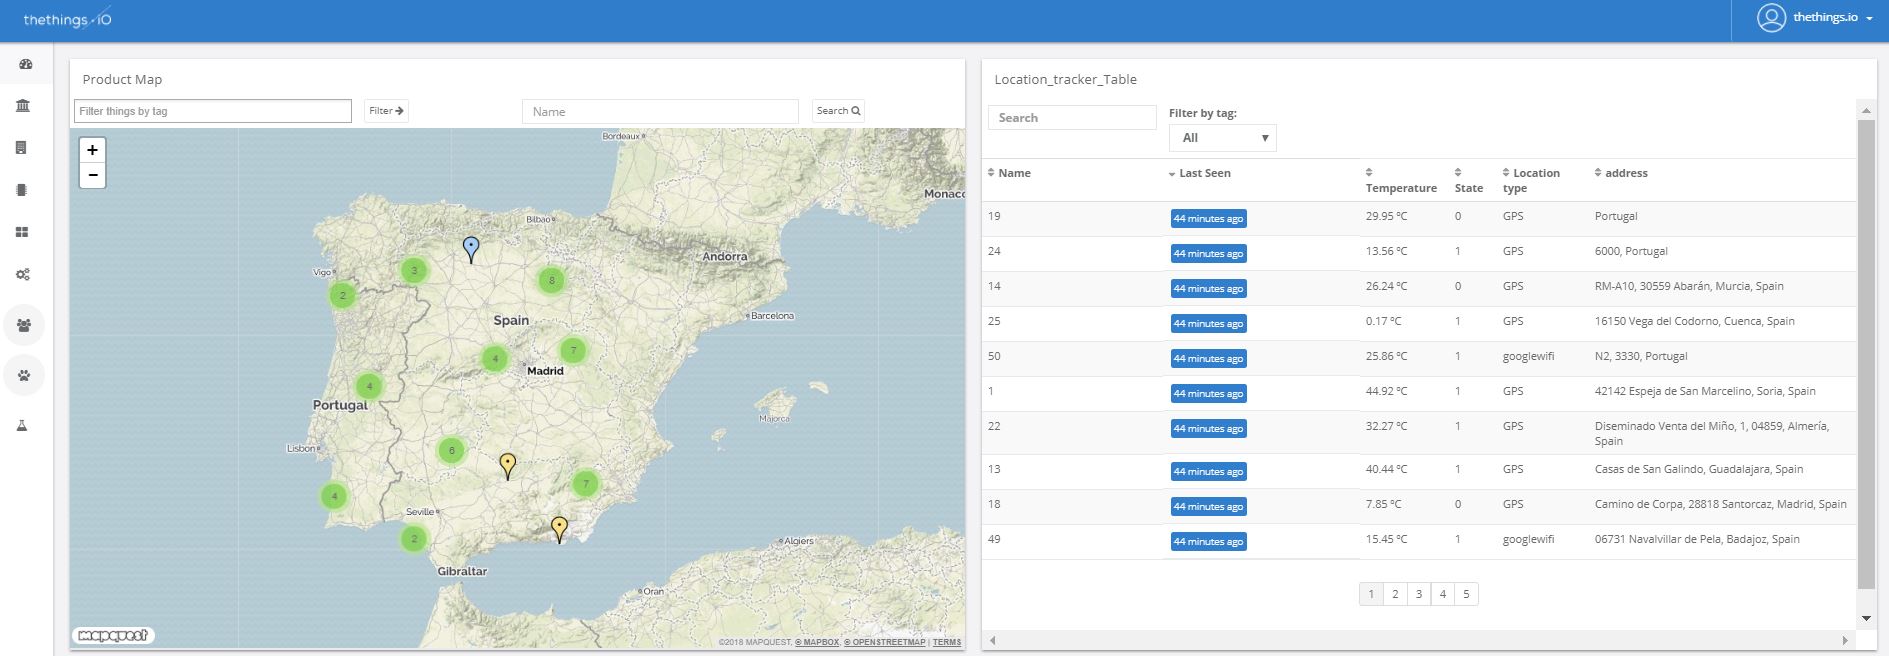
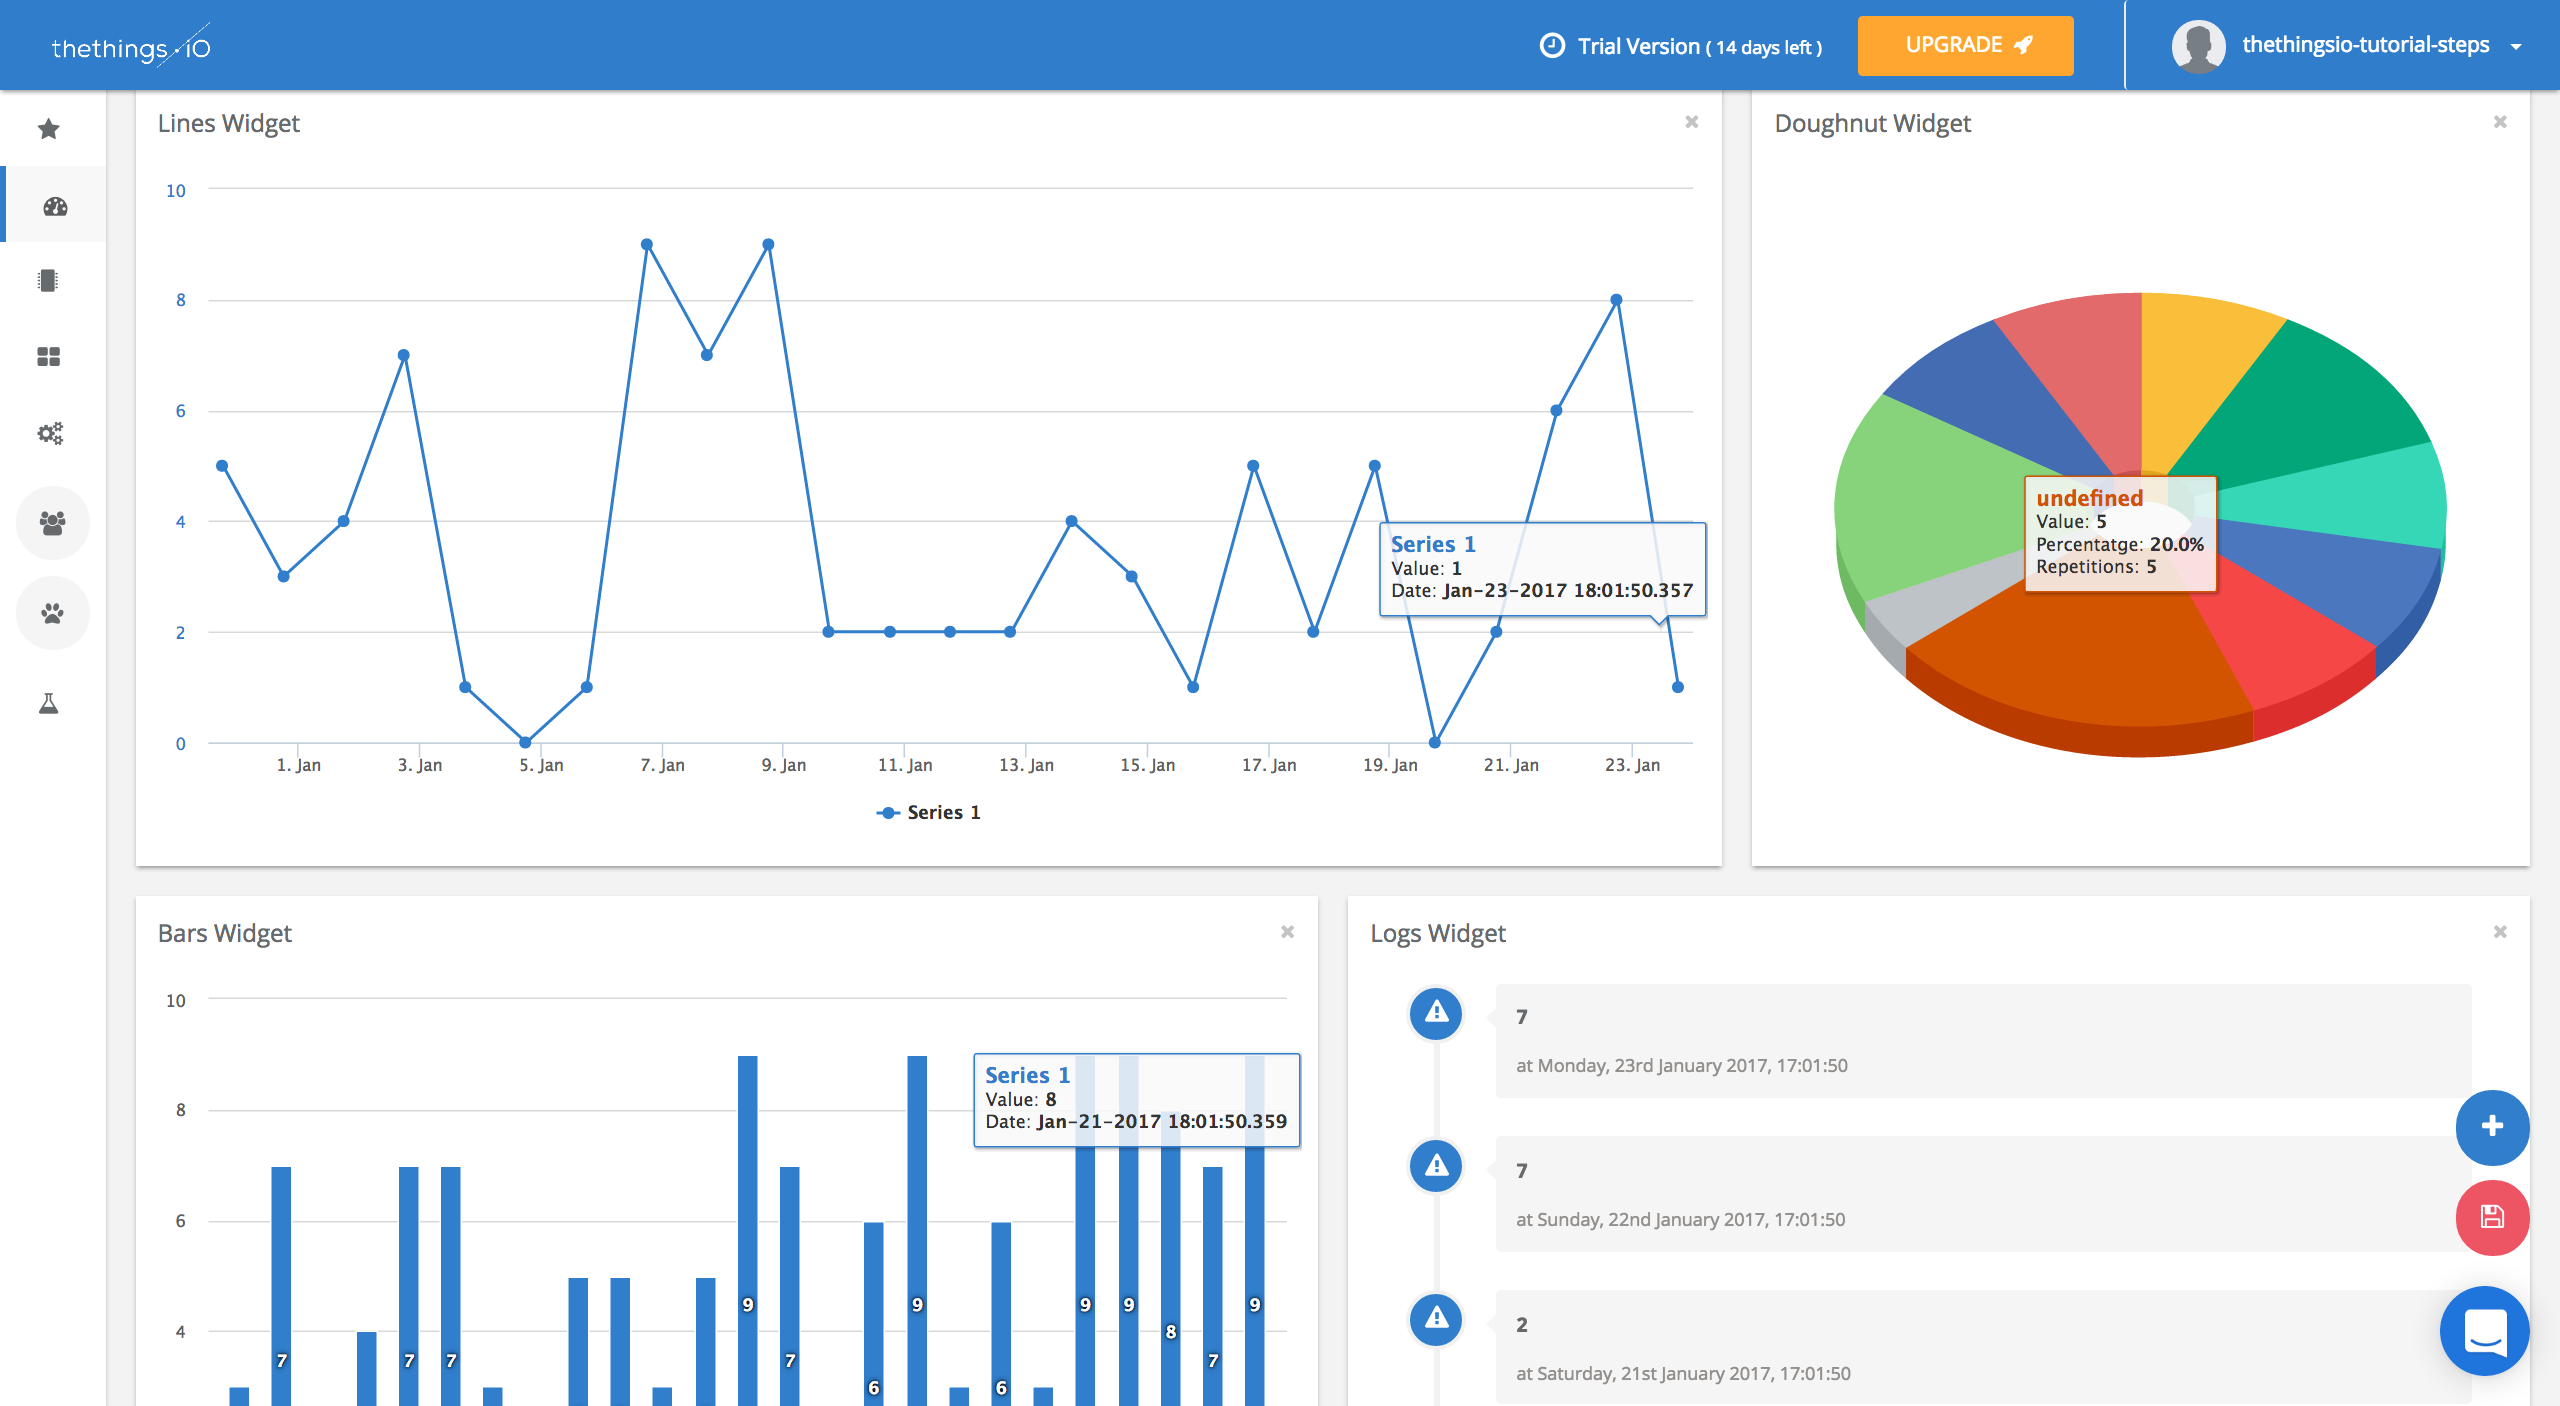
  • Data analysis

Some IoT platforms focus heavily on data analytics, statistics, and pattern recognition mechanisms, as some IoT systems depend on them for their operation. And if the platform itself does not provide built-in analytics, most provide an API to which external analytics software can be attached.

  • Billing

For some projects, billing is an important part of the solution, and some IoT platforms support built-in or third-party billing solutions.

Conclusions

An IoT platform will not only reduce development time, but also help you get your product into the hands of your customers quickly. This reduces both direct and opportunity costs.

Many IoT platforms have features that can be critical to your project and will allow you to leverage out-of-the-box tools and materials for your users. Choosing the right platform for your project will be the first step in helping you succeed with your project.

In thethings.iO, our IoT platform is designed to help companies succeed with their IoT projects regardless of their industry or project size.


Contact us today to learn more!


,

Connect anything to thethings.iO IoT platform with HTTP/S and your JSON

On this post we would like to show you how to connect anything using HTTP/S and your JSON. We used to get contacted by IoT developers and companies who were having devices already connected with their own JSON structures. Usually they wanted to move to thethings.iO IoT platform, so this is the reason why we created the HTTP subscription gateways.

The HTTP subscription gateways enables developers to send data to a unique URL without need to deal with thingTokens, activations among others. We provision automagically all the devices identified with an ID or name to thethings.iO in a simple way.

Find below the video tutorial with an example or find here the HTTP subscription documentation.

Step by Step tutorial

First of all, create a thethings.iO IoT platform account. Go to https://thethings.io and follow the steps. In addition, try to fill the information during the first session so we will be able to help you more.

After that, go to create a Product at the Things Manager. Select JSON as a type of product. Once created, then click on Details of the created Product.

Now it’s important to learn to create the subscription URL. The base path for the subscription is:

https://subscription.thethings.io/http/{productId}/{hash}

Get the Product ID and the Hash defined on the Details box of your recently created Product at thethings.iO. With these values you will be able to generate the correct HTTP subscription URL. The subscription URL will be followed by the parameters idname and fname. The idname parameter will define the name that the ID of the device will have inside the JSON coming in the body (e.g. in LoRa dev_id, in Sigfox idname, etc). The fname parameter will define the name of the function developed on Cloud Code that will parse the JSON sent in the body (e.g. http_parser). The final URL should be something like this:

https://subscription.thethings.io/http/{productId}/{hash}?idname={idname}&fname={fname}

After that, this is the moment to create the function on Cloud Code to parse the JSON sent to thethings.iO. Let’s imagine that you are going to send the JSON file:


{"id": "1234", "temperature": "10"}

For that type of JSON you will need a function on Cloud Code like this:

function main(params, callback){

var result = [
{
"key": "temp",
"value": params.payload.temperature
}
];

callback(null, result);
}

All the data coming at the JSON is coming into the object params.payload. That means that if you have a complex JSON, just use the object params.payload to find all your data and store it at thethings.iO with the key-value JSON needed at thethings.iO.

From now, you will be receiving the temperature and store it as temp, so you are ready to create a dashboard and more with thethings.iO. BTW at the video we used Postman to simulate a device sending data. Nevertheless we have clients using this technique to connect LoRa connectivity services, Sigfox, BLE gateways and others.

Use thethings.iO the most simple enterprise IoT platform. And feel free to send us questions and contact us in case we have to help you more!

Geocoding location coordinates to addresses from GPS-trackers

Today we talk about geocoding. Geocoding is a very interesting art! Geocoding consist of converting addresses (e.g. streets) into geographic GPS coordinates (i.g. latitude and longitude). On the other hand, we have reverse geocoding that is the reverse process: transforming a pair of geographic GPS coordinates into an address (street with number and city).

You might be wondering what geocoding can be used for. From simple analysis to business and customer management to distribution techniques, there is a wide range of applications for which geocoding can be used. At thethings.iO we are helping companies for which is important to geocode the GPS coordinates into addresses for the fleet management, route planning, among others.

At thethings.iO we usually receive the location as geographic GPS coordinates (latitude and longitude). It is known that it is the best way if you want to represent your assets on a map. However, geographic coordinates are not meaningful if they are not represented on a map. That’s why some customers ask us for the possibility of the integration of geocoding services in thethings.iO IoT platform.

Thanks to the Cloud Code service, we help you to integrate third-party services that enable you to transform the data from your connected things into information that will be useful to your daily activities.

Here you can see an example. In the table, you can see the addresses where the devices are located in:

Geocoding services

Although there are many geocoding services, today we will talk about two of them:

  • OpenCage Geocoder
  • Google Maps Geocoding API

Both are free up to 2.500 requests per day. In the case of Google will charge us $0,5/1.000 requests up to 100k daily requests if we overlap the free limit. For OpenCage we have different plans, e.g the x-Small plan includes 10k requests per day and it cost $50 per month.

Some lines below you will find information on how to use it. The first step is to get the API key or token.

Obtaining the API key

OpenCage

OpenCage Geocode is a very simple geocoding service (as we like). You only have to sign-up and follow all the registrations steps. After that you will see your dashboard like this:

Copy and keep the API key. We will use later!

Google Maps Geocoding API

If you have decided to use the Google Maps Geocoding API you must follow these steps:

1. You have to sign in with your Google account and follow this link:

2. Click on ‘Get a Key’ button and follow the instructions.


3. You will obtain your API key. Keep it! We will need it later!


Using geocoding services at thethings.iO

Once you get your API key, you are ready to use the geocoding services on our platform. In the following link, you can find a repository with the functions and examples of how to use these services.

In the repository, you can find two folders and two files. The folders contain the code for the httpRequest with both the OpenCage and Google Maps API geocoding and inverse geocoding services.

With that code, we build two examples that could be useful for your business requirements. Anyway, do not hesitate to contact us if you have further questions regarding this topic. We can provide you with more examples!

       1. Example 1. Trigger (Inverse geocoding with Open Cage API)

With this code every time you send data to the platform that contain location information, the trigger will be executed and we will transform the coordinates from the resource $settings.geo into a physical address. Then we will save it into the resource address. You just have to create a new trigger in the cloud-code. Then copy and paste the following code.

      2. Example 2. Function (Inverse geocoding with Google Maps Geocoding API)

In this case, we transform all the addresses of all the things of one product just in one cloud-code execution. Create a new function, choose the product and copy and paste the code from the file. Finally, introduce “{}” in the Preview Params (Check the picture below). The function will calculate the address for all the devices that contain information in the resource $settings.geo and will be saved in the resource address of each thing.

We hope all this information will be helpful for you. If you want to know more about us, you can create an account by clicking here, sign up to receive our monthly newsletter or follow us on Twitter! Stay tuned and be the first in knowing the latest news of the IoT world and thethings.iO

,

How to integrate LoRa with thethings.iO IoT platform

As you know, thethings.iO is the most simple enterprise IoT platform. An IoT platform consists of helping and improving life of developers that are connecting products to the Internet. And as good makers, we love integrating new systems and platforms to thethings.iO that enable our clients of connecting to the Internet more devices.

In today’s post we will show you what is LoRa and its basics. We’ll also show how can it be integrated within thethings.iO platform.

LPWAN protocols

Nowadays, there is a growing interest to connect devices to the Internet, and there is an emphasis on low power wireless commutations (LPWAN).

LPWAN is designed to allow long range communications at a low rate transmission among low power connected things. LPWAN stands for Low Power Wide Area Network standard.

Devices, such as ESP8266 are capable to connect to WiFi networks. We all know that its reach is limited to few meters around the access point. IoT devices require to bridge much bigger distances since we want to use them everywhere. IoT devices usually work on batteries and we don’t have lots of power for transmission.

The dilemma is… how to reach many kilometres without spending too much power? To create radio connections for a certain distance we can either increase transmission power of the system or decrease the bandwidth of the channel and that’s the key of LPWAN protocols. LPWAN is not comparable with WiFi or 2G networks, and not all a replacement for these technologies since size of data payload is not a strong point of LPWAN. On the other hand, we have all the numerous benefits that we commented before.

As you probably know there are different LPWAN protocols such as SigFox, NB-IoT or LTE-M. As you know thethings.iO is the most simple IoT platform for Sigfox, is getting compatible with NB-IoT (I don’t want to spoiler now). Nevertheless today we want to connect thethings.iO with LoRa.

LoRa

LoRa is a Low Power Wide-Area Network (LPWAN) solution coming out France and it is intended for systems that require the ability to send and receive low amounts of data over a range of many kilometres without high power costs. It is not an open protocol as it is driven by a chip company called Semtech.

The LoRa wireless system makes use of the unlicensed frequencies that are available worldwide. The most widely used frequencies / bands are 868 MHz (Europe), 915 MHz (North America) and 433 MHz (Asia). LoRa is capable of providing data rates from between 0.3kbps to 50kbps which varies based on required range and interference. The LoRaWAN protocol provides both signing and encryption for parts of LoRaWAN packets.

LoRa topology. Source: https://www.mwrinfosecurity.com/

LoRa solutions are made up of nodes and gateways that communicate with a network server. Nodes represent connected things and they are typically low powered and communicate wirelessly with one or many gateways. Gateways are fewer in number, and transfer data from the nodes back to the network server using standard IP connections. A LoRa solution therefore follows a “star of star” topology, where multiple nodes talk to one or more gateways. Network server represents the edge of the systems that would store and parse the data sent from the nodes.

About The Things Network

The Things Network is a community-based, global initiative to provide free LPWAN coverage over LoRa. LoRaWAN coverage is entirely crowdsourced. Members also contribute by providing support or through software development.

The Things Network Backend route messages from gateways to the right application through the Internet, and back. In our case, the application would be thethings.iO platform. The question is, how can we integrate The Things Network data with our platform? How can receive the data  sent through The Things Network in thethings.iO

Integrating The Things Network within thethings.iO

In order to integrate both platforms we encourage you to read this article https://developers.thethings.io/docs/http-integrations#section-a-integration-example-with-the-things-network in our Developer Center at the thethings.iO, but here you can find a summary of the steps.

  1. Get and customize your callback URL with the productid and the hash. You can find both parameter in the Product Details of the Things Manager. The base path of the URL should be like this https://subscription.thethings.io/http/{productId}/{hash}?idname=dev_id*.
  2. Insert this url at the HTTP Integration section of The Things Network Platform.
  3. Finally, go back to thethings.iO Cloud Code section a create function with the name http_parser. Here you can find an example:
function main(params, callback){
  var result = [
      {
        "key": "temperature",
        "value": params.payload.payload_fields.temperature
      },
      {
        "key": "$settings.name",
        "value": params.payload.hardware_serial
      },
      {
        "key": "$geo",
        "value": [params.payload.metadata.longitude,params.payload.metadata.latitude]
      },
  ];

   callback(null, result);
}

Once the URL is configured and the Cloud Code function is coded, everything is ready to start receiving data and monitoring from thethings.iO IoT Platform.

We hope all this information will be helpful for you. If you want to know more about us, you can create an account by clicking here, sign up to receive our monthly newsletter or follow us on Twitter! Stay tuned and be the first in knowing the latest news of the IoT world and thethings.iO

IFTTT, LIFX and thethings.iO

One of the most popular services that helped the Internet of Things to reach a great critical mass is IFTTT. IFTTT means if this then that. IFTTT is a fantastic IoT platform that allow people build recipes, triggers or actions with several connected devices and services.

ifttt thethings.iO

thethings.iO + IFTTT

Actually at thethings.iO we love IFTTT. And this is the main reason why we decided to connect thethings.iO with IFTTT and enable our customers and their connected things the possibility to interconnect any device that they have at thethings.iO with any service or device connected through IFTTT. Let me give you an example, imagine that you have a LIFX lightbulb and your own Arduino device. Now through thethings.iO and IFTTT it is possible to make them speak with just 3 minutes of efforts! Keep reading!

At this post we are going to show you two different examples that we built with the IFTTT Maker channel. The first example is using a thing connected to thethings.iO as the IF THIS part of the IFTTT. The second example enables a device connected to thethings.iO that is the thing connected as THAT part.

THIS

This example uses a Particle Photon with a button and a LiFX bulb. Each time the button is pushed, a message is published via HTTP to thethings.iO. This message activates a trigger in real-time, that sends an HTTP POST to IFTTT (activating the IF THIS statement).

Once the IF THIS statement is achieved, IFTTT activates a LIFX bulb from our LIFX account.

This are the steps to follow in order to do the example:

  1. Create a LIFX account and associate your light bulb your your account.
  2. Register at thethings.iO IoT platform.
  3. Create a product with your thethings.iO account.
  4. Register at particle with and flash your photon particle with the button code provided on our Particle photon github repository.
  5. Register at IFTTT and connect to the Maker channel. At https://ifttt.com/maker inside “How to trigger events”, you’ll find the associated url to send HTTP requests later. Modify the path inside the Cloud Code trigger your credentials.
  6. Create the IFTTT trigger:
    1. Select “this” and search the Maker channel. Then click on it.thethings-this-makers
    2. Click on Receive a web request.
    3. Give a name four your event.
    4. Select “that” and search for LiFX. Then click on it.thethings-that-lifx
    5. Your LIFX account credentials will be asked.
    6. Select the event that will happen on the LIFX bulb (in our case Change Color. Randomised).
  7. Go back to thethings.iO and navigate to Cloud Code.
  8. Create a trigger associated with the previous created product.
  9. Copy the following code to the trigger (remember to change your_event and your_key with your actual ones):

function trigger(params, callback){
  if (params.action !== 'write') return callback();
  
  var body = {	//Add the values that you want
    button: '1'
  };
  
   httpRequest({
    host: 'maker.ifttt.com',
    path: '/trigger/your_event/with/key/your_key', // Remember to change your_event and your_key!
    method: 'POST',
    headers:{
      Accept: '*/*',
      Connection: 'close',
      'Content-Type':'application/json'
    }

  }, body, function(err, result) {
    //and postprocess the api result here before sending to your thing
    console.log('Returned from httpRequest');

    if (err) {
      console.log('httpRequest error');
      console.error(err);
      return callback(err);
    }
    if (result) {
      console.log('httpRequest success');
      console.log(result);
    }
    callback(null, result);
  });
}

After this simple steps, this IF example is completed! Now you can play with it!

THAT

This example uses an Arduino Yun with the IKEA discoball connected with a motor (using a relay). The Yun is connected via MQTT to thethings.iO. Using IFTTT, the disco ball from the Yun spins for 2 seconds each time a new task is created in a certain list in Trello.

In order tu make the example, these are the required steps:

  1. Create a LIFX account and associate your light bulb your your account.
  2. Register at thethings.iO IoT platform.
  3. Create a product with your thethings.iO account.
  4. Create a new arduino sketch and paste this code:

#include <YunClient.h>;
#include <Bridge.h>;
#include <PubSubClient.h>;
#include <Process.h>;

#define TOKEN "youThingToken"    // Change yourThingToken with your actual thingToken

YunClient wificlient;

String topic = "v2/things/" + String(TOKEN);
String message = "";
boolean firstValue = true;

void addValue(String key, int value) {
  if (firstValue == true) {
    firstValue = false;
    message.concat("{\"key\":\"" + key + "\",\"value\":" + value+"}");
  }
  else {
    message.concat(",{\"key\":\"" + key + "\",\"value\":" + value+"}");
  }
}

void callback(char* topic, byte* payload, unsigned int length) {
    // handle message arrived
    String text = "";
    for (int i = 0; i < length; i++) text.concat((char)payload[i]); 
    text.replace(" ", ""); //Serial.println(text);  
    if (text.indexOf("\"key\":\"party\"") >= 0) {
        if (text.indexOf("\"value\":\"1\"") >= 0) {
          digitalWrite(7, HIGH);
          delay(2000);
          digitalWrite(7,LOW);
        }
    }
    
}

PubSubClient mqtt("mqtt.thethings.io", 1883, callback, wificlient);

void publish() {
  String toSend = "{\"values\":[" + message + "]}";
  mqtt.publish((char*)topic.c_str(), (char*)toSend.c_str());
  message= "";
  firstValue = true;
  Serial.println("Published");
}

void setup() {
  Bridge.begin();
  //Serial.begin(9600); 
  //while(!Serial);
  pinMode(7, OUTPUT);
  while (!mqtt.connect("Yunclient")) {
    //Serial.println("Could not subscribe, retrying...");
  }
  //Serial.println("Client connected to mqtt broker!");
  mqtt.subscribe((char*)topic.c_str());
}

void loop() {
  mqtt.loop();
}

4. Register at IFTTT and connect to the Maker channel.

5.Create the IFTTT trigger:

  1. Select “this” and search for trello. Click on it.thethings-this-trello
  2. Choose your preferred action (Card added to board, list or assigned to you).thethings-trello-choose
  3. Your Trello account credentials will be asked.
  4. Insert the fields for the chosen action.
  5. Click on “that” and search for Maker. Click on it.thethings-that-maker
  6. Press Make web request.
  7. Insert on the URL field.
  8. Select POST method.
  9. Select aplication/json for the content type.
  10. Insert the following JSON in the body: {“values”: [{ “key”: “party”, “value”: “1” }]}
  11. Click on create action.

thethings-that-maker-details

It’s fun right? We love that people apply innovation on the top of thethings.iO! this is the reason why thethings.iO IoT platform is connected to Twilio, Twitter, and IFTTT, among other. Let us know what you build and we will publish it at the blog.

Connect a thermostat with OpenMote and thethings.iO

thethings.iO + openmote

thethings.iO + openmote

During the last months we have seen dozens of amazing projects being connected at thethings.iO. Here we are going to show you how to connect a heating system and a thermostat for your house using thethings.iO as the IoT platform and OpenMote as a hardware.

connect-a-heating-system
This project was made by Roberto Romero Jotel as his final Master’s project for the Universitat Oberta de Catalunya this past 2015, so we are going to make a quick review to his one.

OpenMote and OpenWSN

During the project, the maker Roberto connected a heating system with a thermostat using the OpenMote with OpenWSN (IEEE 802.15.4e) and thethings.iO. On the project there is also a Raspberry Pi with Internet and the OpenBase and OpenMote-CC2538 modules connected by USB at the Raspberry Pi. The Raspberry Pi was converting the messages from the OpenWSN(802.15.4e) to Ethernet (HTTPS) to send the data to thethings.iO

The OpenMote platform consists on:

  • OpenMote-CC2538: which uses SoC TI format for Cortex-M3 and CC2520. This SoC can support Contiki, OpenWSN (which is also the protocol we are going to explain later in this post) and FreeRTOS.
  • OpenBase: a plate with different ports such as Ethernet, USB and JTAG.
  • OpenBattery: also a plate with 3 digital sensors and batteries. Its operation is autonomous.
Reliable Low Power Wireless OpenMote

Reliable Low Power Wireless OpenMote

The OpenWSN is a collection of different Internet of Things protocols. It counts on the OpenOs, which is a collaborative of OpenWSN, an OpenVisualizer, the visualization program and a Python CoAP library.

The IoT platform

thethings.iO is the IoT platform of the project. It also provides write and read methods. In the first case (ThingWrite), it allows users to collect data in JSON format with POST request at the URL through the CoAP API:

coap://coap.thethings.iO/v2/things/{{THING_TOKEN}}

In the case of the ThingRead, it allows the user to read the data from a resource (KEY) with GET request at the URL:

coap://coap.thethings.iO/v2/things/{{THING_TOKEN}}/resources/{{KEY}}

thethings-io-dashboard

How to make things work together

The real question in here is how to connect the OpenMote with thethings.iO?

Project's architecture

Project’s architecture

The key is the integration of thethings.iO API on the OpenMote implementation with the Raspberry Pi. Let’s explain the two basic functions of thethings.iO that enables the thermostat to read data and write sensor’s data from and to thethings.iO.

First of all, the thermostat wants to send new data from its sensors (temperature, humidity, etc). How do we do it? Remember that we have to consider that the OpenMote is connected to a Raspberry Pi through a TCP socket. That means that thethings.iO as the IoT platform receives the data through CoAP from the Raspberry Pi thread that listens the TCP socket from the OpenMote.

Once they are connected one to each other, the client sends the Raspberry Pi process the data. All this data collected is sent by the Raspberry Pi to thethings.iO IoT platform using a CoAP POST request. thethings.iO gives an answer which can be “Success” or “Error”. Finally, when the OpenMote receives the answer, the connection ends.

The reading operation from thethings.iO is similar, the OpenMote tries to establish a socket connection with the Raspberry Pi, and the Raspberry Pi sends a request of polling to thethings.iO. Once they are connected to eachother, the client sends a request to read its data to the server. All the data is requested to thethings.iO by the server using a CoAP GET request. Then, thethings.iO sends the answer to the Raspberry Pi, giving a “Success” with the JSON, which is translated in sending all the data requested, or an “Error”.

If you want to know more about Roberto Romero’s project (in catalan) and the public code on Roberto’s github account.

And if you want to start connecting things with thethings.iO you can register here.

4 Steps to Build Your IoT Dashboard

As you know, thethings.iO is the Internet of Things platform that allows you to connect things to the Internet quickly and easily. We allow you to monitor and manage your networked devices in real-time and get flexible analytics reports. And the product goes further, as you will see in this post about the IoT Dashboard that we deployed some weeks ago.

thethingsio-dashboard
This is a quick tutorial of how to build your IoT dashboard and also how to customize it in order to make it more “yours”.

Step 0: Sign Up or Log In at thethings.iO

The first thing you need to do is, in case you have not registered yet, create a new account and Sign Up to our platform. Otherwise, if you already have an account, you just need to Log In to move to your IoT Dashboard.

Primarily you’ll notice that when you first access to your IoT Dashboard, a new window appears to introduce yourself to the platform and specifically, to the IoT Dashboard. The message is the following one:

hello-dashboard
>

Step 1: Starting with thethings.iO IoT Dashboard

The IoT Dashboard is the place at thethings.iO where all the data generated by your things will be displayed. Depending on which kind of information you want to see you may prefer one widget or another. Before start building your IoT Dashboard you should have at least one thing connected using our platform. If you want to start connecting things fast, you should not miss this quick guide of how to connect your first thing in 1 minute! Why? Because you need data to display!

Once you have done that, we can move to the option “Edit Dashboard”, on the lower right section of your screen. The icon is yellow and this tool is the one we are going to use most during this post, so keep an eye on it!

Step 2: Create a Widget

Above the yellow “Edit Dashboard” there is a a blue “Add Widget” icon. So now we are going to click on it and a pop-up you will have to work with will appear. Your screen should look like this:

add-widget

The only thing you need to do now is to complete the fields that appear in this pop-up, such as we have done in the following example:

add-widget-2

At this point, you can choose the kind of widget you want your data to be displayed on your IoT Dashboard. You have different options, such as:

  • Map
  • Doughnut
  • Lines
  • Bars
  • Logs
  • Value
  • Pie
  • Polar Area

Depending on the option you choose in “Values Range” you’ll find one or the other.

Screen Shot 2017-01-25 at 3.30.56 PM


Finally, you can add your new widget to your IoT Dashboard.

Step 3: Customize your IoT Dashboard

One of the coolest things you can do with your IoT Dashboard is to add, remove and replace your widgets easily. To do it you just need to click on “Edit Dashboard” again and just touch one of the widgets. Now you can change its place just moving it, change its size, and also the kind of widget you want it to be!

Look the changes we have done in our example screen:

drag-drop-widgets


Once you finish editing your IoT Dashboard do not forget to save it!

Step 4: Create an Image

You may think that’s all we can offer, but right now we do offer more! Now you can add images to your IoT Dashboard. How?

  1. Go to Edit Dashboard button and Add Widget.
  2. Once you are in the pop-up window, in the “Data Source” field you have to choose the option “External Image”. Here you will be able to add images from your computer or directly from an URL.

widget.extrenalimage

3. Add your Widget to your IoT Dashboard.

Step By Step Video Tutorial

You can also check these 2 tutorials in which we explain how to build and customize your IoT dashboard. In this case we use a Thermostat we’ve recently connected to thethings.iO to show you how it works.

And that’s it. Isn’t it easy? Start connecting things now with thethings.iO and get cool customizable IoT Dashboards as the one we have shown you here.
And do not forget to follow us on Twitter in order to keep you posted about the IoT World and the latest news of thethings.iO.

Beginners Guide: Connecting An Arduino To thethings.iO

Arduino loves thethings.iO

Arduino loves thethings.iO

In today’s post we are going to show you Step by Step how to connect an Arduino to our platform, thethings.iO. You will only need:

  • An Arduino or Genuino board.
  • Ethernet, Wi-Fi (or Yún or an ESP8266, for the cheaper version) or GSM shield.

Now, make sure you have an account at thethings.iO. If not, register quickly by clicking here.

Once you have done this, you can start with this Step by Step.

Step 1: Preparing the environment

First you need the Arduino software installed. Afterthat, download the thethings.iO Arduino library in our github. Extract the thethingsiO from the .zip file and install it by copying the folder to your Arduino library folder.

The default path for the libraries is:

  • Linux: /Home/your-username/Documents/arduino/libraries
  • Mac: /Users/your-username/Documents/Arduino/libraries
  • Windows: \My Documents\Arduino\libraries

Now you can use the classes and functions described in the reference part of the repository.

Step 2: Sending Values

Now you need to open the Arduino software. Navigate to Examples > thethingsiO. Choose a protocol (if you are a beginner we recommend you to choose http) and then choose your shield (Ethernet, Wifi or GSM). Next, choose Send Values. An already “done” code will appear.
Now we need to make sure that we correctly initialize our Shield. For every shield there’s a method that does the previous action.

For the Ethernet shield, we need to provide the mac address of the shield (located below the shield):


void startEthernet() {
Serial.println("Connecting Arduino to network...");

// Local Network Settings

byte mac[] = { 0xAA, 0xBB, 0xCC, 0xDD, 0xEE, 0xFF }; // Must be unique on local network

// Connect to network amd obtain an IP address using DHCP

while (Ethernet.begin(mac) == 0) {
Serial.println(“DHCP Failed, retrying”);
}

Serial.println(“Arduino connected to network using DHCP”);
}

For the GSM shield, we need to provide the PIN number and the apn settings for your SIM card:


// PIN Number

#define PINNUMBER “”

// APN data

#define GPRS_APN “”
#define GPRS_LOGIN “”
#define GPRS_PASSWORD “”

For the Wifi Shield, you need to provide the SSID and the password:


#define SSID YOURSSID
#define PASS YOURPASSWORD

//In case that you already activated the token with an activation code and we have the token, use the next code:

thethingsiOEthernet ethernet_thing(TOKEN);
thethingsiOWiFi wifi_thing(TOKEN);

// Choose the one depending of your shield.

thethingsiOGSM gsm_thing(TOKEN);

// If you have the activation code but not the token, add the following code:
thethingsiOEthernet ethernet_thing();
thethingsiOWiFi wifi_thing();

// Choose the one depending of your shield

thethingsiOGSM gsm_thing();
string token = activate(“Your activation code”);

// Insert this and the next line inside the setup method, after the start function of the shield

if (token > “0”) setToken(token); // If the activation code is correct, a token is provided

Now that you have your thing created, it’s time to send values.

void loop() {
thing.addValue("Power", random(1,5)); // Adding a value from a number between  1 and 5 with the identifier "Power"
thing.addValue("Temperature", random(0,40)); // Adding a value from a number between 0 and 40 with the identifier "Temperature"
thing.send(); // For sending the previous values to your dashboard }

Step 3: Arduino Monitoring with thethings.iO

Now it is time to monitor the data. Go to Things Manager and select the thing where you are sending the data, that’s the Thing Details.

Thing details with arduino data

Thing details with arduino data

Step 4: Arduino real-time dashboard

Let’s create a cool dashboard which you will be able to monitor this data in real-time.
First, we go to the thethings.iO dashboard. Here, you have to Add a Widget. You do this by pressing the blue circle in the lower right corner.

Add A Widget

Now, choose the kind of Data Source you want to see on your Dashboard.

Add a Widget_2

And select the Resource.

Add a Widget_3

After that, you have to select the Widget Type you’ll want it to appear on your dashboard. In our case we are choosing ‘Lines’ for ‘Temperature’, and ‘Pie’ for ‘Power’.
Add a Widget_Temperature
Add a Widget_Power

And this is an example of what your dashboard would look like if you added a bar graph and logs as well…

thethingio.dash


Start with thethings.iO

And that’s it! Easy, right? Now you have your Arduino connected with thethings.iO. Start connecting things now!