Geocoding location coordinates to addresses from GPS-trackers
Today we talk about geocoding. Geocoding is a very interesting art! Geocoding consist of converting addresses (e.g. streets) into geographic GPS coordinates (i.g. latitude and longitude). On the other hand, we have reverse geocoding that is the reverse process: transforming a pair of geographic GPS coordinates into an address (street with number and city).
You might be wondering what geocoding can be used for. From simple analysis to business and customer management to distribution techniques, there is a wide range of applications for which geocoding can be used. At thethings.iO we are helping companies for which is important to geocode the GPS coordinates into addresses for the fleet management, route planning, among others.
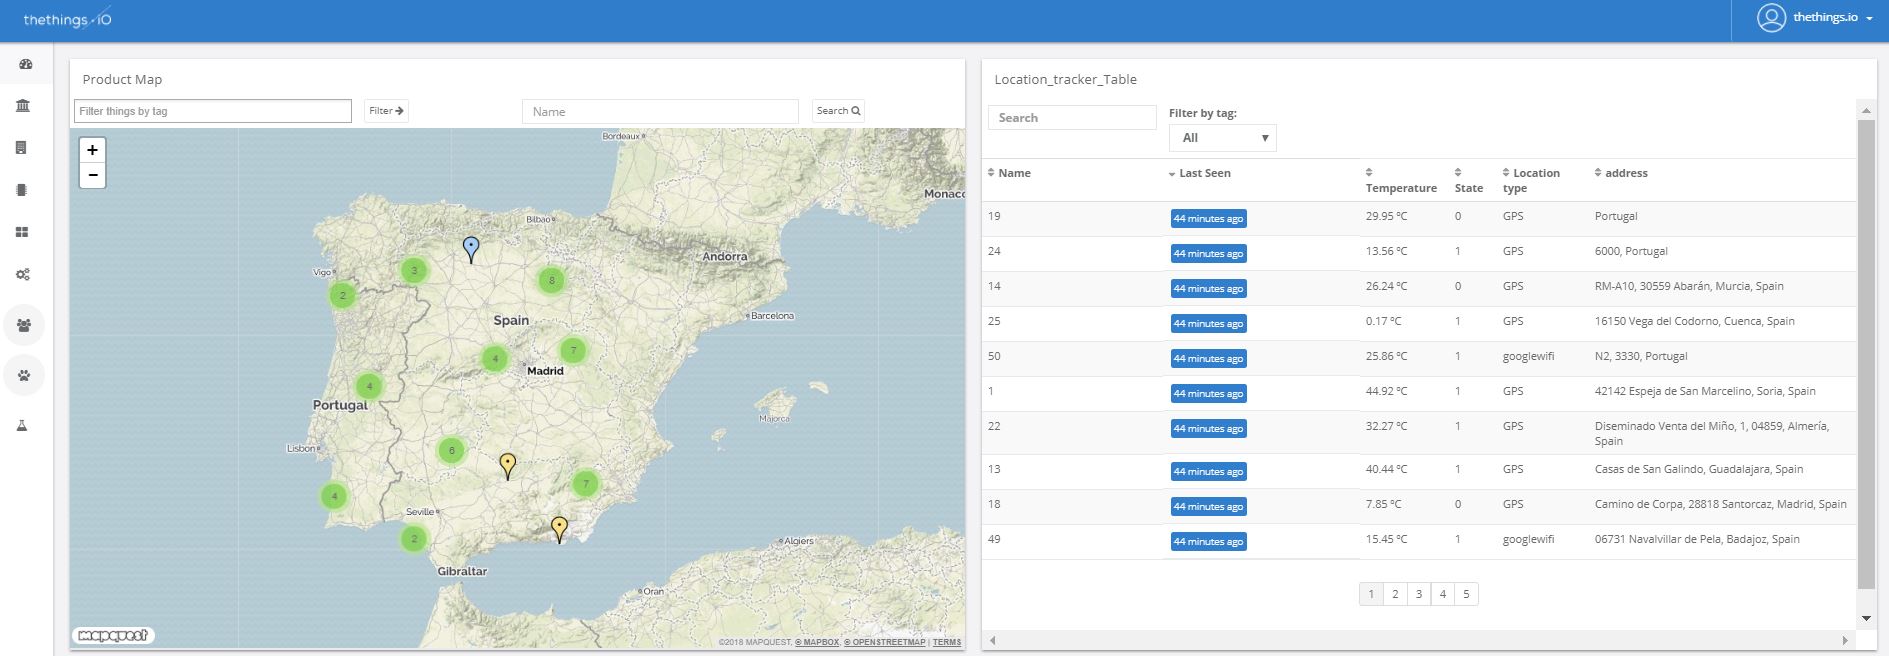
At thethings.iO we usually receive the location as geographic GPS coordinates (latitude and longitude). It is known that it is the best way if you want to represent your assets on a map. However, geographic coordinates are not meaningful if they are not represented on a map. That’s why some customers ask us for the possibility of the integration of geocoding services in thethings.iO IoT platform.
Thanks to the Cloud Code service, we help you to integrate third-party services that enable you to transform the data from your connected things into information that will be useful to your daily activities.
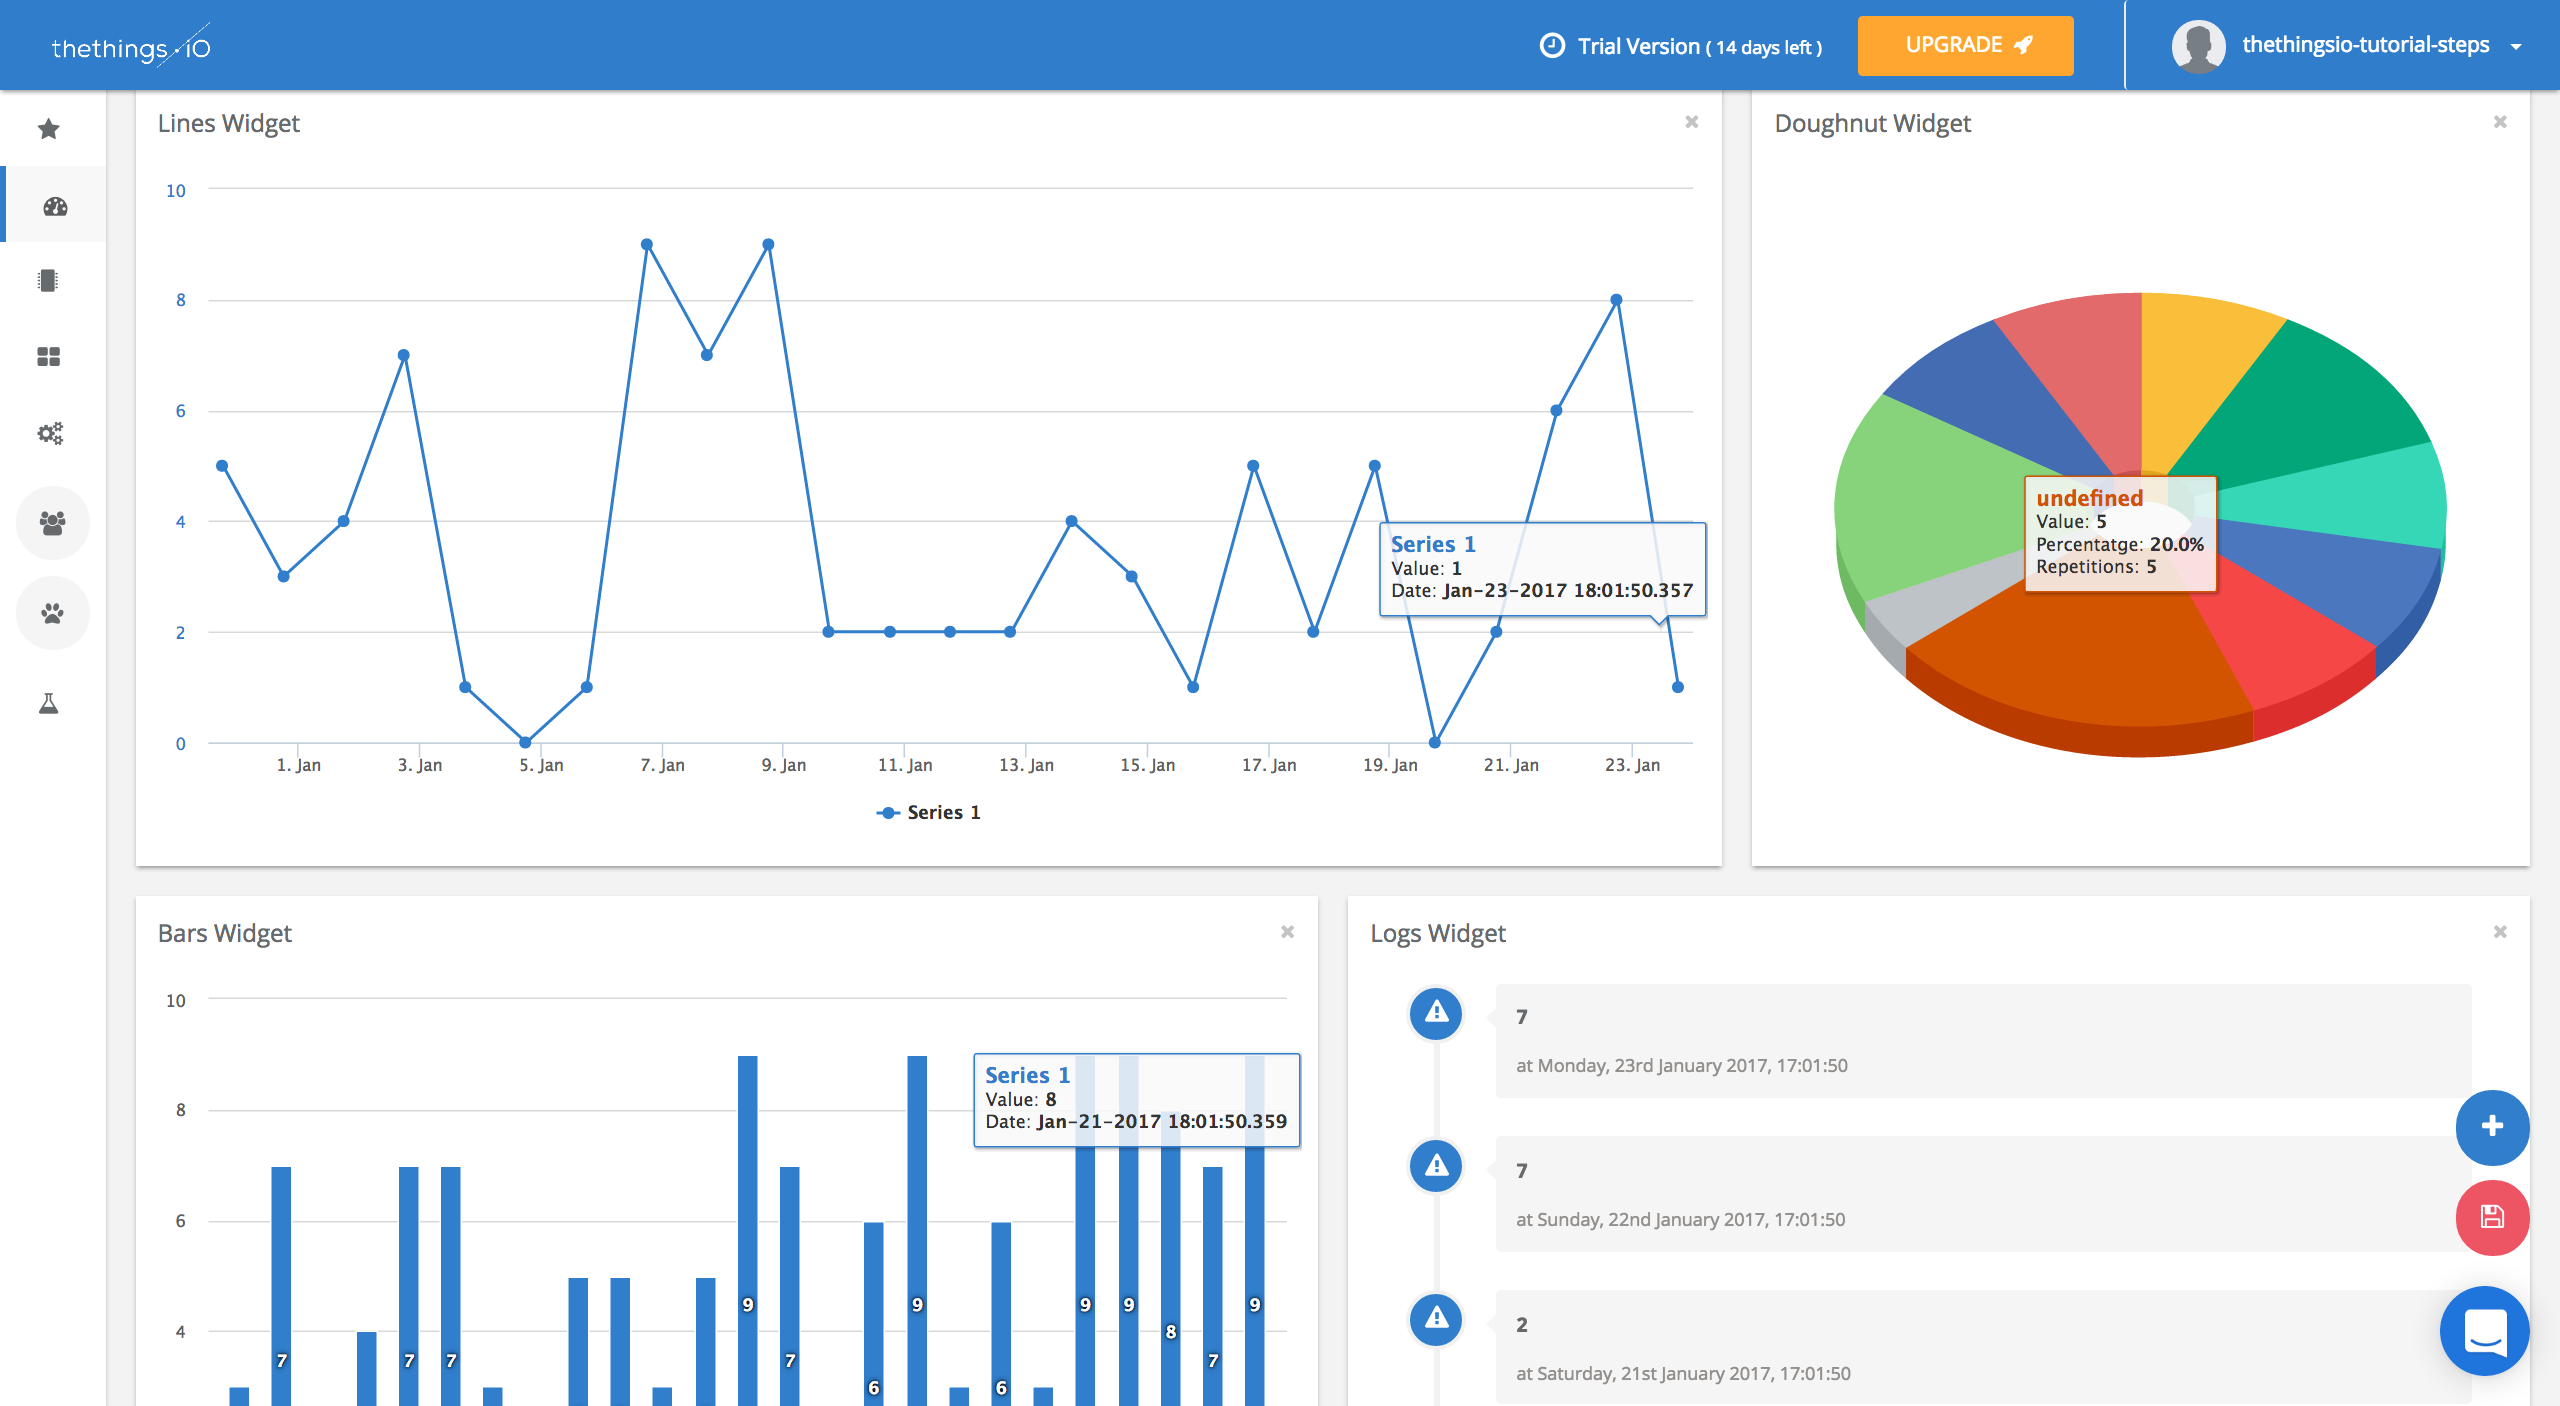
Here you can see an example. In the table, you can see the addresses where the devices are located in:
Geocoding services
Although there are many geocoding services, today we will talk about two of them:
- OpenCage Geocoder
- Google Maps Geocoding API
Both are free up to 2.500 requests per day. In the case of Google will charge us $0,5/1.000 requests up to 100k daily requests if we overlap the free limit. For OpenCage we have different plans, e.g the x-Small plan includes 10k requests per day and it cost $50 per month.
Some lines below you will find information on how to use it. The first step is to get the API key or token.
Obtaining the API key
OpenCage
OpenCage Geocode is a very simple geocoding service (as we like). You only have to sign-up and follow all the registrations steps. After that you will see your dashboard like this:

Copy and keep the API key. We will use later!
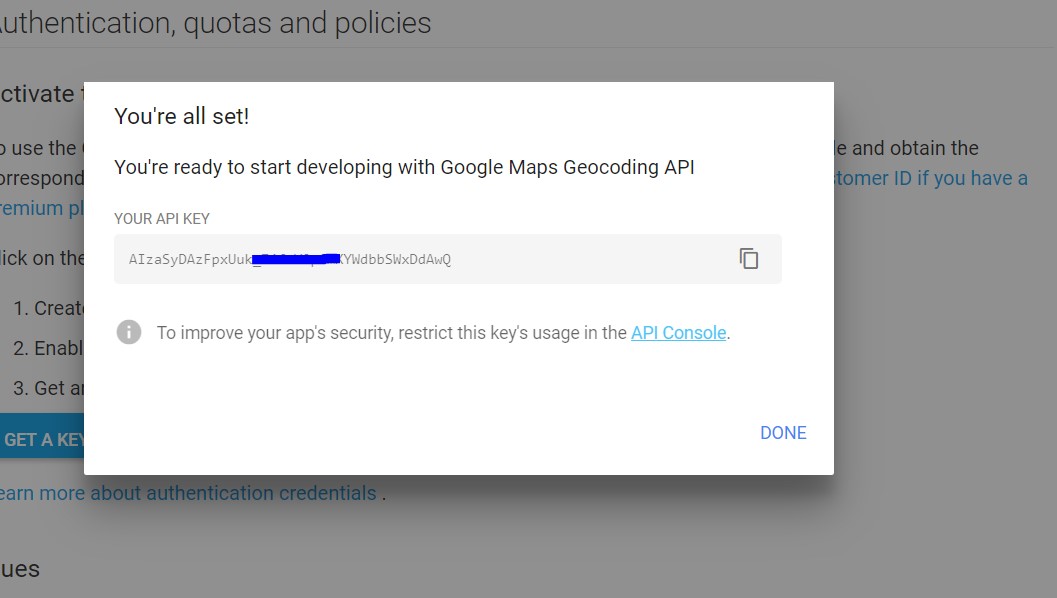
Google Maps Geocoding API
If you have decided to use the Google Maps Geocoding API you must follow these steps:
1. You have to sign in with your Google account and follow this link:
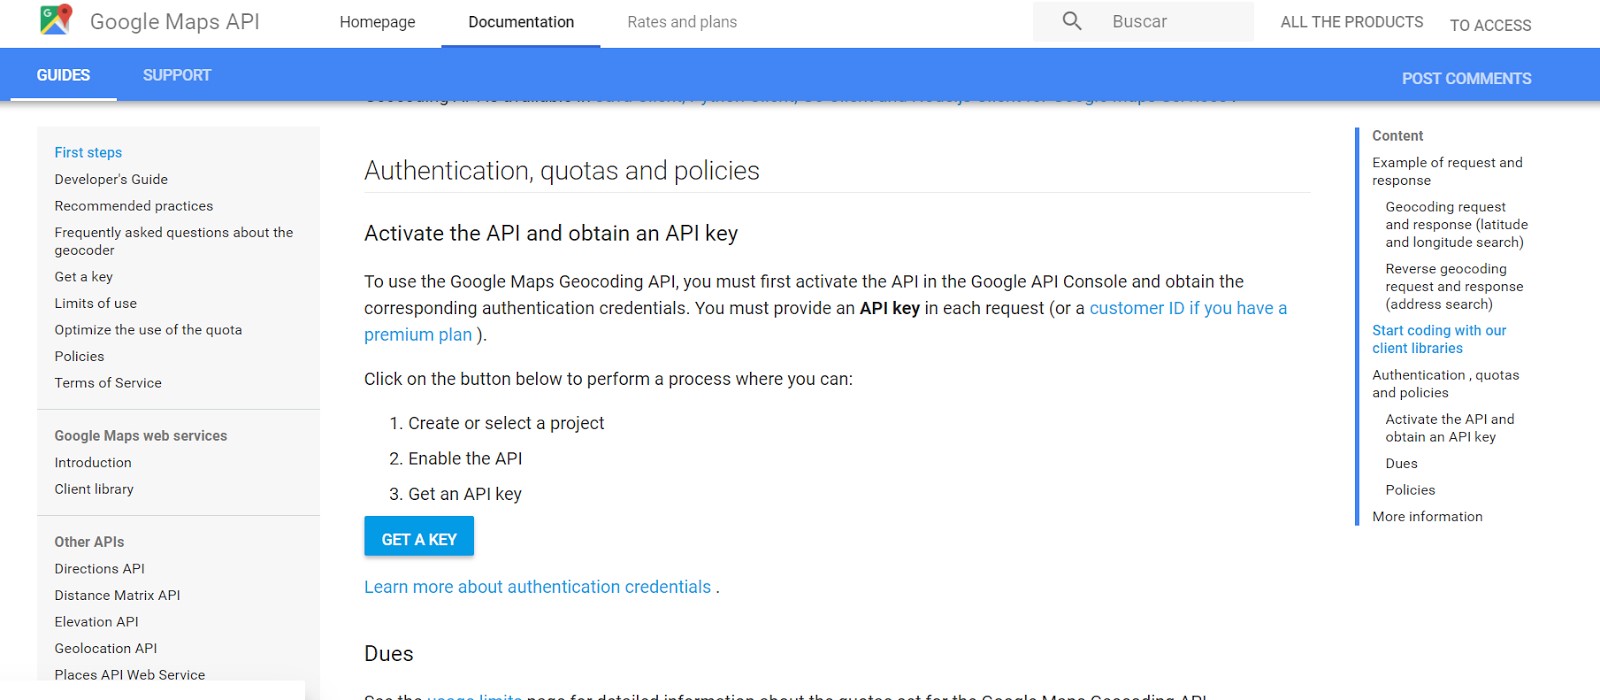
2. Click on ‘Get a Key’ button and follow the instructions.
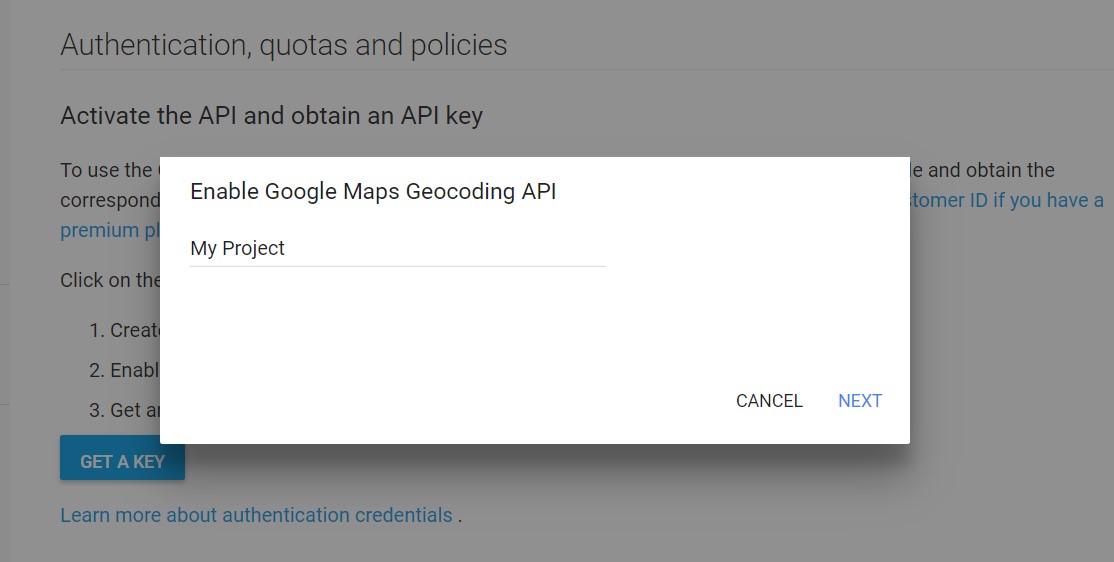
3. You will obtain your API key. Keep it! We will need it later!
Using geocoding services at thethings.iO
Once you get your API key, you are ready to use the geocoding services on our platform. In the following link, you can find a repository with the functions and examples of how to use these services.
In the repository, you can find two folders and two files. The folders contain the code for the httpRequest with both the OpenCage and Google Maps API geocoding and inverse geocoding services.
With that code, we build two examples that could be useful for your business requirements. Anyway, do not hesitate to contact us if you have further questions regarding this topic. We can provide you with more examples!
1. Example 1. Trigger (Inverse geocoding with Open Cage API)
With this code every time you send data to the platform that contain location information, the trigger will be executed and we will transform the coordinates from the resource $settings.geo into a physical address. Then we will save it into the resource address. You just have to create a new trigger in the cloud-code. Then copy and paste the following code.
2. Example 2. Function (Inverse geocoding with Google Maps Geocoding API)
In this case, we transform all the addresses of all the things of one product just in one cloud-code execution. Create a new function, choose the product and copy and paste the code from the file. Finally, introduce “{}” in the Preview Params (Check the picture below). The function will calculate the address for all the devices that contain information in the resource $settings.geo and will be saved in the resource address of each thing.
We hope all this information will be helpful for you. If you want to know more about us, you can create an account by clicking here, sign up to receive our monthly newsletter or follow us on Twitter! Stay tuned and be the first in knowing the latest news of the IoT world and thethings.iO